Category Archives: Garden

Dealing with Emerald Ash Borers

emerald ash borer
emerald ash borer on tree leaf

Dealing with Emerald Ash Borers

By Erna

“The greater the obstacle, the more glory in overcoming it.”

-Molière

Trees are a commitment that we are delighted to bring into our yards. Unlike annual flowers and shrubs where we can have fun with the seasonal changes and trends, trees are a lasting legacy in our homes. With all the love, care, and investment that we pour into them, it can be devastating to see them get sick. Ash trees,
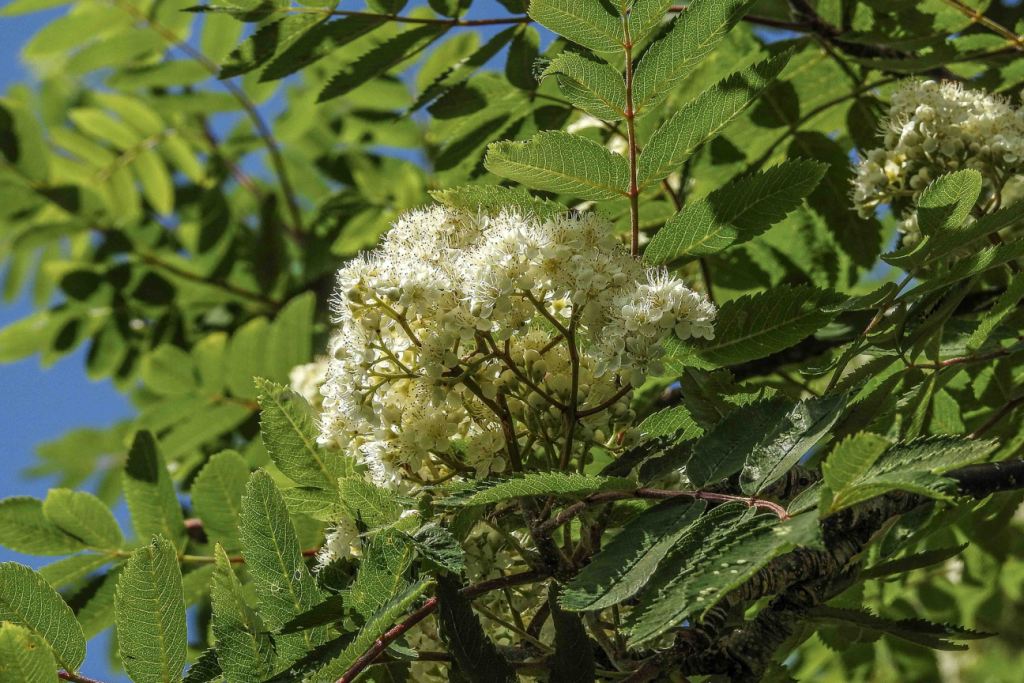
mountain ash tree

in particular, are facing a plague of pests causing damage at alarming rates in North America. With trees struggling everywhere, it’s time that we had a look at public enemy number one: Emerald Ash Borers.

Emerald Ash Borers

The Emerald Ash Borer is actually native to Asia, not North America. Most experts suspect that the beetles first made the journey across the ocean in untreated wood at some point in the 1990s. It took a little while for them to be recognized, but by that point, they had already set to work getting established and infecting more trees.

emerald ash borer damaging trees

These beetles cause their damage by living up to their name boring in and out of our trees. They begin their lives as eggs, laid by an adult beetle in the bark of a tree in the spring and early summer. Once these eggs hatch, the larvae burrow from their shallow homes under the scales and in cracks of bark towards the centre of the tree. After a few years, the larvae become adults, who will bore their way back out. These fully grown adults then make their way to new trees to start the cycle all over again.

The adult borers are easy enough to spot – they’re big and metallic, looking almost like a blue-green grasshopper. The larvae are also pretty noticeable at 8-14mm long, but these cream and brown grubs are often buried deep in the wood of Ash trees, so you wouldn’t be likely to spot one without digging.

How They Do Their Damage

These borers most obviously cause trouble for your trees with the damage they do when burrowing deep into their timber. As they create these tunnels into the wood of your Ash tree, they eat the inner bark. These tunnels disrupt the tree’s ability to circulate water, nutrients, and sugars where they need to go. Without these vital circulation highways inside the tree, part of the plant starts to die.

The problem becomes more significant due to this pest’s ability to spread. A single Borer can travel up to 20 km in a single year. Because of this, an infestation can easily spread from one tree to another, even if they are quite far apart. Their natural abilities to

bark damage
inner bark damage from emerald ash borer

to spread are unfortunately boosted by human movement, where they can be transported in an infected tree that is cut and moved elsewhere.

Dealing with Them

Since they made their way to Canada, the Emerald Ash Borers have destroyed millions of ash trees. It’s easy for them to spread unchecked, as they don’t have many natural predators over here. Unlike the trees of their native Asia, our Ash have very little resistance to them, and our frigid Manitoba

emerald ash borer tree trap

winters don’t seem to curb the populations, either.

But it isn’t time to lose all hope and resign your trees to pests. There are still options to tackle Ash Borers before they do irreparable damage to trees that hold a special spot in your heart and yard:

Spot them early: The first way to prevent borer damage is to catch them early on. This can be a bit challenging as they spend so much time under the surface of our trees, but your tree might show early signs of being infected. Look for trees with thinning or dead branches, or those with withering or chewed leaves. Check your tree for any cracks in the bark where they could get access or even an increase in woodpecker or squirrel activity. To confirm your suspicions, remove a small section of your tree’s bark to look for the telltale ant farm tunnels that borers will leave behind.

Neem seed insecticides (not neem oil) are an effective tool against these tricky pests. These can be injected into the base of the tree to be carried through their circulatory system, killing of larvae as it is distributed around the tree. This is the most effective, proven method to combat an Emerald Borer problem of a small scale.

Other methods, like Emerald Ash Borer Traps that use pheromones, or using natural predators, parasitic wasps, are sometimes used on a larger scale for widespread infestations but are still being researched and developed.

Destroying infested wood is the last, and very important final step in controlling Emerald Ash Borer populations. Don’t transport any wood that could contain these pests, but instead burn it onsite to prevent the beetles from spreading elsewhere.

Since they arrived by accident on North American soils, Emerald Ash Borers have been terrorizing our beloved trees. While we’ve already lost millions of trees, we still have the ability to work to minimize further damage by being more educated about how these pests work, how to deal with them, and how to prevent spreading them. Your trees are an important legacy and part of your home and yard, so it is important that you have the tools to protect them.

Kitchen Gardening Basics

kitchen gardening
kitchen herb garden containers

Kitchen Gardening Basics

By Erna

“I have never had so many good ideas day after day as when I worked in the garden.”

-John Erskine

Kitchen gardens are all about making fresh garden fruits, herbs, and veggies more accessible, and there’s actually a pretty good chance that you’ve had your very own at some point, though you might not have called it that. If you have or have ever had a little cluster of herb pots by your door or a few tomato plants on a porch or balcony, you’ve basically started!

What is a Kitchen Garden, exactly?

The origins of these gardens go back to pre-revolution France. We hardly have to point out that the French are culinary masters, so their kitchen tips and tricks are ideal to steal for your own house. The French Jardin potager was different from traditional gardens in that they were designed for grazing. A big garden plot is meant to be

planted all at the same time, grown, and then harvested to be eaten or stored for later. A kitchen garden offers a treat of tasty fresh flavours at your fingertips for today’s snack or tonight’s dinner.
The kitchen garden made its way across the ocean to Canada and the United States

thyme container garden
patio herb container garden

during the World Wars, when growing food at home went from practicality to an act of patriotism. At one point in 1943, about 40% of all the produce grown in the USA was grown right at home in backyards. While they fell out of fashion for a while, we’ve recently rediscovered that garden-fresh taste and the trend has enjoyed a breath of new life.

A kitchen garden brings those fresh garden flavours right to your backdoor. It’s a place for all the plants and herbs you love to cook with for harvesting a little at a time. Think of it as your own private produce aisle just a step from your kitchen where something is always in season and ready for the table.

How to Start Your Own:

Your kitchen garden, when you get down to it, is about you and your family. It’s essentially an extension of your kitchen pantry – so start with the herbs and veggies that you love to cook with.

Start small, maybe with a couple pots of herbs. Rosemary, thyme, basil, and any other

cutting herbs from the garden

household favourites will help you to build the habit of poking your head outside to snip fresh flavour for today’s food.

Once you get into the habit of your daily trips to see what’s fresh, start thinking about adding tomatoes, salad greens, or peas to your garden. The more you use it, the bigger your garden should become.

Don’t be afraid to mismatch your kitchen garden. In the end, it’s all about the taste! Forget the matching pots and colour-coded plant tags – this is the perfect location for a bit of clutter and eclectic charm. Embrace what works for you, but don’t be afraid to leave the matching pots for the front door.

Kitchen Garden Hits and Misses:

Some tasty garden fruits and vegetables thrive in the small-scale kitchen garden while some others, unfortunately, don’t like the growing environment. We’ve got some ideas to get you started, and some warnings about what hasn’t worked for us in the past:

watering herb container garden

What works: Herbs are basically designed for kitchen gardens. They are hardy and typically easy to care for with minimal watering and lots of sun. Pick herbs that you’re going to use often because they will thrive the more you tear off of them. If you love chicken, maybe plant some thyme. If Middle-Eastern food is your flavour, try coriander.

If you want to go grow your garden, try adding some fruits and vegetables. Salad greens and cherry tomatoes are great starting points. Strawberries also make ideal container bloomers, but other berries, like blueberries or currants, are a better left in a garden bed.

What struggles: Part of planting in a container means that your plants will get tons of heat during the summer. It’s actually part of what makes them great for many of your herbs and veggies! However, veggies that prefer things on the cooler side, like broccoli and cauliflower, won’t perform well in a container. The heat will make them bolt too soon.
Plants that have long maturation times (anything over 80 days) will grow to an overwhelming size and take over your containers! Squashes and zucchini will devour your other pots with their leaves and do nothing but demand water. These plants are a better pick for a garden bed, where you can wait and wait and wait, and then harvest all at once.

colourful herb garden containers

Kitchen gardens offer the best of your garden for fresh-flavoured cooking. They are a great bridge between your kitchen and the healthiest, tastiest vegetables and fruits your backyard has to offer. They’re about what fits you and your family and home, making the best food more convenient every day

How to Train your Tomato

tomatoes
types of tomatoes

How to Train your Tomato

By Erna

“It’s difficult to think anything but pleasant thoughts while eating a homegrown tomato.”

-Lewis Grizzard

Garden-fresh tomatoes are truly the best that our gardens have to offer us in the summer. Just being close to your tomato plants will surround you with nostalgia. Pick your harvest when it’s ripe, and you’ll swear you can taste sunshine as you bite in. They’re a juice-running-down-your-chin, Canadian classic and a local favorite for good reason.

Getting Technical: Types of Tomato

Before you even get into the hundreds of varieties and fanciful names of tomatoes, all tomatoes can be divided into two types. On one side, you have determinate tomatoes. These are usually the newer hybrids. They are well-behaved and self-contained – they’ll sit up straight, keep their hands to themselves, and they won’t need much supervision or training. They are the ideal

tomato plants

choice for small containers or gardens, as they tend to be less gangly and unruly as their cousins. These are the easier varieties to grow and will be a nearly foolproof way to get some tasty tomatoes this summer.

Indeterminates are the other option. They’re a bit more unruly, and they live by their own rules. Indeterminates are vine growers, compared to their compact cousins. They might take a bit more management, but the effort is worth it when it comes time for harvest. The world’s most delicious varieties of tomatoes (including the famously misbehaved heirlooms) are indeterminates and need a helping hand to grow.

Basic Training 

When it gets down to it, your tomato plant is a sugar factory. They take the energy from the sun they adore so much and use it (along with some reinforcements from the soil) to make its stems, leaves, and fruit. Your tomato plants are already experts at growing and ripening, but if you want the

yellow tomatoes

most fruit from your garden as possible, they’ll need some tough love to keep their fruit production in line.

Unsupervised, your plant will produce a lot of growth that won’t ripen fast enough to yield in our short summer. Pruning is absolutely essential, as is tying them to keep them in line. A well-pruned vine will channel its resources towards ripening its fruits, rather than making stems that will never end up yielding.

Tying Your Tomato

An indeterminate that is left to grow on its own will inevitably end up a tangled, green mess. This is not only frustrating to handle but prone to fungus and rot. Training (and tying) your vine correctly, however, will result in a summer full of delicious rewards. You’ll even have fruit ripening a full 2-3 weeks before untrained plants!

picking tomatoes

Your tomato supports can be as complicated as an elegant trellis, or as simple as a stick. Keep in mind while tying that the stems of your plant are very fragile, and the growing fruits become very heavy as they ripen! Avoid handling too roughly or using wire or thin twine to tie your plant. These will bite into or even completely sever your plant’s stem. Instead, use thick twine, plastic plant tape, or even strips of pantyhose tied every 6-8” just loose enough to support, without letting the plant hang too much. As flower clusters start to show, tie just above the clusters (rather than below) to avoid having the weight of the growing fruit pull the stem over.

Pruning 101

We prune our tomato plants for 3 reasons: we want to keep them healthy, to maximize our harvest by the end of the year, and to help divert resources where they are needed most to grow good fruits.

  • Prune for health: This involves punching all the side stems that grow under the first flower cluster. It might seem extreme, but the improved air circulation will help your plant to fight fungal diseases that could attack at soil level.
  • Prune for bigger harvests: As you approach the end of the growing season in the fall, you’ll need to guide your plant to divert its resources towards ripening the fruit it has started, instead of working on maturing fruits that won’t make it before the frost. Our first frost tends to be sometime in mid-September, so this process should start about a month prior. Start by “topping” – pinching off above existing fruit clusters. For bigger tomato varieties, you will also want to pinch off the smallest half of the developing clusters so that the remaining ones get all the sugars they need.
  • Prune to divert resources: Helping your plant focus on growing fruits as fall approaches is vital, but the same concept applies all year. Pinch off all the growth that doesn’t contribute to the growing tomatoes. Suckers are the first to go. You’ll find them growing at an angle out of the joint between the leaf stem and main stem. Pruning the lower branches for air circulation will have the added bonus of helping your plant be efficient with its resources, too.
tomato container garden
How-To Tips

All tomato plants are a little delicate and very prone to disease. To keep your plants safe and working hard to make your harvest, pinch with the fingers rather than using pruners. While a clean cut is nice, the old steel on your tools might hold any number of pathogens that will enter through a fresh cut on the stem.

For similar reasons, never work with your tomatoes (tying or pruning them) if they are still wet from rain or watering. The open wounds that often result from moving the vines around will be extra vulnerable to fungus transmitted from water.

Indeterminates are a challenge, but they’re perfect for the gardener that wants to put in a bit of extra effort for a lot of reward. These are among the most delicious tomatoes our Garden Centre has to offer, and we love the nostalgia that comes with taming a classic variety. We love helping you keep your garden healthy and bountiful. Come by today and talk to us about how to produce a flavourful and rewarding crop.


tying tomatoes

Natural Mosquito Control

mosquito
mosquitoes in Manitoba

Natural Mosquito Control

By Erna

“If you think you are too small to make a difference, try sleeping with a mosquito.”

– Dalai Lama

Gorgeous summer weather typically comes hand-in-hand with mosquito populations booming. These little biters are the bane of barbeques everywhere and can make it a challenge to get out to enjoy our beautiful backyards. Many of us have just learned to live with it, with the itchy bites to prove it. Just because they’re hard to avoid, though, doesn’t mean there are no options for reducing their populations.

Life of a Mosquito

Fighting to keep the mosquitoes in your yard under control can feel a lot like war. The legendary military strategist Sun Tzu once said, “If you know the enemy and know yourself, you need not fear the result of a hundred battles.” We take his advice seriously and know that some basic knowledge about how mosquitos live can help us to make our homes as uninviting to them as possible.

Mosquitos are persistent and irritating, but they still have some vulnerabilities. Their life cycle (and ability to make even more biters) is chained to a few staples they need to reproduce.

standing water
mosquito on skin

Of the 3500 species of mosquitoes worldwide, our country is home to at least 176 types. Almost every variation we find here relies on some standing water to lay their eggs. The eggs can be dormant all winter and hatch in standing water in the spring, starting a new cycle of little flying vampires. The eggs hatch into larvae (called “wrigglers” by some), which spend a week in the water before becoming pupae (also called “tumblers”). They only spend a few days in this form before they become the hungry adults that we recognize.

Blood is the key ingredient in reproduction, as the protein from it is used to make more eggs to start the next generation. While it is true that the male adults don’t have the needle-like proboscis that females do, preventing them from biting, they are still needed to fertilize eggs, meaning any mosquitoes are fair game for smacking!

Fighting Back Against Mosquitoes

Mosquitoes can emerge in the spring and summer and seem like an impossible army to fight. While their numbers are overwhelming, we can use our knowledge of their life cycle and sense of smell against them to reduce their numbers and repel them, before resorting to harsh chemicals.

ageratum

The key to keeping these biters away from you and your yard is to prevent more of them from hatching, to encourage predators to feast on them, and to use the power of plants to keep them away.

Prevention: Drain Standing Water

The first way to stop mosquitoes is to prevent more of them from being born. They cannot travel very far, so being diligent about eliminating places for them to breed in your yard will do a lot to reduce how many of them you face this summer.

Take a walk around your yard, especially after rain. Look for anywhere that these pests could be laying their eggs. Any standing water is suspicious, and you’ll be surprised at some of the places you find it. The most obvious culprits are garbage cans, pet water dishes, rain barrels, and bird baths. Eavestroughs can also be a nursery for these pests that remain out of sight and out of mind. If you have plugged troughs, you can bet they’ll be hatching there.

Drain all the standing water you can, and take a mental note to keep it drained after it rains. For any standing water you can’t drain, consider sprinkling some larvicide. This chemical-free solution is incredibly safe for people and pets, as it simply introduces an army of tiny predators that eat the larvae.

Repelling: Mosquito Repelling Plants

No matter how well you prevent their eggs from hatching, some of these pests will inevitably find their way into your yard. Part of the trick to enjoying your yard in peace is to use mosquito-repelling plants to make your yard as unappealing as possible. These plants may not be as effective as the industrial-strength DEET you can buy at the store, but they do provide a passive repellant that adds beauty to your yard.

Marigold as a mosquito repellent

Most people automatically think of Citronella Geraniums when they think of mosquito-repelling plants. These are definitely among the effective plants, but there is a much more extensive selection of natural repellents than many people think.

Marigolds are an innocent-looking, pretty yellow flower that repels mosquitoes and other garden pests naturally, thanks to containing the pesticide pyrethrum. In fact, many pesticides use synthesized varieties of repellents that occur naturally in plants. Ageratum has coumarin, which is found in many mosquito repellents, while catnip is a member of the mint family that mosquitoes avoid.

Reducing Numbers: Predators

While preventing them is the first step, it is also important to know how to get rid of any lingering mosquitoes you have. Luckily, mosquitoes are slow and very tasty to predators, making them a popular meal. The first step is to encourage the predators to consider your yard as a feeding ground.

First, let’s do a little myth-busting. The internet is full of claims that the Purple Martin and various types of bat are the perfect mosquito hunting machines. These predators will certainly dine on the occasional mosquito, but not enough to noticeably affect the number of biting pests in your yard. They are helpful to have around but aren’t the fix-all solution.

While Purple Martins are the most famous, other birds do an excellent job of keeping your mosquito numbers down. Barn Swallows can eat an impressive 60 per hour, and Robins, Chickadees, and Woodpeckers carry their weight, too. Keep in mind that if you’re fostering a flying mosquito-eating army, you might want to keep your cat indoors or on a leash, as they are the top bird killer in Canada.


Robin Bird

Dragonflies are the best natural mosquito controls you can get. These gorgeous insects are completely harmless to humans but are mosquito-munching machines. A single dragonfly can eat over 100 per day! The catch is that your dragonflies will need a pond or boggy area nearby to live, and are very sensitive to air pollution.

Avoiding mosquitoes and tolerating the occasional bite is a part of our summer routines that most of us would love to eliminate. Trying to reduce the number of mosquitoes that will make it to you is a great way to avoid these bloodsuckers, without resorting to synthetic chemicals daily. By preventing, repelling, and reducing their numbers, you’ll notice a big difference and finally be able to enjoy the outdoors at home in peace.

dragonfly on branch

Recovering Your Garden from Harsh Manitoba Winters

Recovering Your Garden from Harsh Manitoba Winters

By Erna

“Soon comes the cold and the night that never ends.”

– George R. R. Martin

This winter was a particularly harsh one. We saw it all, from the biting cold to periodic spring weather in January. This winter really took itself out on us but as the weather has turned to summer we saw that it was especially tough on our plants. With less snow cover than usual, our plants didn’t get the sheltering insulation they’re used to so they shivered away all winter. Too much cold and not much protection has left our plants stressed.

The good news is that while the plants may be stressed, we see lots of healthy signs! Many of our plants are just as tough as we are – they’re recovering well, with plenty of budding and regrowth. Some plants may not have fared so well, though. Plants from somewhat outside our Zone 3b hardiness might need some help getting back into a growing mood. Plants that are even Zone 3 and better took a beating, too! This can happen on occasion, especially with stronger winters like this one.

While it may seem like a daunting task to recover your garden this year, don’t fret! We’re here to give you some simple tips and tricks to helping your garden even when it’s stressed.


Recovering After Winter

After the winter ends, it’s all about playing the waiting game. Sometimes after a particularly hard winter, plants may take longer to bounce back. It can often feel like a test of patience, but giving them the time they may need may reveal healthy, thriving plants you once thought dead. You can tell if your plants are waking up by looking for simple signs of life: buds, green growth, green tissue under bark, and bendable branches.

If your plants are struggling to make a spring and summer come-back, we recommend a healthy dose of Evolve Rage Plus Organic Fertilizer.

This fertilizer comes from the Dirt n’ Grow company, based right here in Manitoba. Being from here, they know what our plants go through in the winter and can give them all they need to bounce back. Rage Plus is an amazing metabolism boost for plants at any stage. It is packed with hormones and potassium that act as a multivitamin for your plants. It gives them the nutrients they need and works to digest dead or dying roots to help bring them back to life.

Plants that don’t recover may not have stood up to everything the winter throws at us. To keep your garden full of healthy life, they will need to be replaced. If they haven’t shown any signs of a recovery by now, we’re afraid that they might not have made it. Right now is the best time at the garden centre to replace your plants, trees, and shrubs! Introducing new additions to your yard earlier in the season is ideal so that they can be well situated in your yard months before the cold weather hits, and therefore ready to take on all of our local weather challenges. If you had a plant that didn’t make it last season, we’ll be happy to help you find something that is a perfect fit for your yard – and hardy enough or easy to protect to make it through winters to come. We are at the peak of our inventory, so replacing is easier than ever.

Harsh winters often leave us worried for our gardens. Given our weather, it’s natural to be worried about your plants roughing it in the cold all winter. With a little knowledge and preparation, though, your garden can thrive even in the worst conditions Manitoba can offer. For more tips and tricks for handling our winter climate, come into the garden centre today! We’re always excited to help you take care of your plants and set your yard and garden up for success all year.

Strawberries: From Garden to Table

Strawberries: From Garden to Table

By Erna

“There is such a simple sweetness in being able to participate in creation.”

– Pamela S. Nadav

Like the rest of our garden fruits and veggies, strawberries taste best when they are fresh. They taste so great, in fact, that it might be hard to resist eating all the delicious, red gems while you pick to have enough left over for cooking with! Whether you snack in the garden or bring them to the dinner table, we have some tips and tricks for the best fresh and delicious strawberry treats in the summer.

Picking a Plant

Not every strawberry plant is the same and there are so many varieties tailored to different needs. There’s a fruiting habit for every need and it all comes down to picking what you want from your strawberries:

  • Day-Neutrals: Day Neutrals get their name from their ability to grow no matter the day’s length. Where most strawberry plants need heat and sun to produce flowers and fruit, these strawberries will continuously bloom regardless of whether the days are long or short. The only requirement they have is temperature. Once warm weather hits, these hardy plants will produce small yields all year until a hard frost sets. Here at Oakridge, we have even seen them prevail in weather as low as -30℃!
  • Everbearing: As implied by their name, these plants are fruit-producing factories. They’ll produce berries consistently all season, but less at a time than their June-bearing cousins. Constant, smaller harvests are ideal for sweet treats to graze on, and can even be saved up for pretty delicious jams. These tend to be tidier and more compact, making them great for containers and hanging baskets.
    – Alpines: This variety is sometimes considered its own branch of the strawberry family, but is actually a subspecies of the everbearers. Alpines are even smaller, creating petite fruit that is full of irresistibly sweet juice.
  • June-bearing: Among some of the most popular choices for home gardens, these plants will overflow with bountiful harvests of large berries between late spring and early summer. If you’re looking for a quick harvest that brings home bushels of berries for baking or jams, these varieties offer the heavy harvests you need.

How To Grow Sensational Strawberries

Your strawberries will want to set root in some rich and well-draining soil that is preferably a little acidic. This sounds like a tall order, but simply using compost (or sea soil) has given us great success in the past. Strawberry plants also greedily devour phosphorus and potash to create the fruits we love. You can help feed your plants by selecting fertilizers with higher middle and last numbers, or you can add a little bone meal or wood ash with your compost when you plant.

Providing the right nutrients gives your strawberries a great start, but they will want plenty of sun to create the sweet fruit you crave. This sounds simple enough! The catch is that, while they love to soak up the sun rays above ground, their delicate roots are sensitive to heat. You’ll want to choose a location for your plant that offers a good 6-8 hours of sunshine, but protect their roots with a layer of mulch to buffer the temperature. About 2 inches of wood mulch or clean straw are both natural choices that do the trick.

Water your strawberries weekly (or more if it’s particularly hot and dry out) and your strawberries will work hard to make delicious treats for you!

From the Garden to the Table

The best-tasting strawberries are undeniably from your own garden, where they straight from the stem to your taste buds. The trick for the best flavour comes down to picking at the right time. Pick your berries when they are evenly red all over, without any white or green. For an extra boost, try to pick your strawberries in the sunny mid-afternoon heat, which brings out their sugars. Pinch the stem about a ½ inch above the fruit and pick gently.

Strawberries taste amazing straight from the garden and we challenge you to have the willpower to avoid snacking as you pick. These berries are also incredibly versatile, too, making them an excellent addition to your dinner table this summer. Try mixing it up with some of our summer favourites:

  • For a fresh take on dinner, toss your garden-fresh strawberries with spinach and feta cheese for a tasty summer salad.
  • To capture that summer flavour for longer, create a strawberry jam that you can enjoy long after your garden is buried under snow.
  • For a tasty thirst-quencher, we love to add pureed and sliced garden strawberries to lemonade (or for an extra kick, with a dash or vodka and triple sec for a summer cocktail).
  • For a tasty dessert that takes advantage of that natural sweetness, toss strawberry slices with chopped rhubarb and sugar. Bake into a pie for a tangy and sweet treat that everyone will love – especially with a scoop of cold ice cream!  See below for the recipe our baker uses, here at Oakridge Cafe!

Oakridge Cafe’s
Rhubarb Strawberry Pie Recipe

From Our Table to Yours: 

This is the tried and true Rhubarb Strawberry Pie Recipe that we make here at Oakridge Cafe. With a couple cups of sliced rhubarb and strawberries and a couple other ingredients, you can bake this delicious pie yourself, and share a dessert that’s perfect for the whole family to enjoy.

Preheat the oven to 400º. Line a deep 10″ pie plate with a single pie crust. Flute the edge.

Mix the topping and set aside:
3/4 cup flour
6 tbsp butter, softened, not melted
6 tbsp brown sugar
1/4 cup sliced almonds
1/8 tsp each cinnamon and salt

Mix the filling:
5 1/2 cups mix of sliced rhubarb and strawberries
1 1/4 cups white sugar
3-4 tbsp flour
3 tbsp butter, melted
2 eggs

Pour the filling into the unbaked pie shell. Bake for 15 minutes. Turn the oven down to 350º. Sprinkle the topping on the pie.

Turn the oven down to 350*. Sprinkle the topping on the pie.

Bake for 55-60 minutes or until bubbling around the edge and golden brown. Cover with foil if it’s getting to brown. Let cool to room temp before serving.

There are tons of options for how you can take advantage of your delicious, sweet garden berries this summer. These scrumptious summer treats taste even better alongside any other garden-fresh fruits and veggies you grow. Not only will they taste better than supermarket versions, but you’ll also get all the nutritional benefits of fresh food with added the pride of growing your own food at home!

Whether you decide to eat them fresh, mix them in with dinner, drink them, or bake them, you’ll enjoy having access to the sweetest berries only a few meters from your door. Whatever flavour fits your fancy, here at the Garden Centre we’d love to help get your visions of summer strawberries get started!

Zones: What They Are and How to Use Them

Zones: What They Are and How to Use Them

“There is such a simple sweetness in being able to participate in creation.”

– Pamela S. Nadav

Like the rest of our garden fruits and veggies, strawberries taste best when they are fresh. They taste so great, in fact, that it might be hard to resist eating all the delicious, red gems while you pick to have enough left over for cooking with! Whether you snack in the garden or bring them to the dinner table, we have some tips and tricks for the best fresh and delicious strawberry treats in the summer.

USDA Zones

Take a moment to picture all the diverse habitats we have in North America. This massive continent is home to everything from tundra, to desserts, to tropical rainforests. We’ve got a big home and our climate can change a lot from one location to another.

By dividing things into zones, it gets a little easier to guess if a plant will make the cut in the worst of your weather. The US Department of Agriculture (USDA) created a system that plots every region in North America, taking the guesswork out of selecting plants for our home climates.

The lowest temperature in the winter are what usually make the decision whether your plants will make it to the spring or not. The USDA Zones are all based on the coldest extremes in each region. These zones range from 0 (frigid arctic tundra) to 12 (balmy tropical forests). Canada has a massive diversity in our zones from the coldest 0 to tiny areas as warm as zone 8 on Vancouver Island.

What Zone Am I?

Our prairie home sits comfortably in Zone 3, with some areas just outside of Steinbach, to the North and East, being a little colder. Exploring further North in Manitoba, zones as cold as 2 and 1 can be found.


Many of the deciding elements in our zone are geography and climate, but also keep in mind that bigger urban centres, like Winnipeg, create their own tiny microclimates with slightly warmer temperatures. This usually isn’t enough to change your zone entirely, but it could mean you can cheat your zone a little with some extra work.

Am I Stuck in My Zone?

As we are comfortably within Zone 3, anyone could pick up a Zone 3 (or colder!) plant and have it thrive in their yard with very little work. Picking a plant within your zone means that it is practically designed to thrive naturally in our conditions. You can plant it and forget about it as it will only need occasional watering and no fuss over the winter. These plants tend to be absolutely gorgeous, but not very exotic. You’ll need to put more effort and TLC into the more exotic plants to make them more at home here.

It is absolutely possible to plant with some plants that are outside of your zone. Flirting with some of these exotic beauties will mean extra care and love for your plants. If you’re tempted to plant something from Zone 4, you’ll be asking yourself if you want to put a little more effort into everyday care and winterizing. If you’re ambitious, you might be setting your eyes on a Zone 5 plant, but at that point, it becomes more of a question about how lucky you feel – getting them to succeed will be much more of an uphill battle.

To nurture your warmer-zone plants in the winter, make sure you water them extra in the fall (and in the rest of their growing season) and mulch them before winter descends upon us. This is the minimum requirement, but the more you baby your tender exotics, the more they’ll reward you.

Zone numbers are a great, quick cheat to see if the plants that you love in the store will perform ok in the worst of conditions our winter has to throw at them. Given our famously harsh climate, the zone numbers are incredibly important to our gardens. While staying within your local zone is the safe and easy bet, dreaming outside your home zone doesn’t have to be impossible. You can make the more exotic zone 4 or maybe even zone 5 plants thrive in your own yard, but the charms of these plants comes with a price – and a bit of a gamble that the winter won’t be too extreme.

How to Plant a Container Garden

How to Plant a Container Garden

By Erna

Container gardens have taken a steady climb into popularity recently. While they had their humble beginnings in 1950’s suburbia, the trends of that time look particularly uninspired compared to some of the wild creativity these days. Traditional containers were about stuffing as many of the same dozen popular plants into a pot as possible to make a single-tone assault of colour. Whether you’re looking at magazines, online, or even just have container-envy peeking over at your neighbours’ yards, it’s clear that today’s containers have kicked it up a notch.

So you want to plant your own containers? It can be pretty intimidating with all the polished designs and exotic plants in containers these days. Stop being intimidated – you can make your own container gardens and they are going to be absolutely awesome.

Find a Method – Getting Started

We love container gardens because they are so flexible. You can find so many fun varieties to fall in love with at your local garden centres these days. With those, you can make a creation based on whatever your heart sets itself on in the store. 

Containers are also really freeing – there aren’t a lot of rules, so there aren’t many wrong choices! We have some suggestions to help you create the best container you can with plants that look and grow together well. In the end, though, it really comes down to what you want. And at the end of the season, when your annuals are finished growing, you get to reset back to the beginning in the spring to make something new. Containers aren’t about commitment, so it’s easier to take the first step in making something creative that you love.

Of course, when you put together your container, you’ll want to set yourself up for success by pairing plants that have similar needs together. They’ll all be sharing one tiny root system so matching needs will give you healthier and more vibrant plants. Past that, the garden centre is your oyster! Explore and fall in love with new plants to bring home. Depending on how free-spirited and artistic you feel, there are a few approaches (ranging from “boldly artistic” to “structured and safe”) to exploring the world of plants out there. Here are a couple ways you can piece your container together. Have fun, get creative, and get ready to fall in love with plants and colours while you’re shopping:

Easy Beginnings – The Recipe Method

If you’re still a bit intimidated about starting, or are a bit of a perfectionist that doesn’t want to leave anything to chance, or want a big and showy container without the fuss, go ahead and grab a container recipe. Look anywhere online for something that catches your eye, but we’ve found lots of ones we like on ProvenWinners.com and Better Homes and Gardens.  These sites (and many others) give you a planogram to lay out your planting and a glossy picture to show you your impressive container before you even start.

If this sounds a little too good to be true, it’s because it is. Container recipes are still a great starting point and can definitely give great results. Keep in mind while browsing, however, that most online gardening material caters to the Eastern and Southern States, where more of their customers are. The plants suggested in many recipes might be best suited for those more temperate climates and may struggle this far north. It doesn’t have to be a deal breaker, but you’ll want to double-check their ingredients to make sure they’ll last outside up here.

Another thing to keep in mind is that many of these recipes are built in order to sell their own plants, and some popular or spectacular recipes might include new or rarer plants to encourage people to buy. You’ll often struggle to find one or two items in a recipe. This isn’t the end of the world, but if you have your heart set on a look, we recommend trying to find something that looks and grows similar instead of embarking on a wild goose chase.

For the Moderates – Napkin Planning

Using a recipe gives predictable and planned results, but can be a little less fun for the creatively inclined. If you don’t want to be chained to a plan, but also aren’t ready to walk into the garden centre cold turkey, try sketching out your ideas first! Have a look at where you want your container, and think about what you’ve liked (and disliked!) in other containers you’ve seen. Build from there to create a container you love.

For the Ambitious – Go Commando

We always encourage this one! You’ll need all your creative forces to walk into the garden centre and let your heart guide you. A container and gardening are all about expressing yourself, so the most beautiful container for your home will be filled with plants that speak to you. Your best container will be centred around plants that make you smile, and that beauty is sure to show when you put them together.

To get started, find something that you love. It’ll probably call to you like a little puppy at the pound, waiting to be taken home. Once you ’ve found “The One,” you can build the rest of your container around it. It doesn’t even need to be the biggest or showiest part of your container, but you’ll know you love it when you see it.

Take this plant with you, and start to pair others with it that you think blend and match well. You might not think that you’re very artistic, but many people are surprised at what they find when they’re shopping! If it looks good to you, it’ll probably look great to others, too (and if it doesn’t, you still love it and that’s the important part). Pair together plants that will play well with each other and look good together to create a container until you have something the same size as your pot’s diameter. You’ll only need to find about 3-5 different plants to make a totally original container.

When it comes down to it, planting a “successful” container garden is much more about finding plants that make you happy than matching what you see in other people’s yards or online. Your container garden is a part of your home and outdoor space and is a fun way to experiment and enjoy gardening for our short summer season. No matter what method you use to create your container garden, we hope to help you put together something that makes you smile every day of the summer!

Our Top 3 New Edibles

Our Top 3 New Edibles

By Erna

“Eat food. Not too much. Mostly plants.”

– Michael Pollan

One of the greatest joys of the gardening season is enjoying your hard work! Nothing quite beats the taste of garden-fresh veggies in the summer. Eating well is so much easier when it’s this tasty and nutritious. Whether they make it all the way to your table, or you just can’t resist snacking as you pick, we have some exciting new edibles for your garden this year.

Dragon Roll Pepper

These peppers are an absolute delight. We love them because they have a smoky and sweet flavour with just enough kick. A hybrid of the popular Shishito Pepper, younger Dragon Roll peppers pack a little punch but will grow in spice with time. At maturity you’ll have a pepper that is only about 1/10 as spicy as jalapenos – which is the perfect flavour for summer snacking. Try them roasted, sprinkled with salt or sesame seeds for a delicious treat. They are the perfect pairing with an ice cold beverage on your deck or patio this summer.

To grow these fun peppers at home, make sure that you choose a spot in your garden with as much sunshine and heat as possible. They’ll prefer moist and warm soil to grow, so mulching will be a big help in getting the tastiest peppers. Fertilize these plants with an all-purpose vegetable mix to give them a boost, but keep in mind that plants grown in drier and less fertilized conditions will give you much more spice – if you like to kick it up a notch. 

Try to catch your peppers while they are still a little immature and green. Always cut (rather than pulling or tearing) when you pick them, leaving part of the stem on the pepper. Your Dragon Roll Peppers will develop a little more after you pick them, turning an enticing shade of red that is full of flavour. Watch your peppers transform after they are picked and enjoy them in as many ways as you can imagine.

Steak Sandwich Tomato

Tomatoes are the garden veggie that always tastes better fresh. With tomatoes straight from your garden you can almost taste the sunshine in them! Steak Sandwich Tomatoes are no exception. These tomatoes are the perfect balance of everything. They’ve got the classic, sweet tomato flavour in a perfect, bright red package. They will stay firm when ripe, making them easy to slice onto sandwiches and burgers, but you won’t need to worry about cracking with moisture changes.

When you’re growing your own Steak Sandwich Tomatoes, find a spot for them that has good drainage and lots of sun. While they like well-draining soil, they will certainly be very thirsty plants, so keep them well-watered and use mulch to help keep that moisture at the roots where it is needed. While your tomatoes won’t be prone to cracking like some other varieties, they are vulnerable to root damage, which can cause rot. Keeping your plants healthy will help to avoid disappointment when it comes time to pick and eat your harvest! For smaller but plentiful harvests, you can plant without a stake and they will sprawl across your garden. For a larger tomato with a cleaner appearance, plant a stake to support the vines as they grow.

Pick your tomatoes when they are at their ripest! They are perfect for picking just when they look the most tempting – fully red and firm to a light squeeze. Harvesting will let more tomatoes grow, too! We probably don’t have to tell you to, but enjoy your tomatoes as quickly after picking as you can for the best flavour – but we bet you’ll be too excited to eat them for them to last very long.

Patio Snacker Cucumbers

The perfect pairing with the juicy taste of garden tomatoes, we also love light and crispy cucumbers from our gardens. The Patio Snacker really lives up to its name with the sweetest little cukes that are the perfect size for snacking. These little veggies are 3-bite size and a great choice for a patio planter, where you can keep them within arm’s reach all summer. If you can resist temptation long enough to get them from your garden to the kitchen, they are also a hit in crispy cucumber salads.

Cucumbers are a heat-loving vegetable and will soak up as much sun as you can give them. They like moist soil but hate wet feet, so make sure they are planted in soil with good drainage. Frequent but shallow watering will keep them happy, and a trellis or hanging basket will give you the best fruit. Despite their light flavour, these veggies are heavy feeders and will need plenty of all-purpose fertilizer as they grow.

Be sure to harvest these sweet little cukes often, before they get too big. If your cucumbers over-ripen on the vine, your plant might prematurely stop producing fruits. Also, your cucumbers taste their best when you pick them young. But remember, they won’t store very well because of their high water content. Don’t worry though, it’s amazing how fast they disappear into hungry mouths once they’re picked.

Summer is full of fresh, green growth and sunshine, and we are lucky to get to bring some of that freshness from our gardens right to our tables! Our weather is fantastic for growing some really great and tasty summer vegetables and this year’s newest edibles are no exception. These selections offer delicious flavours and remixes of old-fashioned classics, making your dinner table the community favourite this year. Happy harvesting!

The Colours of Spring

The Colours of Spring

By Erna

The Cast:

According to Shakespeare, all the world’s a stage and we all play our unique parts. The same idea holds true in our own backyards, hundreds of years later. Our gardens are an eager, but empty, stage in the spring and every colour has its own personality and role to play. The colours of our garden are dynamic and lively. They’re fascinating as solo acts or playing with each other. We, as gardeners, can take advantage of their harmony and contrast to paint what we want. Our gardens can be our art – however perfect or imperfect we want to make them.

Many of us shy away from colour. With our modern world so full of off-whites, greys, and beige, it’s normal to be a little intimidated by the full saturation of our gardens. Our own backyards are a great place for a refresher on colour. Here’s how to use your own garden to celebrate vibrancy at home:

Yellow: Pure Joy

Yellow is light and bubbly, emulating joy that can’t keep a secret. It’s no wonder it is a favourite colour for so many gardeners – not to mention famous artists, like Van Gogh! Yellow adds beauty to your garden and will bring with it a sense of satisfaction and happiness. As a symmetrical beauty, like the sunflower or the happy-go-lucky glow of a lantana, yellow is warm and exciting for your garden.

When we use yellow in the garden, we throw subtlety out the window. There’s no hiding its beautiful hues, and we can’t help wanting to bring home the brightest shade we can find. We love pairing yellow with other warm plants in a container to create a harmonious image. When you’re looking at your garden as a whole, though, plan to use yellow sparingly. The places you choose to add it will add a pop of celebratory colour! Rationing your yellow will make your spotlights of joy more special without being overbearing.

Blue: Mystery

Picture an oceanic expanse, with water and sky as far as the horizon stretches. This moody scene is complete with thousands of shades and layers of blue: full of life, complexity, and mystery. In your garden, blue can be just as varied. It can be precocious and carefree, or it can draw your eye into intoxicating depths of shadows and muted tones. While the light blues of your garden are refreshing and invigorating, the darker hues take on a thick richness that your eye lingers on to take in.

We don’t think a garden is quite complete without a little bit of blue. It would hardly be fair to have a celebration of colours in your yard without paying some tribute to the sky above. Blue is a cool colour, but its range is very diverse. Whether you prefer intense deep hues, light and icy tones, or any shades in between, blue is a great choice for the part of your yard that you want to relax in. Despite its many shades, it always seems to inspire relaxation and contemplation, perfect for a little quiet at the end of a long day. Our warmer-coloured plants might call us to play and explore, but blues are what invite us to close our eyes and enjoy a moment in our own gardens.

Red: Intensity, Passion, and Danger

If yellow is unfiltered joy, red is much more focused. It is a colour that can be full of boldness and passion, or even tension and alertness. It’s a very flexible colour that can take on many different meanings, but each meaning seems to be full and intense. Red wakes up your senses and invites them to come play and adventure in your garden. You can practically feel the power when looking into a bright, red flower as it seems to be moving towards you!

We love red, but be careful with it in your garden. It’s so bold and fierce that it could easily overwhelm the rest of your colours! It’s an excellent tool to make a container really stand out. Mixing it with other warm colours, like oranges and yellow, will make it practically glow as a centrepiece!

The beauty of gardening is that you have the opportunity to explore any number of your favourite shades and plants in your garden at home. These are all intense and wonderful colours that have inspired gardeners (and artists!) before you, and they are all ready for you to bring home and play with this year.