Category Archives: Garden

The Basics of Soils and Soil Amendments

mosquito
christmas decorated winter porch pot

The Basics of Soils and Soil Amendments

By Erna

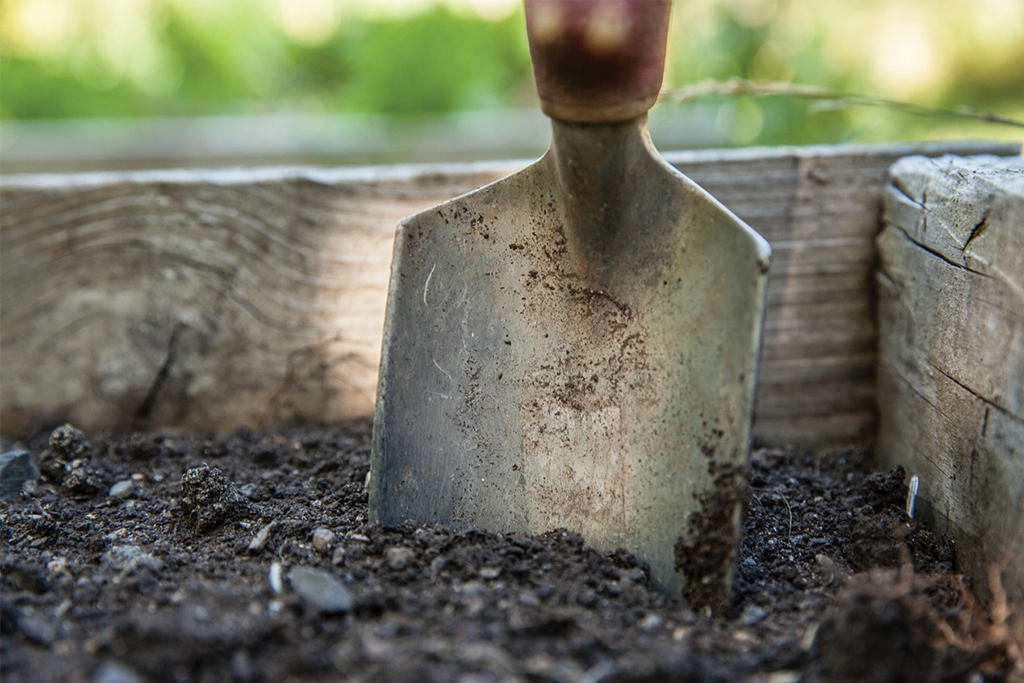
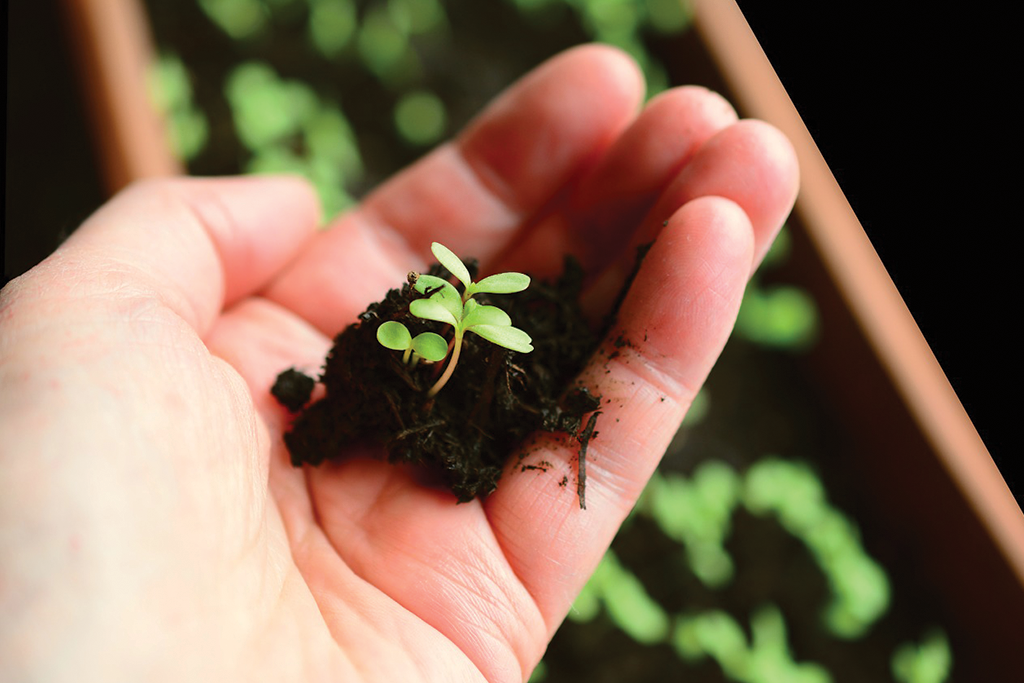
As much as we all need soil, not many of us can say it’s our favourite part of our gardens. To a beginner gardener, soil may seem like a necessary mess that doesn’t seem too exciting at all. With experience, however, we can start to appreciate soil as a living organism that performs a lot of different functions to keep our plants healthy. Furthermore, like any living thing, our soil also needs to be nourished to stay productive.

What Exactly is Soil?

Soil is made from water, organic matter, gas, minerals, and network of living organisms. All soils are complete ecosystems, just like the forest or the sea, and are home to thousands of bacteria that play important roles in helping plant roots absorb nutrients.

When we talk about soil in a gardening context, we often focus on a soils tendency to drain or retain water and its content of 

oakridge winter porch pot

organic matter. When we’re just buying bags of soil, we often have the luxury of bags and labels that help us match the soil to the needs of our plants. When it comes to the soil we already have, however, it can get a bit more complicated. It’s up to us to determine the soil types on our property and to “diagnose” issues that may be holding back the performance of our gardens.

Soil Types

Soil types fit into six main categories, each with their pros and cons. They are:

  • Sandy – Composed of coarse mineral particles, sandy soil tends to allow water to pass through quickly.
  • Chalky – Chalky soil has a hard time holding onto both water and nutrients, and often contains a lot of rocks.
closeup of holiday decorated porch pot with berries, lights and pinecones
  • Clay – Clay soil contains fine mineral particles, which hold onto moisture so well, it tends to pack down and impede airflow.
  • Silty – Silty soil has a similar texture to clay soil but contains more soil nutrients due to a higher concentration of organic matter.
  • Peaty – Peaty soil is high in organic matter but tends to be very acidic.
  • Loamy – The “gold standard” of soils, loamy soils have the best qualities of each type: nice drainage and airflow, high concentration of soil nutrients, and just-right water retention.

What Are Soil Amendments?

While just about every soil type is favoured by at least some plants, the soil we have isn’t always hospitable to the plants we want. Soil amendments are additives that allow us to “treat” soil problems by adjusting the overall composition of the soil. From drainage issues to an undesirable pH, soil amendments can help us adjust our soils to create a better environment for our plants over time.

Uses of Common Soil Amendments

Once you have your soil “diagnosis”, you can remedy issues with the many amendments we carry in-store. The most common ones are:

Compost/Manure – Organic matter is important to add soil nutrients and improve the structure of clay, sandy, and chalky soils.


closeup of holiday decorated porch pot with berries, lights and pinecones

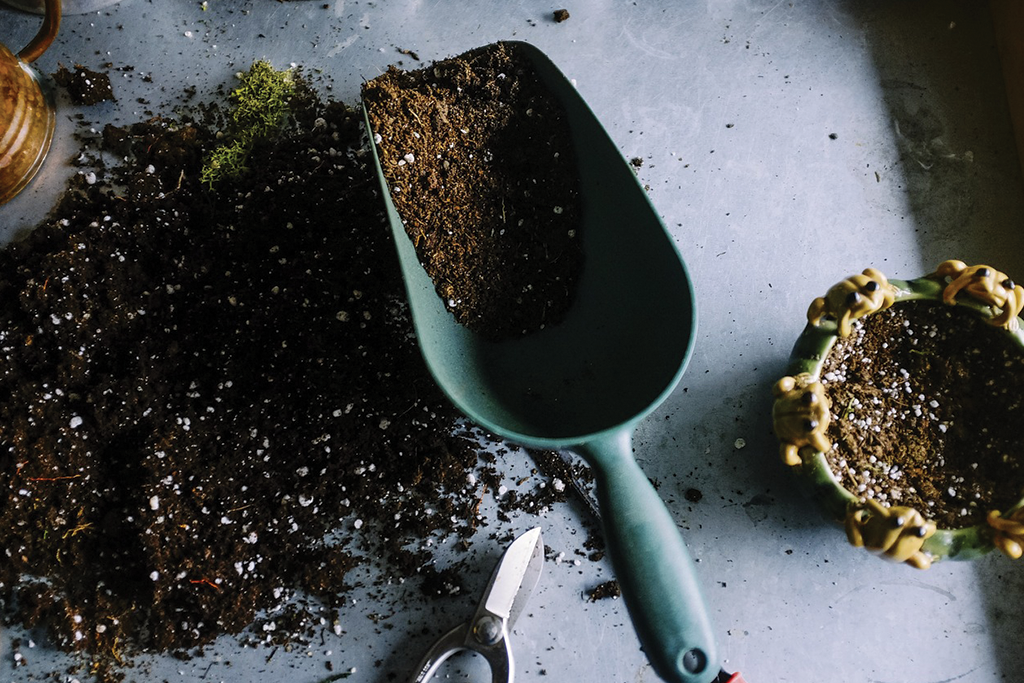
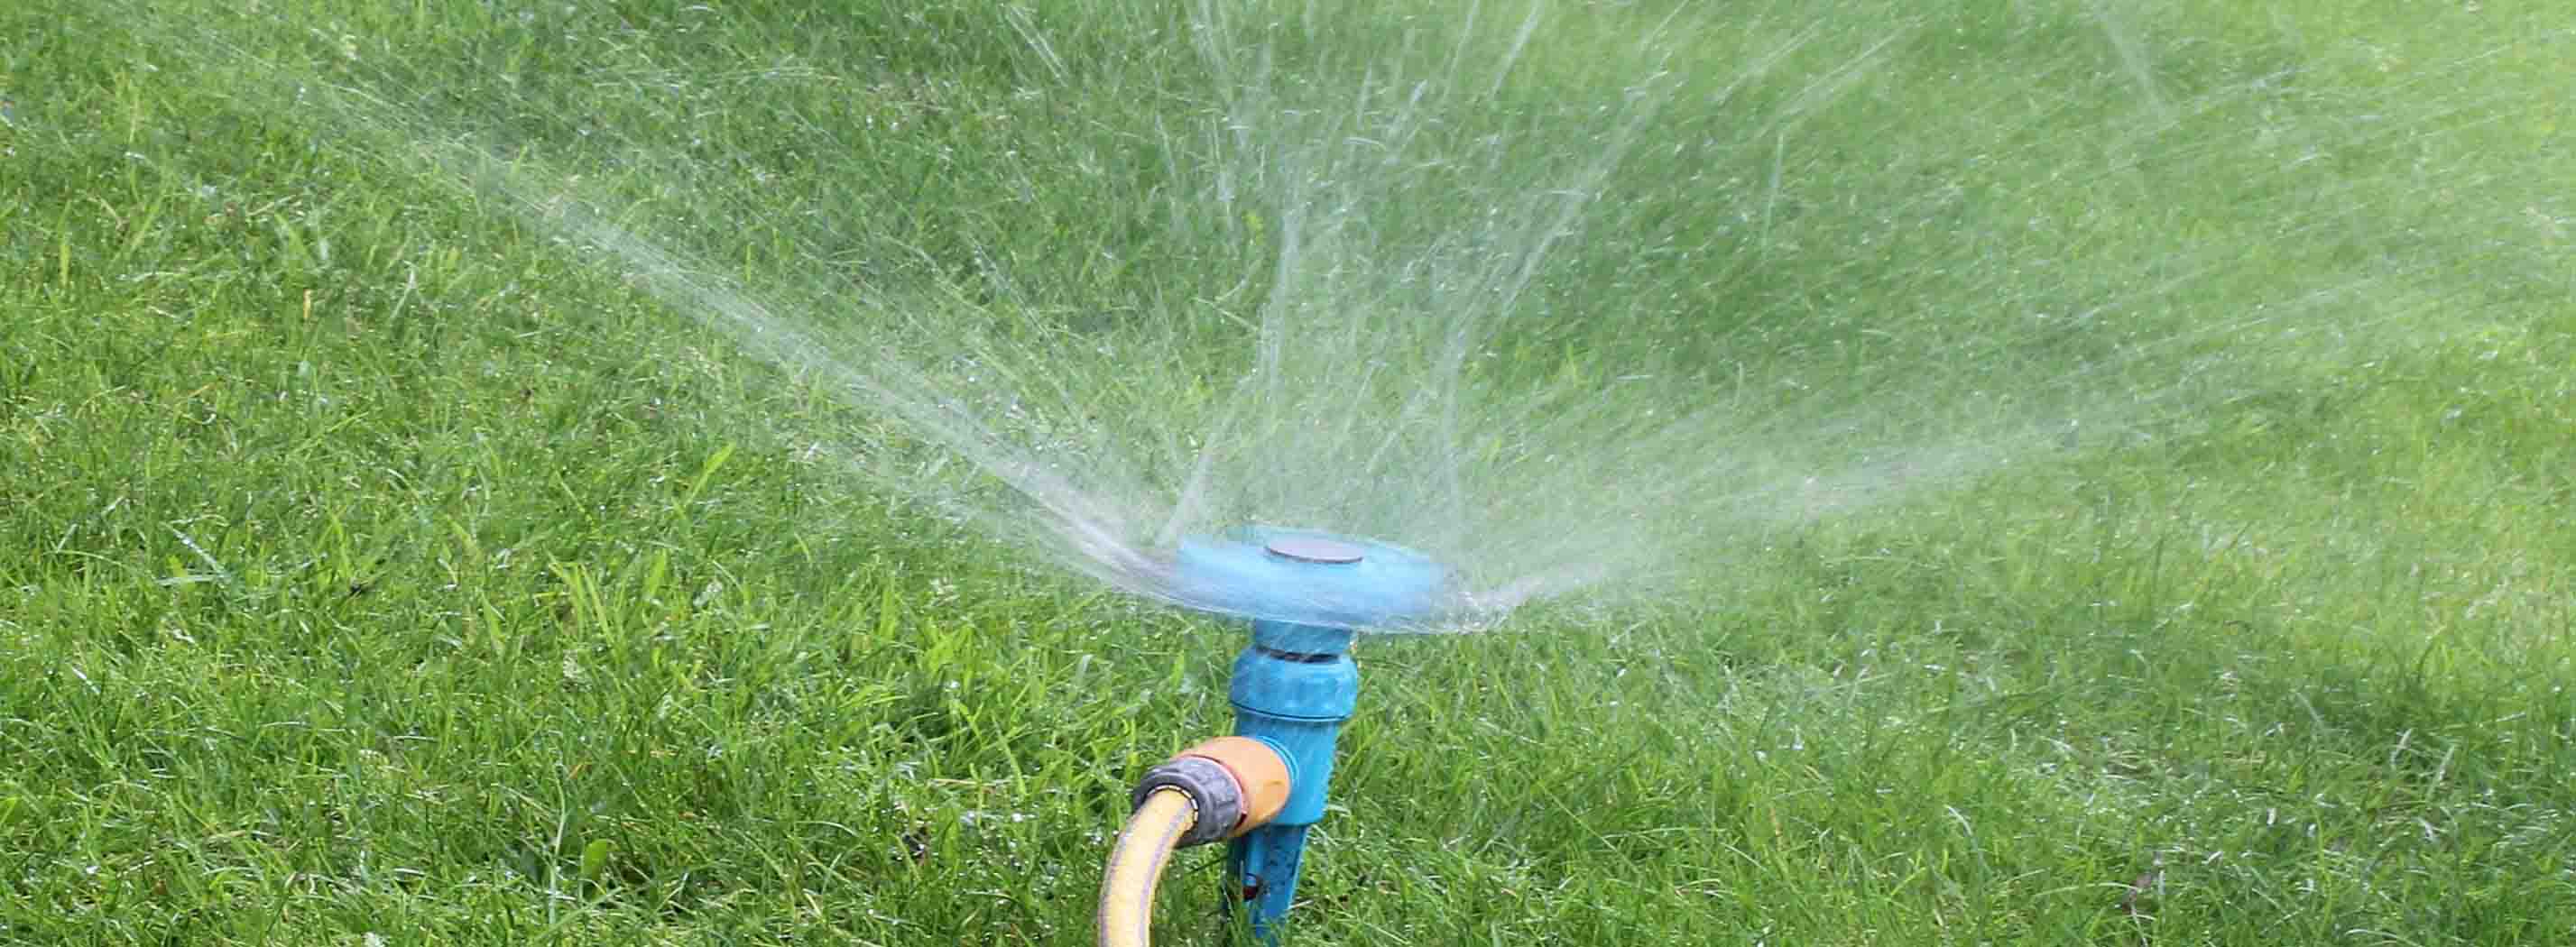
Water retention aids – Shredded bark mulch, peat moss, and vermiculite are highly absorbent and prevent sandy and chalky soils from drying out too quickly.

Gypsum – Like organic matter, gypsum adds nutrients and structure to the soil but breaks down at a slower rate to improve soil quality over the long-term.


There are many other soil amendments available for more challenging soils. If you’ve been struggling with keeping your plants going, talk to us during your next visit to our garden centre and we’d be happy to offer advice. With a proper plan of action, just about any soil can be transformed into a healthy home for your prized plants!

Seeding Indoors

mosquito
christmas decorated winter porch pot

Seeding Indoors

By Erna

While we can’t wish the deep freeze temperatures away, there are some things we can do as we wait for the weather to warm up. The time is near for beginning our indoor seeding – even if the cold weather outside doesn’t make it feel like garden season is around the corner. It’ll soon be the right moment to start giving our favourite annuals and edibles a “head start” into the season by seeding them in the warmth of our homes, giving us a longer window to enjoy them after their spring transplant.

Before You Plant Your Seeds

Gardening indoors during the winter can have a magical effect on your mood, as we’re able to get the joy of seeing fresh spring shoots before the real thing appears outside. Beyond the mental health benefits, however, seeding our flowers indoors has tangible benefits for our gardens, too!

Our growing season in Manitoba is unfortunately short, with most regions only

oakridge winter porch pot

seeing up to 125 frost-free days per year. While there are plenty of early-maturing flower and edible varieties out there, indoor seeding allows us to enjoy other varieties who wouldn’t have a chance to reach maturity if we waited to plant until after the last frost. Before you get started, though, you’ll want to prepare first:

Read your instructions carefully. The back of each seed packet has important information specific to that particular variety. Ensure you read the back of the packet before purchasing so you’re prepared to meet your seedlings’ special requirements – and that the end result is what you’re looking for.

Get familiar with your zone. The southern

winter porch pot in urn

half of Manitoba is predominantly zone 2a, 2b, and 3a. Review a plant hardiness zone map prior to purchasing seeds. While some that are from zones close to ours can be convinced to grow here, some seeds adapted to much warmer climates may start indoors just fine, but might not survive our climate after transplanting outside.

Start small and work your way up. If it’s your first year of seed starting and you hope to plant an entire edible garden, pause before you start seeding all your vegetables indoors! It’s better to start with one or two varieties and learn how to care for them well, rather than biting off more than you can chew with five to ten plants in the first year. It’s better to have one or two strong, healthy, high-yielding plants than several struggling ones. Besides, you can still always purchase starter seedlings in the spring if you still want to expand your edible garden.

Don’t start too early. While it may be tempting to start seeing something fresh and green as soon as physically possible, you find yourself a little underwhelmed by starting seeds too early. Most plants only need about six weeks of start time before they’re ready for transplant. Start too early and the conditions the plant needs to grow won’t be there for it yet, leaving you with a weak, lanky, or stunted seedling. Review a seeding calendar to plan your indoor seeding schedule first!

Planting & Germinating

      Once you’ve prepared properly, you’re ready to get growing! Here’s how to get your seeds started indoors:

    Use the right soil blend. Potting soil is great for houseplants, but plants that are being grown with the intent to transplant need different conditions. We recommend a

closeup of holiday decorated porch pot with berries, lights and pinecones

blend of peat moss, perlite, and vermiculite, which should allow sufficient drainage and oxygen flow for your developing plant. Whatever your blend is, though, make sure it’s with new materials purchased at the garden centre and not pulled from your garden, because your vulnerable little seeds will need sterile conditions to get started. Then, follow the seed packet instructions for the correct planting depth.

Give seedlings a proper introduction to light. Before germinating, seeds haven’t developed a system for synthesizing light. So they should be kept covered to conserve moisture until the first leaf develops. Once you see the leaf emerge, place them by a sunny window. In our climate, your seedling likely won’t receive the necessary 12 hours

wooden sleigh with winter porch pots

of light it needs per day this early in the year, so supplement light during those dark hours with a grow light!

Be mindful of moisture levels. Seeds are already rich in the nutrients they need to grow, so they need no fertilizer, but they will need a consistently moist environment to germinate. Too much water can cause mould and too little can dry out the baby plant. Keep soil damp by misting as needed with a spray bottle.

Transplant thoughtfully. While those first few days of above-zero weather may make us feel like breaking out the shorts and t-shirts, it’s still a little early for your seedling to survive outside – especially in the chilly spring nights! After the risk of frost has passed, harden them off by giving them a few hours outdoors at a time, then move them back indoors. Repeat this daily for longer and longer stretches of time. Overcast days without wind or rain are particularly good starting points, as your plant is not accustomed to direct sunlight or rain. After a week or two, your seedling should be toughened up enough for transplanting.

closeup of red berries in winter porch pot

Plants, like babies and puppies, are a lot more work than you’d expect from something so small – but at least they have the manners to stay in one spot while they grow! However, as they mature, all the dedication you put into them is worth it. Before long, you’ll be able to look on proudly as they sway in the summer breeze – and this winter will be a distant memory.

Growing Herbs Indoors

mosquito
growing herbs indoors

Growing Herbs Indoors

By Erna

“Herbs deserve to be used much more liberally.”

Yotam Ottolenghi

While the days of fresh vegetables from the garden have passed for the time being, the days of savoury stews and hearty dinners have only just begun. Of course, the secret to a truly memorable home-cooked meal is the addition of fresh herbs. Not only do they impart a beautiful flavour and aroma, they also add that great hit of colour that you simply can’t get with the dried varieties. Not to mention, it looks downright gorgeous when a dish is served with a garnish of thyme or rosemary sprigs!

Fresh Flavours Indoors

Here in Manitoba, the long and chilly months of winter can leave us longing for the warmer season. Luckily, we can still add some life to our homes, hearts, and plates by keeping an indoor herb garden! Rosemary, thyme, parsley, and basil can all thrive indoors with the right conditions and a little TLC.

growing plants indoors

Pests Off

If you’ve brought your herbs in from your outdoor garden, the first order of business should be to get them freshened up and ready for life indoors. Outdoor herbs can bring some unwanted guests inside with them, like spider mites or aphids, so they appreciate a gentle bath with a little warm water and dish soap just before settling into

aphids

their new homes.

If you notice more bugs than expected on your herbs, all is not lost! Insecticidal soap is safe to use on your edibles as you migrate them indoors. Wash them weekly with the insecticidal soap treatment until the pests are all gone. If you chose to use your herbs in the meantime, give your sprigs a good rinse before using to take care of any bitter residues.

Growing Herbs Indoors

Light is the most important gift you can give your indoor herb garden! Set them up close to a west- or south-facing window where they’ll be treated to full sun for as long as possible. Deep into winter, even a full day of sun isn’t all that much, so you may need to supplement with a grow light. A few

windowsill herbs

extra UV rays will make such a big difference in the height, health, and flavour of your herb plants.

Water: Herbs might experience a little culture shock travelling from their outdoor summer climate into an indoor winter escape. Just as the much as the dry winter air has most of us reaching for the lotion bottle, your herbs will be craving moisture when the humidity fades away.

fresh basil leaves

There are a few tricks for increasing humidity indoors – some of which might make your home more comfortable for you, too!

  • A humidifier is an excellent way to keep your herbs (and other indoor plants) happy and humid during the cold months. Plus, if you’re prone to coughs and colds, you may even find the humidifier also helps you breathe better!
  • Spritzing herbs with a misting bottle will help keep your plants looking vibrant, but during very dry weather it can be cumbersome to keep up with. If you don’t mind spritzing throughout the day, it’s hard to overdo it in the winter – so spray away!
  • Pebble trays cost very little and help a lot! Just place a layer of pebbles on a flat tray with a lip about ½” high. Add water until the pebbles are almost submerged, but not quite, then place the herb pots on the pebbles. The water from the tray will slowly evaporate into the air around the plants all day long. Just check the tray daily and top up with water to maintain.
growing herbs in pebble trays

When it comes down to it, it doesn’t take much work to grow your own herbs inside when the weather outside is frightful. That means you’ll have plenty of time for the real work – the cooking!

Houseplants to Clear the Air

mosquito
Outdoor Fern

Houseplants to Clear the Air

By Erna

“Fresh air impoverishes the doctor.”  – Danish Proverb

What do camera phones, LEDs, CAT scan technology, and handheld vacuum cleaners all have in common? All these technologies exist because of all the hard work that goes into space exploration. We also have the fine folks at NASA to thank for finding out which of our humble houseplants put in the most work to keep our homes clean. Luckily, it’s not rocket science, so feel free to take advantage of their discoveries to help clear the air at home.

NASA’s Air-Cleaning Plants

The problem that NASA was working on in 1984 was simple enough (well, simple compared to some of their other rocket-based problems): they were researching building bubbles with carbon and the latest lightweight plastics to live on other plants. Problem was, they found that all the synthetics they had to use made the air inside practically unliveable in a matter of

NASA's air-cleaning plants

days. All those chemicals give off toxins, like formaldehyde, trichloroethylene, and benzene, which were making those that breathed that air severely ill. In addition to all the complex filtration technologies they worked on, NASA also turned to nature in attempts to clear the air. They found that very common plants that many of us enjoy as houseplants did an amazing job at cleaning the air, not only cleaning up toxins, but using them to actually boost their own growth!

Toxins at Home

We don’t have space-station amounts of plastics and synthetics at home here on Earth, but as every year passes they seem to make up a bigger part of our lives. Air-borne toxins aren’t just NASA’s problem – our homes are slowly filling with a cocktail of toxins, too.

Air-borne toxins

Household Plants and Household Toxins

The simple version of the science behind air-cleaning plants is that they breathe (or “transpire”, if you ask a scientist) kind of like we do. They take in carbon dioxide and breathe out oxygen, but they also take in tons of other chemicals as they breathe, too, pulling those toxins down to their roots to use as fertilizer. The same chemicals that

Household Plants and Household Toxins

can cause headaches, respiratory issues, or irritation for us can actually boost the growth of our plants. Even better, with indoor houseplants that don’t have to brave our Manitoba winters, our homes get a health boost all year. Just be sure your houseplants don’t get root bound!

Our Top Picks For Removing Airborne Toxins

Not every plant is equal when it comes to cleaning your air. Here are some of our favourite air-cleaning powerhouses:


Peace Lily: These plants are a blessing in every way. They thrive in low-light rooms that your other houseplants might not cut it in and are incredibly easy to care

Boston Fern: The oldest houseplant in the world

for. They also produce elegant, white flowers almost all year and are experts at eating toxins. These are an excellent choice for beside an entertainment unit where they can devour the acetone that come off the electronics.


Boston Ferns: This is the oldest houseplant in the world, and we can’t help but wonder if their ability to filter toxins and molds had a part in that. They are absolutely greedy for toxins in the air and will even treat you to a humidity boost around them.

Spider Plant: This plant is so easy to manage that it is often the unsung hero of houseplants. They’re practically impossible to kill, require very little light and care, and love cleaning up your air. It’s one of the few houseplants that will take on deadly carbon monoxide with enthusiasm, making it a great choice near fireplaces and kitchens.

Spider Plant - the unsung hero of houseplants

English Ivy: This vine is easy to grow (you’re more likely to be cutting it back than coaxing it to thrive) and is a gift for allergy sufferers. It gets rid of true nasties in the air, like mold or even airborne feces (yes, you read that right). You are what you eat, though, so this plant is toxic and should be kept out of reach of children and pets.


Bamboo Palm: Also known as “Reed Palm”, this plant is stately and compact enough to fit in any obscure corner of your home. It’s also a heavyweight champion when it comes to eating up benzene and trichloroethylene. This is a good choice to place near new furniture to make the most of its appetite.

Bamboo Palm is also known as Reed Palm

It wouldn’t be the first time that we “borrowed” space age research to make our lives here on Earth better. Thanks to some of the brightest scientific minds, we can breathe easy while enjoying a bright future of working with our favourite plants more and more as they work with us, too!

Growing Your Own Garlic

Oakridge Lifestyle Blog
Growing Your Own Garlic

Growing Your Own Garlic

By Erna

“Garlic is divine.”            – Anthony Bourdain

It’s hard to imagine a good, old-fashioned, home-cooked meal without a generous hit of garlic. From garlic bread to Caesar salad, garlic is the star ingredient in all the most popular dishes on the table, and it even boasts some serious health benefits that have made it a versatile healing aid for millennia. Thing is, growing garlic is a long process that starts in the fall and yields in the summer. However, if you love garlic as much as we do, we think you’ll agree that growing your own is well worth the wait!

Garlic for Your Well-Being

While it tastes sinful, there are actually many benefits to a garlic-rich diet. It’s almost as good at preventing seasonal colds and bouts of flu as it is at kicking up your pasta dishes! If our harsh Manitoba winters seem to be taking their toll on your sinuses, keep your meals rich in garlic for a beneficial boost of Vitamins C and B6.

Growing Your Own Garlic

The natural antibiotic properties in garlic also make it a wonderful home remedy for feminine infections, chest infections, and coughs. Garlic is also high in iodine content, which is great news for people living with hyperthyroid conditions, as well.

Additionally, a diet high in garlic has been shown to guard the body against more serious conditions. Garlic has been shown to gently removes plaque from the arteries, which helps to prevent the onset of cardiovascular disease. It has also been shown to slow the growth of tumours related to cancer in the stomach, prostate, breast, colon, and bladder.

More amazing yet, garlic doesn’t just help your body on the outside. Crushed garlic was even used as a topical ointment for open wounds during the First World War!

To get the maximum benefit from this amazing little plant, consume up to 3 cloves per day – and if you take the time to grow your own fresh, it only makes it that much more irresistible!

Growing Garlic at Home

Growing Garlic at Home

Fresh-grown garlic is a truly an experience to be relished. Not only is it beautifully fragrant, but the flavour of fresh garlic is much fuller and fresher than store-bought, which is often treated with preservatives for longer shelf-life. Speaking of store-bought garlic, growing your own garlic is not only better but far cheaper.

Garlic planting season is in early October, which is a fleeting moment in Manitoba. As we Manitobans know, the soil could be frozen solid by Halloween, so it’s best to seize the day! Just don’t seize it too eagerly – planting too early can cause garlic to grow too vigorously, which will backfire once the frost sets in.

Pick a sunny spot in your garden with good drainage, preferably on sandy soil. The perfect garlic garden is neat and weed-free. Garlic likes company about as much as we enjoy company with garlic breath!

When you’re ready to plant, source your garlic cloves from fresh heads of garlic free from blemishes, bruises, and fungus. Select the fattest, firmest cloves to get the plumpest possible garlic heads at harvest time and do not remove the husks from the cloves – that papery layer is the closest thing your young garlic will have to a wool sweater out there!

Plant your cloves in holes about 2” deep, 6”-8” apart. Top with a little bone meal before covering with 3”-4” of organic mulch, ideally made from cedar or straw. This will protect your baby garlic plants from the cold through the winter months. Make sure to mark each clove so you know exactly where to look when the snow melts.

A Summer Treat

Once summer arrives and the bottom leaves of your garlic plants have died, your home-grown garlic will be waiting for you. Simply dig them up and get to work enjoying it in every meal you make! To get the best flavour from your hard-won harvest, avoid using a garlic press. Instead, slice cloves thinly before adding to recipes.

Growing and planting garden fresh garlic
Growing Fresh Garlic

Remember, fresh garlic is much more perishable than the kind you buy at the grocery store. Once you’ve dug it up, store it in the refrigerator to prolong its crispness. If you’ve grown too much, fresh garlic makes a lovely token of neighbourly appreciation. It’s a magical feeling to share the special flavour of garden-fresh garlic with others who have only tried its supermarket counterparts. By offering some as a “thank you” gift to teachers, colleagues or in-laws, you’re not only be giving the gift of great flavour but also the gift of good health!

Taste of Autumn: Picking & Storing Apples

mosquito
apples ripe for picking

Taste of Autumn: Picking & Storing Apples

By Erna
Even if I knew that tomorrow the world would go to pieces, I would still plant my apple tree.”

 – Martin Luther

We can’t decide if our favourite part of Autumn is the impressive colour display or all the fantastic fall flavours that we get to enjoy. Whether it’s every delightful shade of yellow, orange, and red, or tasting seasonal favourites like pumpkin spice, harvest time is the perfect way for our growing season to finish with a bang.

Apples are an autumn classic that embrace all the colours

and tastes of fall, and they certainly become available in abundance at this time of year. Here are all the tips and tricks for you to make the most of apples at home – as you harvest and into the winter.

Fairest of Them All: The Perfect Pick

Apples sweeten as they ripen, so they’ll only get better the longer that they “hang out” on the branch. As long as you don’t wait for so long that they end up in the grass, they’ll be at their tastiest when they’re nearly ready to drop. Picking them at the perfect time is easy if you pay attention to a few small details:

bright red apples on a branch
Where to pick: The outside of your tree sees the most sunlight through the season, so this is where your fruit is going to ripen first. The best way to enjoy your fruit is to simply pick (and eat!) your way inwards on the tree. Check the South and West sides of your tree first for deliciously ripe apples, as these more sun-exposed sides will ripen even faster.

What to look for: Most fruits make it easy to pick perfection as they give away their ripeness with colour! Generally, apples are ready to go when the last shades of their immature green have faded into a glossy red or yellow. Of course, though, this changes depending on what variety you’re growing. Some types will keep an unripened tinge for weeks after they are ready to pick, so while checking colour is a good rule of thumb, getting to know your own tree is important, too.

Knowing by feel: The best ripe apples are ready to drop right off of the tree, so they should be easy to pick with a slight twist of the wrist. If you’re shaking your whole tree and pulling with both hands, that apple probably isn’t ready to go yet and will need some more time on the tree to ripen.

Storing and Eating Apples

When our apples are ripe, they certainly come off the tree by the bucket-full! Many of us love our fresh home-grown fruit but can be a little overwhelmed with what to do with all the surplus. The trick to making the most of your apples is variety, and we have all the tips for how to enjoy your bounty now and later!

picked apples in baskets
Eating apples, like Honeycrisps, are best enjoyed right away. They are sweet and delicious right off of the tree, but aren’t the best to store for later. Fortunately, they’re so darn tasty that many of them won’t even make it all the way inside once you pick them. These types of apples are great as a snack or uncooked in salads, but will taste their best when you eat them the same day they are picked.

Cooking apples are ideal for storing instead of grazing while you pick. Stored properly, they can keep for quite a while, but you’ll want to make sure that you’re only putting away healthy and undamaged apples – any with blemishes could spoil the whole batch. Do a quick visual check as you pick these apples. Those that are free of marks and dents can be kept for later, while any that are damaged should be cooked and eaten right away.

Different types of apples will ripen at different times. If you aren’t sure if your tree is an early, middle, or late-season riser, Google tells all. Everyone’s trees are different but you can usually expect your early-season trees to be eating apples for consumption right away, while mid-season apples can be stored for a week or two and late season apples store for even longer.

To make the most of storing apples, wash and dry them before storing in a cool and dark place – a pantry, closet, or cellar is perfect. Choose only unblemished apples to store, and consider wrapping them in newspaper to prevent them from touching to get the most from their days in storage. Keep their storage area well ventilated and away from potatoes so that the ethylene gas they give off doesn’t over-ripen them too quickly. Also, consider storing them away from onions and garlic to avoid weird-tasting apples.

Local Picks: Best Apples in Manitoba

The colder provinces in Canada don’t have nearly the same variety to choose from as the warm orchard country, but what grows here in Manitoba is enough to keep most of us happy and well-fed.

Goodland apples are Manitoba natives that are hardy, delicious, and ready to eat

honeycrisp apples on the branch
right off the tree, but just as tasty in an applesauce. They’re delightfully sweet and don’t compromise at all in our cold weather – making them perfect for growing in the backyard.

Another eating apple you won’t be able to resist is Prairie Magic. These large, rose-hued apples have a perfect, crispy bite to them, with a sweet flavor that is hard to beat. Enjoy them when snacking or chop them into a fresh salad.

For fans of Royal Gala apples, the Odyssey variety will be a big hit on your table. With an unbelievable sweetness that pairs perfectly with spices, this apple is a surefire win for all your cooking and baking needs.

box of picked apples
Fresh apples are an essential part of the autumn harvest season, and we can’t wait to sink our teeth into them as soon as the season hits. With these easy tips and tricks you will be well on your way to getting the most out of your apples right now and into late fall. Don’t wait; tasty treats and baked goods are waiting for you!

Gardening as an Anti-Depressant

gardening as an anti-depressant
planting flowers in a flower bed

Gardening as an Anti-Depressant

By Erna

There are a lot of inarguable benefits to gardening that attract us to it. We love having a beautiful, thriving space in our backyard, we like having fresh food that we trust on our tables, and our families enjoy the benefits of a place to relax and play all summer. Nurturing life from simple dirt in our own homes is life-affirming and a great getaway from our sometimes hectic, screen-bound lives. Gardening makes a lot of us happy. It turns out that the glow we get from getting our hands into some fresh soil isn’t just psychological, it could come down to chemistry, too.

Happy Gardeners

There’s some evidence to prove that you do, in fact, feel better when you’re digging around in your garden. In 2007, a study from the University of Bristol first started to look into a common soil-borne bacteria called Mycobacterium vaccae. This bacteria is harmless and they found that when they

standing water

exposed mice to it, it had some promising effects that showed a reduction in anxiety. This bacteria helps to stimulate the production of more serotonin in the brain, which is commonly known as the “happy hormone.”

While the brain and brain chemistry are incredibly complicated, and we are only just beginning to understand it, we do know that serotonin is closely connected to our mood, appetite, and memory, among other things. Having more in our system usually means feeling better, less anxious, and having better memory function – just like these mice did in the tests performed during the study! Even if mice are a bit of a far cry from humans, it shows a lot how these natural bacteria can be such a helpful influence on the brains of mammals.

Helpful Bacteria Right at Home

You get M. vaccae bacteria in your body the same way as any other bacteria. Our lives are full of these microscopic organisms that we can’t even see, and it’s reassuring to know that many of them making their way inside are actually helpful. Just having these bacteria on your hands from working with

walking on an outside trail

soil or even breathing in the fresh air of nature can introduce them to your bloodstream, where they get to work.

Gardening is one of the more direct ways to get introduced to M. vaccae regularly because of how involved you get with your own soil, but you can find these helpers in nature, too. A walk in the woods or being outside is enough to inhale them. There’s some science behind how much going for a walk or simply being outside improves your mood and reduce anxiety.

Healthy Soil, Healthy Home

Of course, the healthier your soil is, the healthier it will be for you. Soil is a living ecosystem that is incredibly complicated. Try to cut back on harsh, synthetic fertilizers and other chemicals in favor of some gentler, natural solutions, and you’ll be rewarded with a healthier garden that grows better, while rewarding you with better mood-boosting bacteria.

healthy soil

Learning Gardens

The benefits of these bacteria certainly aren’t limited to adults that need the stress release. Kids reap lots of benefits from spending time in the garden. They love to explore, they love the wonder of tasting the food that they’ve helped to grow, and they also benefit quite a bit from the exposure to a world of bacteria and dirt.

kids in the garden

The benefits of M. vaccae are still being looked into and refined, but we do know that they are very helpful in boosting memory and the ability to learn. We’ve also found over the years that exposing our kids to dirt and germs in a healthy way is important to boost their developing immune systems. Turns out, a healthy garden reaps even healthier benefits for our kids!

It doesn’t come as too much of a surprise to some avid gardeners that a healthy garden keeps them healthy in return. In fact, the more we learn about our gardens, the more we learn about their benefits for us and our families. More than just a beautiful backyard addition, gardening makes us not only healthier, but happier, too!

Saving Your Garden in a Heat Wave

summer garden
sunlight on summer garden

Saving Your Garden in a Heat Wave

By Erna

“If you saw a heat wave, would you wave back?”

– Steven Wright

In Manitoba, we know what the cold weather feels like, so when summer finally hits, the last thing we want to do is complain about the weather. When our luxurious warm weather is interrupted with a heat wave, though, it’s easy to be overwhelmed.

In a heat wave like this one, everything around us feels like it is moving in slow motion – the days are long, and everything feels like it’s moving impossibly slow. It’s downright

uncomfortable to go outside, and even more difficult to get anything done.

As tough as the heat can be on us, our plants are feeling it even more. While we have the escape of the indoors and even air conditioning, our plants are rooted to the spot, taking the worst of it. As much as we want to be relaxing, sipping our lemonade in the shade, we can’t forget to give them some of our attention, too. Here are some tips to keep them from quitting on us when the weather gets hot:

Keeping It Relaxed

Heat stress is an efficient killer in the garden, but there’s tons you can do to help your plants escape it. Thankfully, preventing heat stress requires less work and stress from you, too.

Skip mowing the lawn. The heat doesn’t

avoid trimming full blooming flowers in a heat wave

just target your garden, but your grass, too! Keeping the grass on the longer side will give the ground some extra shade to keep roots cool. The longer grass will also help your lawn to retain moisture and avoid drying out. It’s also a great excuse to save yourself the work under the hot sun, too – what’s best for your yard is best for you, in this case!

Avoid any trimming. Step away from the clippers! A trim to your plants will give them the signal to start growing. This is the last thing you need in a heat wave. Your plants should be using their energy to stay healthy, not struggling with new growth. As much as you don’t want to be labouring on these hot afternoons, your plants don’t, either. Give everyone a break and save the trimming until the temperatures have cooled a little.

Keep It Cool

We’re all looking for ways to cool down this summer, from a chilled glass of lemonade to a dip in the lake. Our plants want to keep the temperature down at a manageable level too, but will need our help to do it.

Mulch – You’ve heard it over and over how

apply mulch to keep moisture in your garden

mulching will help to regulate soil temperatures in your garden, and this is exactly the circumstances that calls for it! If you had to walk around wearing a heavy dark shirt during a heat wave, you’d be pretty hot and upset. The dark colour absorbs heat and would be your last choice to stay cool. Soil works the same way. As such a dark color, it soaks up the sun and can hold enough heat to cook your plant’s roots. Use a lighter coloured, plant-based mulch, like straw or cedar, to protect your plants with their cooling effect.


Staying Hydrated in the Garden

This is one of the most obvious ways to keep your garden healthy in the heat, but is so important it’s worth talking about a bit more anyways. When the mercury rises a cool glass of water sounds more and more appealing. We’re sweating more to try and stay cool, so we need to replenish our water

water your garden in the morning

more. Soil has the same problem with water evaporating in the heat, and will need some extra care to stay hydrated.

Get to know your garden. Not every plant or root system is created equal, and some of your plants will need more help in this heat than others. Plants native to this area and zone will have an easier time tapping into water reserves with their deep root systems than the tropical annuals that keep their roots close to the surface. Keep them from struggling with extra water and care to help manage the heat.

Know when to water. You don’t want to be outside watering all the time, so choosing when to water can help you make the most of your time and effort. Watering at the hottest point of the day will have half your water evaporating before it can even get to the roots. Water when the temperatures are cooler and the sun is less intense. Morning is the best time for your plants to take advantage of it before the afternoon heat. You can water in the evening too, but if the nights start to cool off, you might be adding mildew to your garden problems.

Soak, don’t sprinkle. In extreme heat, little water droplets will evaporate before they can do much good for your garden. If you still prefer the convenience of sprinklers, consider using a soaker hose in heat waves. They keep the water close to the ground where it’s needed, saving you water, time, effort, and money, all while giving your plants the hydration boost they desperately need.

use a soaker hose in heat waves

When summer heat strikes, you don’t want to leave your poor garden and plants out to dry. Help them stay cool and hydrated in the heat with good garden habits so they can come out the other side of the heat looking their best, ready to shine for the rest of the summer. Remember to beat the heat and stay cool, in and out of the garden while the high temperatures last!

Not All Bees are Scary

cluster of honeybees
honeybees

Not All Bees are Scary

By Erna

It’s myth-busting time, for the sake of our gardens and friendly local pollinators. Putting all things that buzz into the same basket – that is, assuming that all bees and wasps are alike – is like equating a sparrow and a hawk.

Bees are the pacifists of your garden. These unassuming bumbling pollinators will not be aggressive unless they feel really, truly threatened. While bees and wasps might come from the same order (Hymenoptera) that’s where most of the similarities end. Bees are vegetarians while wasps are carnivores; and they certainly do not work together, in fact, they are usually enemies by nature!

It breaks our heart when people come to us asking how to kill the bees in their year, mistaking them for their far more annoying or even dangerous relatives. We are sure that the more you learn about different bees in your yard, the less afraid of them you’ll be. They are some of the hardest working insects in your garden that bring a whole list of benefits with them and are just not dangerous unless they feel mortally threatened. With their populations struggling and as we discover more and more how much we need them, it’s time to get to know our buzzing friends so that we’re more comfortable with them in our yards and homes.

Honeybees 

It would be difficult for us to exaggerate how helpful honeybees are. They are responsible for pollinating a third of the food we eat – meaning they have a significant role in our bountiful produce aisles at the store and in our gardens. But they also produce one of the most amazing foods on earth: honey.

jars of honey

We don’t just like honey; it’s a “perfect food” because it’s actually a bit of a scientific marvel. If kept in an airtight container, it never spoils. There have been reports of perfectly edible honey being found in sealed Pharaoh’s tombs thousands of years after their burial. It’s also a tasty food that is created in surplus as part of bees’ pollinating routine, so it is part of a bigger, beneficial process. Here’s how honeybees work:

Honeybee Hives

The actual size of honeybee colonies can alarm people. They live together in hives that can have more than 60 000 buzzing bees – there’s always a bit of a natural hum surrounding them that puts people on edge. These hives work like a little society, with incredibly well-organized hierarchies and

honeybee hives

communication networks to make sure it is working at peak capacity. The queen of a hive lives for up to 4 years, while workers only survive about 6 weeks. A dozen workers will make about a teaspoon of honey in their entire lifespan.

Once the mercury plunges and the flowers are no longer blooming, the bees settle in for the winter, but they don’t hibernate. They use the honey that they produced all winter as an energy source and crowd together to brave our winter extremes. They all work to vibrate their wings, which generates enough heat to keep the centre of the colony a balmy 30°C, even when temperatures drop well below -40°C! For the kind of energy to keep that going, a hive might consume about 40 pounds of honey per winter.

Honeybees in the Garden

Unlike wasps, who have earned their nasty reputation, honeybees aren’t aggressive and won’t sting unless their life, of the life of their hive is threatened. They’re much more focused on their job making honey and spreading pollen. It takes a lot to make a honeybee want to sting – you basically have


bees in the garden

to sit on them! The stinger on a bee is barbed, which means it sticks in your skin. When they sting, a large part of their insides is torn out of them with the stinger as they fly away, resulting in death. It makes sense then, why they aren’t quite so eager to sting the random passerby.

Wasps

The majority of wasps are solitary, parasitic, harmless to humans, and nearly invisible. But there are a few more social species that have earned quite the bad reputation for all of them. The outdoor picnic-ruining Yellow Jacket is the poster child of these nasty wasps and is not only the most common but

yellow jacket wasps

a sleek, aggressive flyer that isn’t as shy about stinging as some of its distant bee relatives.

Yellow jackets love to nest below ground or in hard to reach places. Sometimes this helps us avoid them, but other times you aren’t sure where a nest is until you’ve run over it with the lawnmower. These wasps are attracted to strong scents like perfumes and colognes, as well as bright coloured clothing, and they’ll try to scavenge whatever sweets and meats left out on your patio that they can.

The important difference between the humble honeybee and the wasp is that while honeybees are grazing foragers, wasps are predators. They’re carnivorous and aggressive, and won’t spend much time pollinating when they can hunt insects like flies and caterpillars instead.

Their colonies might be much smaller, at only 1000 strong, but given the difference in disposition between honeybees and wasps, a much smaller wasp hive is still a way bigger nuisance.

While wasps are obviously not as imposing to us as they are to their prey, their stingers still pose an issue. They aren’t barbed like a bee stinger, making them much more willing to sting, and able to sting repeatedly when they do. To rub salt in the wound, as they sting they also release a pheromone that invited their friends to join the party. We might fear a visible swarm of honeybees, but even a solitary wasp can be more dangerous.

hornets nest

Hornets

Hornets are actually a type of wasp, but they act a little bit different. We’re most likely to see bald-faced hornets in our area, who have black and white markings on a broader body than wasps.

Wasps and hornets are carnivores that technically eat enough pests in the garden

to be seen as beneficial, though most people don’t see their threat of stinging as worthwhile. They also love to eat rotting fruit, so you can expect them to show up where there is fallen apples or other fruits.

You’ll find a hornet in classic grey, pear-shaped nests – stumbling across one always gets the heart beating a little faster.

bumblebees in the air

Bumblebees

We’re always amazed at how these gently, fuzzy blimps can even sustain flight on their itty-bitty wings. These gentle giants live in comparatively small nests of only 50-300 bees each, and only make enough honey for their own use over the winter – only the queen survives all winter, protected in holes

in the ground, meaning that much less honey is needed.

These adorable bees are timid, but they’ll still sting if threatened. Contrary to popular belief they can actually sting numerous times, but they still rather keep to themselves than bother you.

While honeybees have a short tongue and can be found in your open, full-blooming flowers, different bumblebees have different unique tongues that make them specialists at obtaining nectar and pollen from certain types of flowers. These specialized bees are very efficient with their favourite blooms, but their unique abilities also make them much less adaptable and more vulnerable to habitat loss.


Getting to know these bright pollinators and pests in the garden help to reduce a bit of the fear that comes with their ominous buzzing sound. Bees are such an essential part of how our gardens and food supplies work, that it’s a relief to understand how harmful they are, and how fortunate we are when they visit our own gardens!

Flowering Shrubs for Cut Flowers

roses in vase
cut roses in vase

The Best Flowering Shrubs for Cut Flowers

We love the charming elegance that our garden flowers bring to our backyards. With so many gorgeous shapes, scents, and colours, nobody can blame us for wanting to bring a bit of their style inside. The summer season always seems a little too short, so cutting flowers from your yard to bring indoors is the perfect way to make the most out of the best that your garden has to offer.

There are all kinds of iconic blooms that come from common shrubs that make enjoying your flowers in every way possible easier. Who doesn’t want to have some homegrown beauty lighting up their kitchen or living room? These are some of our favourite flowering shrubs to cut flowers from to enjoy inside:

Roses

Roses are an easy winner for the most universally beloved and sought-after cut flower. These blooms are gorgeous, delicately intricate, and come in a stunning variety to suit any taste. They’re a symbol of love and friendship, and we can’t help but associate them with gestures of romance

pruning roses

and affection. Why not take some of their charm indoors to enjoy, or surprise a friend or loved one with a homegrown bouquet?

As such a popular flower, there are dizzying numbers of rose varieties, offering choices in blooms, hardiness, size, and care needs. Roses have a bit of an earned reputation as finicky and difficult plants to grow, but newer hybrid varieties have started to offer gardeners the same gorgeous blooms with less particular care needs. There are so many options that the decision for what variety of rose to plant really comes down to gardener choice. While each type has its own set of particular needs, they all generally need lots of sunlight and rich, well-draining soil with some mulch. Water deeply every week and prune just before blooming season for a shrub bursting with blossoms for both your yard and home.

Hydrangeas

These shrubs boast spectacular blooms that are amazing for cutting. They simply overflow with globes of blossoms that are brimming with colour and bubbly personality. Many gardeners favour these plants for the fun that they offer them in the garden. Anyone can play at being a mad scientist

hydrangeas

with their hydrangeas, tinkering with the soil chemistry to change the colours of their flowers! These shrubs will give a lot in return for only a little work, making their stately and effortless beauty all the better to enjoy.

Plant where they will enjoy morning sun, but only dappled sunlight into the afternoon, and sheltered from strong winds. Hydrangeas love rich soil and will benefit from mulch to keep the moisture levels at their roots consistent on dry days. Make sure to prune right after blooming to promote more gorgeous blossoms for next season. Cut these flowers when they are fully open and at their prettiest to help them last longer, dazzling in your home.

Lilacs

Lilacs are famous for their delicious fragrance, but their pretty flowers certainly don’t disappoint either. These blooms are so iconic that they have become the namesake for the shade of purple that decorates their petals, but they’re also available in an array of other colours and shades to suit your

cutting lilacs

tastes and decor. These are an excellent choice in a vast arrangement, as they lighten up the room while adding a delicate, summery scent to your home! Make sure to keep their vase full of fresh water to keep these thirsty flowers looking their best after they’re cut.

Plant your lilac in full sun in rich and well-draining soil. They love moisture but won’t tolerate wet feet. Mulch will be key to keep them happy by keeping the moisture locked in the soil without drowning them. Prune your lilacs every year after they bloom to encourage an even more impressive display next season. If you want to display cut flowers inside, cut them when they are only half-opened for most enduring results.

Azaleas
Azaleas

These might be among the more famous varieties of Rhododendrons – and with their drop-dead gorgeous beauty, it’s not hard to imagine why! These flowers offer breathtaking clusters of unique, trumpet-like flowers. Azaleas are most known for their shades of pink and purple flowers, but many

other coloured varieties are equally as charming.
To grow your Azaleas at home, start them off in well-draining, acidic soil. Staying on the acidic side is essential to help them develop properly without suffering from yellowing leaves. Choose a location with dappled sunlight and protection from strong winds and weather. Generally, these flowers are low-maintenance if you start them out right and mulch them. They will only need a little bit of extra water in dry spells or if you notice their leaves curling. Nurture them with a high-acid fertilizer annually and prune them right after their blooming ends for gorgeous flowers year after year.

mockorange plant
Mockorange

Just as their name suggests, this shrub doesn’t grow oranges, but it could certainly fool you. They offer delicate, white flowers that look nearly identical to orange blossoms, and they even release a delicious citrus scent that you, your family, and the local butterflies will adore. While they only

bloom for a short period they have wonderfully brooding, dark green foliage that makes a fun contrast in your yard or a great accent as a cutting. You might not get to enjoy tasty citrus fruits from this shrub, but you’ll love its southern appeal and pretty charm.

Plant your Mockorange in full sun or partial shade in well-draining soil that’s had a boost of compost. Keep the soil moist as it first gets established, but afterwards enjoy its low-maintenance upkeep. Water during dry spells when precipitation isn’t quite enough, and prune annually just after blooming for delightfully citrus-like blooms annually without all the effort.

It’s wonderful to be able to enjoy the best colours of the summer right inside your home, to savour the most beautiful fruits of your garden as much as you can. Simply cut your blooms early in the morning, trim on a 45° angle, and you, your family, and your friends can enjoy your flowers inside, as well as in the garden.