Author Archives: Oakridge Lifestyle

Maintaining Outdoor Containers

mosquito
christmas decorated winter porch pot

Maintaining Outdoor Containers

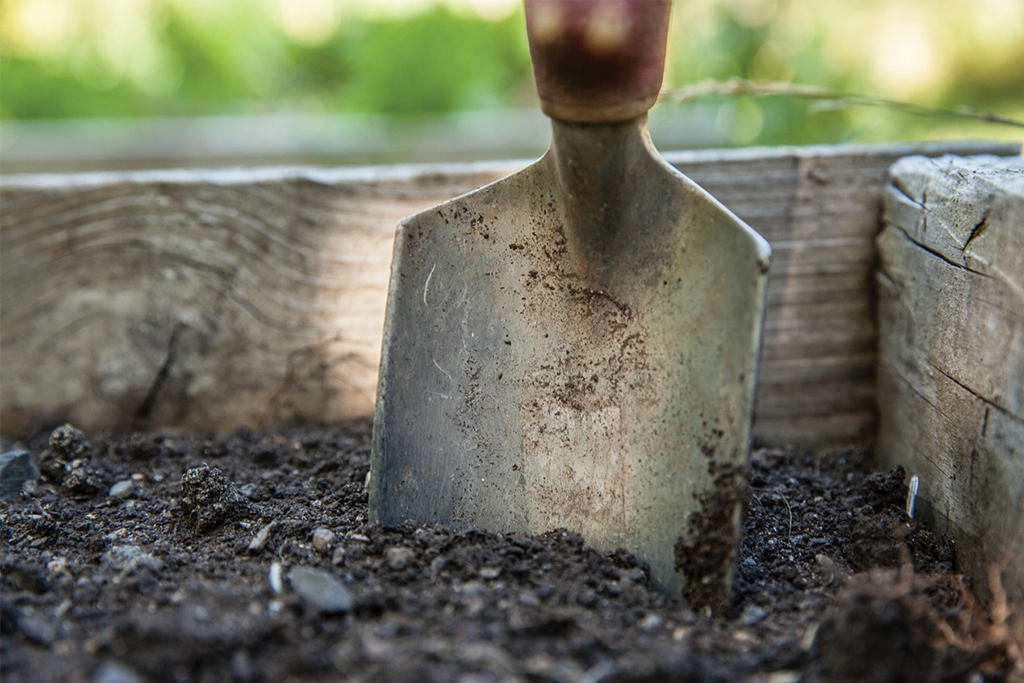
Planting in containers is the easiest, most versatile way to garden. We always recommend container gardening to beginners to help you “get your hands dirty” (quite literally!) and learn the basics of plant care. It’s exciting to choose some pretty containers and some equally gorgeous annuals to fill it up, but once everything has been planted—then what?

Learning how to care for potted plants is no more complicated than taking them home and planting them! Here are our best tips for keeping your outdoor containers looking vibrant into the fall.

Keeping Outdoor Containers Trimmed & Tidy

The key to maintaining container gardens is to keep them from looking unkempt. Unkempt plants will throw off the balance of your container design or detract from the beauty of your plants with unsightly dead material. Here are a few questions we often hear from new container gardeners at our garden centre:

oakridge winter porch pot

What time of day should I water my plants? The best times to water your plants are in the early morning or in the early evening. At these times, the heat and sunlight aren’t at their peak, which gives your plants more time to absorb moisture before the sun begins to evaporate the water in the container. Well-hydrated plants are less likely to die prematurely, especially in the blazing Manitoba summer sun. You can help containers retain moisture by applying a layer of mulch over the soil—just make sure you leave a little room between the mulch and your plant stems.

How much water is enough? Plants should generally be watered when the first inch or so of soil feels dry. In the cooler months of the growing season, like late May and early June, this may happen only every few days. In the heart of summer, you can expect to water your plants daily or even twice a day for smaller or shallower containers. 

When you water, water the soil and not the plant leaves to keep disease at bay. Water thoroughly enough that water emerges from the drainage holes at the bottom of the container, but make sure the water can drain through the soil. If your soil has poor drainage and water is pooling in the container, your plants will be susceptible to rot. Amend your soil with peat or another amendment to improve drainage as soon as possible.

When should I cut back my plants? There’s an element of design preference when it comes to trimming back plants. For instance, you may have a Creeping Jenny vine that you want to cascade bountifully out of the side of your container, whereas another gardener may prefer a few tendrils of vines peeking down. However, there are two other common-sense times when trimming back is appropriate.

The first is if a part of your plant appears diseased, dead, or dried out. To prevent the issue from spreading to the rest of the plant, trim off these bits so your plant can focus on generating new, healthy growth. The other is if your plants have begun to overwhelm the other plants in your container. If it appears one of your plants is getting buried in the foliage of another, trim strategically so each plant has its time in the sun.

How much should I trim off my potted plants? When you start out trimming container plants, you may be concerned about taking off too much. As long as you trim back no more than ⅓ of the plant at a time, your plant should bounce back just fine. It’s also extremely important to leave plenty of foliage on the plant, which allows the plant to photosynthesize sunlight into energy.


Fertilizer for Outdoor Containers

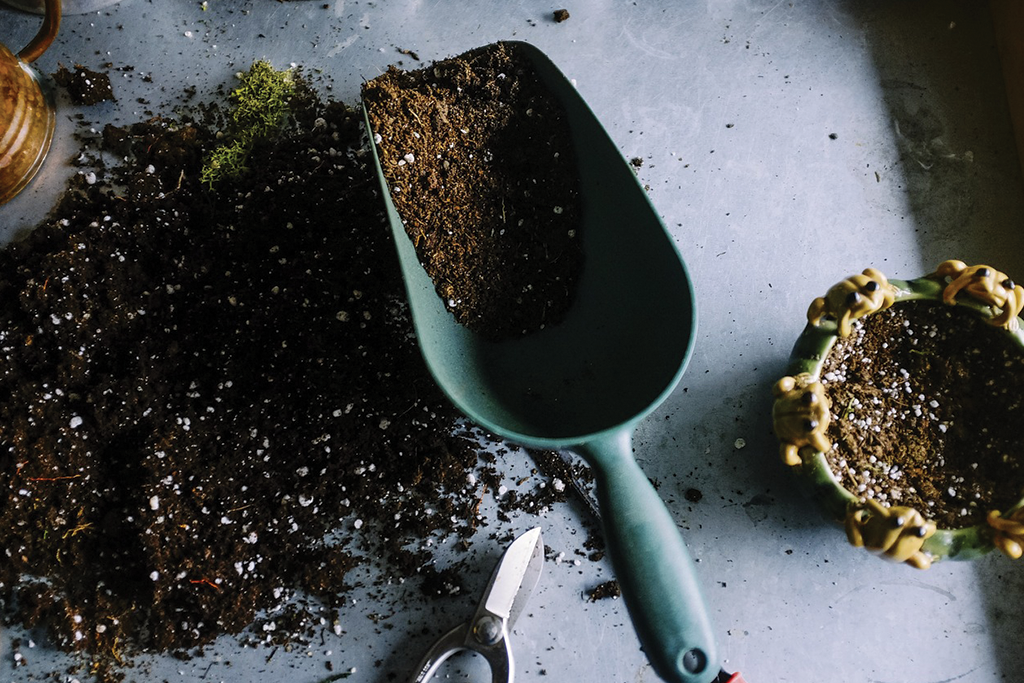
Fertilizer is often an intimidating topic for fledgeling gardeners, but it doesn’t have to be. Container gardeners especially should learn the basics of using fertilizer, as containers are small, enclosed environments that need to have their soil replenished with nutrients regularly. Here are some of our most popular fertilizer questions for container gardens.

What is the best fertilizer for container plants? You may not love this answer, but it depends. The plant variety is much more important than the container when it comes to choosing the correct fertilizer. Fertilizers for flowering plants will need a different nutrient balance than fertilizers for foliage plants, so it’s best to ask one of our garden centre specialists for help when selecting your formula. 

How often do you fertilize container plants? This also depends on the fertilizer product you use. Always follow the instructions on the fertilizer packaging—it provides the details of how much to apply for the amount of soil in your container, how to apply it, and how often.

What’s the difference between liquid fertilizer vs. dry fertilizer for potted plants? Liquid fertilizers are normally applied as you water your plants. There are both synthetic and organic formulas available, but the downside to these fertilizers is they need to be applied more often. This is because these fertilizers are water-soluble and drain through the container as you water your plants. Slow-release fertilizers, on the other hand, come as a solid medium you add to the soil that releases nutrients little by little. Both kinds of fertilizers can be very useful, it comes down to the plants you’re growing and your personal preference.


Prolonging the Blooming Period

One of the simplest tricks to keeping your container flowers looking great is to deadhead or pinch off spent blooms. While it may seem counterintuitive to pluck off flowers, deadheading prolongs the blooming period and encourages the plant to produce more flower buds. If spent blooms are left on the plant, the plant will begin to sense the season is ending and stop producing new flowers altogether.

Healthy, great-looking containers are a major asset for your yard. Just about any outdoor space can be enhanced with a pot or two of vibrant flowers and foliage within view. By taking a little time each day to tend to your containers, you and your plants can soak up every sweet moment of our precious summer days.

Planting Your New Tree

mosquito
christmas decorated winter porch pot

Planting Your New Tree

Trees are some of the most important features of our landscapes. They provide shade, beauty, and structure to a property, and they add value to the home. Especially for families, trees often hold a great deal of sentimental value. From tire swings to treehouses, some of our most precious memories couldn’t have happened without our beloved trees.

As our communities grow and our landscapes change, many newer homes tend to lack mature trees. Planting just one new tree makes a tangible, long-lasting difference in an entire community. That tree is likely to stay on the property much longer than you will, and every year it’ll give a little more back. From its earliest days, your new tree will produce oxygen, then soon after it will become a shelter for wildlife. Then, someday, it will become a landmark that will always remind someone of home.

The Best Time of Year to Plant a Tree

The best time to plant a new tree is when the tree has gone dormant. Early spring is the most favourable time to plant a new tree, as the tree is just beginning to wake up and the air isn’t too warm yet. If you can get the tree or shrub into the ground before the buds burst into leaves, the timing will be just right for them to settle in and enjoy their new home before the temperature rises.

However, despite common belief, summer planting is not entirely out of the question! While there certainly is more possibility for transplanting stress in the summer, planting a pot-grown tree can be done anytime as long as you can get a shovel in the ground. 

oakridge winter porch pot

With the increased temperature, though, when planting in summmer it is important to remember to water thoroughly and regularly to keep the root ball from drying out. We recommend a generous drink every third day or so.

Planting a New Tree

Choose a location for your tree that will look attractive and suit the environment the tree is adapted to. For instance, if the tree prefers a wetter environment, a lower area in the landscape will collect more water during rainfall.

Before you plant your tree, make sure you’ve got some black earth on hand to backfill the space between the tree’s root ball and the surrounding ground. Fresh black soil has air pockets that will allow new roots to pass through easily as the tree establishes, whereas compacted old soil may be tougher for the new roots to penetrate. Allow several inches of space around the root ball. The tree’s label will tell you how much space is recommended.

The hole itself should be about the same depth as the root ball so the tree can be planted level with the ground. After planting, water the tree well and lay down a layer of mulch to conserve moisture and prevent weeds from sprouting in the fresh soil.

Your New Tree’s First Year

During your tree’s first spring and summer, water it well every 10-14 days to help it establish. Continue watering until the ground begins to freeze in the late fall. Freshly planted trees are much more vulnerable than established trees, so be very careful not to run over the root ball or bump the trunk with a lawn mower or weed whacker. Mulch the tree within about a foot and a half radius of the trunk to prevent the need for lawn tools near the planting site— just be sure not to pile up mulch around the base, because this could lead to rotting.

If you’re concerned about your new tree surviving its first Manitoba winter, try wrapping the tree. We carry a few tree wrap materials to help you guard your tree against harsh frost and wind. Our staff can help you choose the right wrap for your tree species.

A new tree is a significant investment in your landscape— one that you’ll grow to love more and more each year. As your tree matures and grows, it will begin to shape the way you and others see your property. With the right start, your new tree will be on its way to enjoying a long and healthy life.

Raised Bed Gardening

mosquito
christmas decorated winter porch pot

Raised Bed Gardening

Especially at this time of year, when the weather is precarious and the threat of frost isn’t altogether gone, we’re all too aware of how precious the warm weather is. While we love our four distinct seasons in Manitoba, as gardeners we always wish the growing season was a little bit longer. We can’t control Mother Nature, but we can gain a bit more control over our growing conditions by building a raised garden bed.

Benefits of Raised Gardening

Raised garden beds solve a lot of the issues we face when planting directly into the ground. Not unlike the difference between heating a kettle of water and heating a swimming pool, soil that sits in our yards takes far longer to reach a warm and cozy seeding temperature than the soil we keep above ground in a raised bed. While we still need to keep our eye on the forecast, this allows us to plant some cool-weather tolerant varieties a little earlier than may be advisable in our standard garden beds.

oakridge winter porch pot

However, there are even more benefits to raised bed gardening. It’s far easier to control the environment in a raised bed, as we can simply replace all the soil with fresh, sterile soil and compost any time we need to start again. The contained environment is also far less vulnerable to pests and weeds, making it a suitable place to grow our more finicky annuals and edibles. Plus, it’s much easier to spend hours tending the raised bed, as the need to bend over is virtually eliminated.

Building Raised Garden Beds

There are several ways to build raised beds, but the most traditional way is with wood. Also known as ‘garden boxes’, wooden raised beds are a fairly simple woodworking project for anyone who isn’t afraid of a few boards and nails. There are many raised garden bed plans available online that vary in difficulty, so it should be a snap to find a project that isn’t too intimidating.

When choosing your plan, keep in mind the plants you hope to grow and how much room you’ll need to house them. Consider spacing, planting depth, and the room those root systems will need. Unless you have other beds you can transplant into, you’ll want to ensure your plants will be able to reach maturity comfortably inside the bed.

Some raised bed plans include raised walls, which offers a little extra wind cover. If the plan you choose doesn’t involve a higher wall, try to position the planter near a fence or wall that can shield plants a little from strong gusts.

Due to the weight of the finished garden bed, most folks choose to build them in the same spot the garden bed will sit. Keeping in mind that it will be hard to move it once it’s built, choose a nice spot for your garden bed before you build. A little bit of dappled shade isn’t a bad idea since raised beds tend to dry out a little faster than your typical garden soil. You’ll still want to make sure your plants are getting plenty of sunlight, but unless you plan to check on them frequently, choose a spot that will offer a little cover from the sun midday.

When choosing a raised bed style, don’t discount the importance of height. While many people are perfectly happy with a simple raised bed that’s just a foot or so higher than the ground, those with back problems may prefer one that sits on wooden legs or cinder blocks. The closer to hip-height your garden bed is, the easier it will be to work in. While a higher design may add some extra steps and materials to the building process, it’s important to consider how important that long-term benefit could be!

How to Choose Wood for Building a Raised Garden Bed

Like any permanent fixture in our gardens, materials make a huge difference in the longevity and appearance of a garden box. Most home renovation and hardware stores sell raised garden bed kits that have already been cut and partially assembled to make setup easy but beware of kits that are far cheaper than the rest. The heat, moisture, and bacteria that will inevitably fill your garden bed will lead to a faster breakdown of cheap woods, so your kit should ideally contain parts made from cedar or redwood.

These woods are ideal choices due to the oils in the fibres that naturally protect against rot and infestation. Cedar has an especially pleasant aroma, which can be reminiscent of a trip to the sauna. Redwood and cedar planks and kits may cost more than other woods, but they’ll pay for themselves as the years go on and you’re not left repeatedly replacing your garden bed!

Straw Bale Gardens

If you’re not dead-set on the look of a constructed garden bed, straw bales are an excellent choice for a maintenance-free raised garden! The straw functions as a great growing medium, as it boasts great drainage and plenty of slowly-degrading organic matter. A little extra soil on top can help keep plants in place as they establish, and then all they need is a little watering.

To make a straw bale garden, purchase a wheat straw bale and move it to an area with full sun in your garden. Place a barrier, like landscaping fabric or even newspaper, between the bale and the ground to prevent weeds from entering the bale. For two weeks, water the bale every day, fertilizing every other day with high nitrogen (or a higher first number) fertilizer. For the second week, add the fertilizer at half-strength for the first three days and switch to plain water for the last four days.

This process helps the straw start to compost and break down. To confirm the bed is breaking down properly, you should notice the temperature of the straw bale is noticeably higher. It may also be starting to show small specks of soil forming on the hay.

If you wish to sow seeds in your bale, add a little extra potting soil on top of the bale and plant as you would any other garden bed. To plant seedlings, gently separate the hay to make holes for your seedlings and secure them with some potting soil. Finish planting by watering thoroughly to help your new garden settle in.

Straw bale gardens work just as well as raised vegetable gardens or raised flower beds, but they do expire quickly. You should expect to need a replacement bale each year. If you have access to bales and you like the rustic country look of straw in your garden, they’re a low-cost option that’s perfect for beginners.


Raised garden beds are excellent options for those who have a hard time with ground-level gardening, with a little more room to grow than a typical container. With total control over the growing environment, raised beds may even enable you to grow plants you never would have considered trying out. If the usual plant maintenance chores have gotten harder on your body, a raised bed may be just what you need to reinvigorate your passion for gardening!

Incorporating Tropicals in Your Outdoor Containers

mosquito
christmas decorated winter porch pot

Incorporating Tropicals in Your Container Garden

Most of us know and love tropicals as cheerful houseplants. As tough as it is to replicate their natural environment in the middle of a Manitoba winter, we certainly appreciate the little touch of the tropics to get us through! In the summertime, however, not everyone knows that we can bring some of that island aesthetic outside. In fact, incorporating tropicals into our container garden design is a great way to create a “staycation” destination in our own backyards. That’s especially great news for those of us who are passing on trips abroad this year!

Can I Plant Tropicals Outside in Manitoba?

With most of us sitting firmly in Zone 3 territory, it’s reasonable to be reserved about bringing tropicals outside. The fact of the matter is, though, while our growing season is famously short, our summers are perfectly hospitable to tropical plants! In fact, the best thing we can do for our existing tropical houseplants is to let them soak up all the extra sun possible during the warmer months. This is especially true if the plant has started to lean toward the sun, a major hint that the plant is craving more light. Treating them to direct sunlight is the least we can do after keeping them cooped up all year!

oakridge winter porch pot

Caring for Tropicals Outdoors

It goes without saying that our region is a long way from the tropics, but tropical plants are a lot more adaptable than we might give them credit for.

Sunlight is what tropicals crave the most (and even so, there are a fair number that are more adapted to the shady rainforest floor). When you think about it, sunlight is abundant here—in the summertime. We often forget that our summer days are much longer than the global average, so tropicals have a large window to get the minimum amount of sunlight they need during those warm July days. Allow them to adjust gradually by moving them into a brighter location, like a sunroom or gazebo, before moving them into direct light. If a plant appears to be yellowing, it may even be better off in a spot that gets some relief from the sun midday.

Watering is seldom an issue for outdoor tropicals. Manitoba summers can get fairly humid, which tropicals love, but we also get a fair amount of rain. Tropicals are adapted to moist soil and often prefer their soil to dry out between waterings, so enjoying the odd rain shower with the occasional watering suits them just fine.

Fertilizer for tropicals should have a lower middle number (phosphorus) than most flowering plants. Select a fertilizer specifically made for tropicals and follow the package directions for application.

Space can be an issue for larger species, like philodendrons, who tend to grow very large very fast in the right conditions. Make sure your container has the right space to accommodate your tropicals’ growing habits and keep an eye on them in case they need to be trimmed back.

Styling Tropicals in Your Container Garden

As with all container gardens, the rule of thumb is to include a thriller, a filler, and a spiller to balance the look and proportions of the arrangement. Since you’ll be fertilizing tropicals differently than most of your other plants, it makes the most sense to plant tropicals with other tropicals. This will also keep your arrangement looking cohesive. Here are some examples of tropicals to incorporate in your container garden design.

Tropical Thrillers

  • Palms
  • Croton
  • Canna Lily
  • Elephant’s Ear
  • Bird of Paradise
  • Philodendron
closeup of holiday decorated porch pot with berries, lights and pinecones

Tropical Fillers

  • Lantana
  • New Guinea impatiens
  • Dragon Wing Begonia
  • Cuphea
  • Ctenanthe
  • Succulents, like Leatherpetal or Ghost-plant

Tropical Spillers

  • Alternantera
  • Fittonia
  • Pilea
  • Peperomia
  • Clematis
  • Jasmine

Overwintering Tropicals

Keeping tropicals in containers makes it easy to bring them inside when the weather becomes less-than-ideal. In the fall, as soon you feel the urge to wear a light jacket, bring your tropicals back inside. Tropicals can’t handle frost, and it’s best not to tempt fate. Switch to a monthly dose of a balanced fertilizer during the cool months and keep them under a grow lamp in the evenings before bed when the days get short.

closeup of holiday decorated porch pot with berries, lights and pinecones

Even though they come from far away, tropicals are happy to vacation outside with us while the weather is warm! Incorporating them into your outdoor container design is a fabulous way to enjoy them while they best suit the season.

The Basics of Soils and Soil Amendments

mosquito
christmas decorated winter porch pot

The Basics of Soils and Soil Amendments

By Erna

As much as we all need soil, not many of us can say it’s our favourite part of our gardens. To a beginner gardener, soil may seem like a necessary mess that doesn’t seem too exciting at all. With experience, however, we can start to appreciate soil as a living organism that performs a lot of different functions to keep our plants healthy. Furthermore, like any living thing, our soil also needs to be nourished to stay productive.

What Exactly is Soil?

Soil is made from water, organic matter, gas, minerals, and network of living organisms. All soils are complete ecosystems, just like the forest or the sea, and are home to thousands of bacteria that play important roles in helping plant roots absorb nutrients.

When we talk about soil in a gardening context, we often focus on a soils tendency to drain or retain water and its content of 

oakridge winter porch pot

organic matter. When we’re just buying bags of soil, we often have the luxury of bags and labels that help us match the soil to the needs of our plants. When it comes to the soil we already have, however, it can get a bit more complicated. It’s up to us to determine the soil types on our property and to “diagnose” issues that may be holding back the performance of our gardens.

Soil Types

Soil types fit into six main categories, each with their pros and cons. They are:

  • Sandy – Composed of coarse mineral particles, sandy soil tends to allow water to pass through quickly.
  • Chalky – Chalky soil has a hard time holding onto both water and nutrients, and often contains a lot of rocks.
closeup of holiday decorated porch pot with berries, lights and pinecones
  • Clay – Clay soil contains fine mineral particles, which hold onto moisture so well, it tends to pack down and impede airflow.
  • Silty – Silty soil has a similar texture to clay soil but contains more soil nutrients due to a higher concentration of organic matter.
  • Peaty – Peaty soil is high in organic matter but tends to be very acidic.
  • Loamy – The “gold standard” of soils, loamy soils have the best qualities of each type: nice drainage and airflow, high concentration of soil nutrients, and just-right water retention.

What Are Soil Amendments?

While just about every soil type is favoured by at least some plants, the soil we have isn’t always hospitable to the plants we want. Soil amendments are additives that allow us to “treat” soil problems by adjusting the overall composition of the soil. From drainage issues to an undesirable pH, soil amendments can help us adjust our soils to create a better environment for our plants over time.

Uses of Common Soil Amendments

Once you have your soil “diagnosis”, you can remedy issues with the many amendments we carry in-store. The most common ones are:

Compost/Manure – Organic matter is important to add soil nutrients and improve the structure of clay, sandy, and chalky soils.


closeup of holiday decorated porch pot with berries, lights and pinecones

Water retention aids – Shredded bark mulch, peat moss, and vermiculite are highly absorbent and prevent sandy and chalky soils from drying out too quickly.

Gypsum – Like organic matter, gypsum adds nutrients and structure to the soil but breaks down at a slower rate to improve soil quality over the long-term.


There are many other soil amendments available for more challenging soils. If you’ve been struggling with keeping your plants going, talk to us during your next visit to our garden centre and we’d be happy to offer advice. With a proper plan of action, just about any soil can be transformed into a healthy home for your prized plants!

New Years Planning: Our Seed Reference Guide

mosquito
Beautiful Garden Flowers

New Years Planning: Our Seed Reference Guide

By Erna

While we’ve all flirted with the usual New Year’s resolutions – shed a few pounds, be more productive, and so on – that early January goal-setting mindset is an especially significant event for those of us who spend most of our summers in our gardens.

With a whole year ahead of us to take on a new gardenscaping project, it’s the perfect time of year to let our excitement for a new year kickstart our planning process. To help light the fire in your belly, we’ve put together a seed reference guide to our favourite annual and perennial varieties to help you visualize your spring garden layout!

Seed Reference for New Years Garden Planning

From bold colours to ground covers, you can find these varieties at Oakridge Garden Centre. For detailed information about our entire selection, our catalog is available in-store.

Our Favourite Annuals for Beds & Borders

  • Marigold Durango – These bushy, bright marigolds make a statement in your garden while attracting beneficial insects to your beds and borders. Prefers full sun.
  • Gazania New Day – These mounding blooms come in a wide range of stunning deep jewel tones. These gazanias are easy to care for and perform just as well in containers. Prefers full sun.
  • Hibiscus Little Zin – The deep burgundy foliage of Hibiscus Little Zin makes it a fantastic accent plant to complement bronze leaf begonias and deep red-toned blooms. Thrives in full sun.
Marigold Durango
Salvia Victoria Blue
  • Plectranthus Nicolletta – These soft and silvery spreading annuals make excellent ground cover. Their muted green foliage pairs well with neutral-coloured blooms and paler colour palette and will fare well anywhere from sun to shade.
  • Salvia Victoria Blue – Add height to borders and beds with these fragrant sky-blue flower spikes. Their long-lasting flowers bloom from late spring until the frost. Prefers full sun.

Annuals for Containers and Baskets

  • Lantana Cherry Sunrise – Show-stopping bursts of sunrise-toned blooms make these lantanas the star of any container garden. The delicate-looking, but surprisingly low-maintenance, flowers attract hummingbirds, butterflies, and double-takes! Thrives in full sun.
  • Solenia Begonia– The delicate flowers of these brightly-coloured begonias bring cheer and sunshine to hanging baskets and container gardens. As delicate as they look, these bushy begonias are pretty tough – standing up to wind, disease, and intense sun.
Latana Cherry Sunrise
Zinnia Double Strawberry
  • Nemesia Angelart Peach – By the time these compact plants finish, their dark green foliage is covered with a dense blanket of blooms that look just like peaches! Containers with Nemesia Angelart Peach will overflow with flowers all season long, with fragrant blooms in shades of soft gold, pink and orange. Performs best in semi-shade.
  • Verbena Lascar White – These early-blooming plants boast clusters of bright-white flowers on deep green foliage. Their trailing habit looks positively elegant in containers and hanging planters. Prefers full sun.
  • Zinnia Double Strawberry – If you love zinnias, the punchy colour of Double Strawberry will steal your heart. Incredibly easy to grow, these sturdy magenta flowers perform wonderfully in drought conditions. Thrives in full sun.

Perfect Perennials with Beautiful Blooms

  • Aquilegia Songbird Cardinal – With stunning bi-colour, trumpeting flowers, these cardinals bring colours and shapes worth looking forward to year after year. Plant in part-shade in well-drained soil.
  • Echinacea Hot Coral – Feeling a little weary of standard purple coneflowers? Their neon-red cousins will revitalize borders and beds with scads of bold blooms. Talk about making your New Year’s firework show last! Plant in full sun or light shade, into well-drained soil.
  • Lily Tiny Double You – A true double flower, these gorgeous blooms have a dwarf habit that works equally well in containers as they do in beds and borders. However, the real “WOW” factor comes from their versatility in soil tolerance. Plant in full sun or light shade into any soil type from normal, to sandy, to clay – even rock gardens.
Aquilegia Songbird Cardinal
Perennial Phlox
  • Hemerocallis Fooled Me – These sunny daylilies bloom like nobody’s business, with over 500 blooms per year! Fooled Me is exceptionally hardy with excellent drought and disease tolerance, making them a perfect choice for standing the time in our Manitoba climate. Plant in a sunny or part-in area in moist, well-drained soils, ideally loam.
  • Perennial Phlox – When perennial phlox blooms, the foliage is nearly hidden from view under a soft blanket of rich, uniformly-coloured blossoms available in bold shades of white, pink, purple, and red. Plant in full sun, into moist, rich soil.

Perennials for Ground Cover and Foliage

  • Aralia Sun King – These bright green foliage plants look almost tropical, yet complement woodland foliage beautifully. They form a large flowering clump that attracts honeybees and dissuades deer. Plant in part shade in fertile, good-quality soil.
  • Hosta Rainforest Sunrise – These hostas start out deep green, and ultimately develop a chartreuse-to-gold toned centre. They also eventually produce a flower spike of lavender-toned blossoms. Plant in part-to-full shade in good-quality, neutral-to-acidic soil.
  • Heuchera Peach Crisp – These ruffled collectors plants produce foliage in an interesting peachy-gold shade. Plant in full sun in well-drained soil.
Hosta Rainforest Sunshine
Heuchera Peach Crisp
  • Astilbe Colorflash – These colour-changing astilbes are almost like mood rings in their variations of shades through the year, with foliage ranging from green to burgundy to purple. They produce light pink flower spikes which create interesting visual contrast during their flowering period. Plant in part shade in well-drained soil.
  • Panicum Hot Rod – This perennial grass makes an interesting accent in beds and borders, and develops burgundy tips early in the summer. Plant in part sun in good-quality soil, and water frequently.

Like a painter at their canvas, proper planning is essential for creating a masterpiece of colour, scale, and shapes in our gardens. The process of preparing for a new year of gardening can quickly become overwhelming, especially if you anticipate trying something new this year with your layout or variety choices. Even the best artists can occasionally benefit from a fresh pair of eyes! Speak to one of our garden experts for ideas, inspiration, and information about what’s new to in-store for 2019.

Charcuterie Board Plating

mosquito
Charcuterie Board Plating

Charcuterie Board Plating

After a long season of leaning over hot stoves and meticulously decorating cookies, we’re ready for a little break. As much joy as we might get from entertaining, we only have so much time and energy. On those occasions when we’re running low on both, we’re especially thankful for every great host’s secret weapon – the charcuterie board.

Charcuterie Board 101

Charcuterie boards are, traditionally, platters of all our favorite cold cured meats, but these days have grown to include samplings of meats, cheeses, and more – often served with condiments, bread, and crackers. What separates a charcuterie board from the simpler, straight-from-the-store meat and cheese platters commonly found at your typical social is a focus on quality ingredients and presentation.

Plating a charcuterie board is not unlike arranging a bouquet of flowers. You want to make sure that all your high-quality ingredients are displayed beautifully and in a way that every piece compliments its neighbour. A beautifully-presented charcuterie board should consider:

oakridge winter porch pot

Scale – A variety of heights on your charcuterie board gives the presentation appealing dimension. Try cutting firm cheeses and placing them on their side, or serving meats or condiments on risers for a tiered effect. Stacking and well-planned slicing not only give your platter more visual appeal, but the flexibility to fit more crowd-pleasers on a single tray.

Colour – An interesting combination of shades makes your charcuterie look much more appetizing. Try combining very different-looking cheeses with dried fruit, pickled vegetables, and fine condiments to add pops of colour, while matching their exciting flavours.

Flow – A charcuterie board is made for sharing, mingling, and experimenting. Create space between each element so guests can feast without being in the way of others. Encourage guests to try certain combinations by arranging specific complementary ingredients closer together. People tend to scan from left to right, so give some thought to which order you want people to explore the selection and place them accordingly.

Charcuterie Board Accessories

Chacuterie Board with apples, bread slices, nuts, cheese, salami

Beautiful accessories go a long way in making the presentation look picture-perfect. For starters, a set of cheese knives is a must-have for serving charcuterie, pairing function with grace. Opt for a dedicated surface, like a raw-edge wooden serving tray, which sets the stage for a gorgeous arrangement. Cute, tiny vessels for condiments will keep the area neat while adding visual appeal. And, of course, make sure any packaging you leave on the board is beautiful – keep any shrink wrap or price tags hidden away!

What to Put on a Charcuterie Board

The best part about charcuterie is it requires no heat, minimal prep, and you can usually get everything you need at the specialty foods shop. Really the only downside is how overwhelming it can be to choose from a hundred cheeses and meats! As a rule of thumb, we recommend each charcuterie board contain:

Charcuterie Board with condiments and meat
  • At least three types of cheese – Ideally something soft, something firm, and something a little daring.
  • At least three types of meat – Always try to have something mild and approachable, something a little more robust, and something spicy.
  • Condiments – At least one savoury and at least one sweet, but a little kick of spice is always good, too.
  • Carbohydrates for serving – Typically crackers or a selection of breads.

Foolproof Charcuterie Board Ideas

There are thousands of to-die-for combinations and options, but these boards are guaranteed to send the compliments rolling in. Try one of these serving suggestions at your next function, or use them as a starting point to inspire your own:

For Low-Key Gatherings

Cheeses:

Boursin – Soft, spreadable, mild yet addictive
Applewood – smoked cheddar – Firm, sharp, and smoky
Shropshire bleu – Has the savoury qualities of cheddar with the tang of a milder bleu cheese

Meats:

Genoa salami – A mild, easy-to-eat classic
Dry-aged prosciutto – Salty with a dry, jerky-like texture
Hot capicola  – Tender and very spicy
Condiments: Olive tapenade and liquid honey
Serve with: French bread and Ritz crackers

For Intimate Special Occasions

Cheeses:

– Baked brie – Try it seasoned with lemon zest and fresh herbs!
– Gorgonzola – A strong, soft-textured bleu
– Aged Irish cheddar – Sharp, delicious flavour with a unique texture

Meats:
– Prosciutto – A chewy Italian ham with an earthy flavour
– Chorizo – A boldly spicy dry sausage
– Soppressata – A full-flavoured dry salami with a kick
Condiments: Honey, fig preserves
Serve with: Pear slices, bias-cut discs of baguette


For Black-Tie Soirees

Cheeses:

– Délice de Bourgogne – Can be hard to find, but has an unforgettable buttery flavour and texture. Substitute – with Saint-André if unavailable.
– Castello Blue – A bold Danish bleu
– Manchego Viejo – Aged Spanish cheese with a slightly sweet flavour and crumbly texture

Meats:
– Jamón – A well-cured ham with a distinctive flavour
– Foie gras – A true delicacy. Substitute pâté if foie gras is not available.
– Hot Coppa – A spicy, dry salami similar in texture to aged prosciutto
– Condiments: Dried fruit, agave syrup
– Serve with: Water crackers, cream crackers, assorted bread, and dry toasts

Serving delicious foods to our guests doesn’t always mean hours of prepping, cooking, and plating. For a sophisticated serving that will be the hit of any soiree, these charcuterie boards will be a surefire success!

charcuterie board filled with meats, cheese, olives and a glass of wine

Unique Houseplants to Love

mosquito

Unique Houseplants to Love

unique houseplants decorated in house

Each of us is a unique strand in the intricate web of life and here to make a contribution.

  – Deepak Chopra

Plants, like people, are unique living things. No two plants are exactly alike, even within the same species. However, some plants truly stand out from the crowd. They’re the ones that make you stop and take a closer look, the ones that make you wonder how they came to be the way they are. If you’ve had the good fortune to bring home such a plant, you may find that its strangest qualities are what you find the most endearing. Perhaps there’s a lesson in humility there!

Here are some of the more unusual houseplants we’ve grown especially fond of this year.

Goldfish Plant (Columnea gloriosa)

While real goldfish most likely appreciate a little live vegetation in their tanks, that’s not what we’re referring to when we talk about these plants! Goldfish plants are unique houseplants that are both cute and whimsical in equal measure. With their bright orange, fish-shaped blooms, they look just like a bowl of goldfish swimming happily around a cluster of foliage. They have become quite popular lately, as they add a little fun and movement to a room. Keep goldfish plants in bright indirect sunlight and let the soil dry between waterings.

Green and Red Goldfish Plant (Columnea Gloriosa)

Goldfish Plant by Kevan, Source: Flickr.com

Snake Plant (Sansevieria)

These unique indoor plants are known by many names, and not all of them are especially flattering! Despite their more disparaging monikers, snake plants have beautifully patterned leaves and are very robust. They are famously low-maintenance and add nice dimension to any space. Snake plants are sold as small as a few inches and as tall as 3’ high, with slender, snake-like leaves. They’re often found in waiting rooms, living rooms, and other spaces filled with low chairs and stout furniture, as their lanky shape balances those low silhouettes. Snake plants like to live in indirect sunlight and shouldn’t be watered too often.

snake plant (Sansevieria)

Monstera (Monstera deliciosa)

These strange indoor plants have exploded in popularity in the past year, showing up everywhere from art prints to fabrics. Their unusual leaves – which have earned them their other name, the ‘Swiss cheese plant’ – have captivated the attention of plant lovers everywhere for their bold, sculptural appearance. While monsteras are among

Monstera Plant

the most beautiful houseplants in the public eye right now, they’re also among the wildest (at least for us here in Manitoba!). The leaves and stems are toxic to people and pets, and they are capable of becoming invasive climbing plants if brought outdoors. However, if well-cared-for in a sunny indoor spot, and kept in peaty soil with good drainage, they behave just fine.

Closeup of Bright Green Ficus Houseplant

Ficus (Ficus benjamina)

Another one of the more beautiful houseplants on the list, ficuses are slender trees with a shock of shiny, bright-green leaves. However, the most striking feature of the ficus is their flexible trunks, which are often braided before being sold. The braid adds an unexpected texture to the plant that is both subtle and elegant. Ficus do best with a thorough weekly watering in a spot with bright sunlight. To keep the symmetry of the leaves, it’s best to rotate them when watering.

It’s truly amazing how nature’s creations come in shapes, sizes, and colours beyond our wildest imaginations. No matter where you live or who you are, there’s a houseplant just as unique as you are!

How to Plant a Container Garden

How to Plant a Container Garden

By Erna

Container gardens have taken a steady climb into popularity recently. While they had their humble beginnings in 1950’s suburbia, the trends of that time look particularly uninspired compared to some of the wild creativity these days. Traditional containers were about stuffing as many of the same dozen popular plants into a pot as possible to make a single-tone assault of colour. Whether you’re looking at magazines, online, or even just have container-envy peeking over at your neighbours’ yards, it’s clear that today’s containers have kicked it up a notch.

So you want to plant your own containers? It can be pretty intimidating with all the polished designs and exotic plants in containers these days. Stop being intimidated – you can make your own container gardens and they are going to be absolutely awesome.

Find a Method – Getting Started

We love container gardens because they are so flexible. You can find so many fun varieties to fall in love with at your local garden centres these days. With those, you can make a creation based on whatever your heart sets itself on in the store. 

Containers are also really freeing – there aren’t a lot of rules, so there aren’t many wrong choices! We have some suggestions to help you create the best container you can with plants that look and grow together well. In the end, though, it really comes down to what you want. And at the end of the season, when your annuals are finished growing, you get to reset back to the beginning in the spring to make something new. Containers aren’t about commitment, so it’s easier to take the first step in making something creative that you love.

Of course, when you put together your container, you’ll want to set yourself up for success by pairing plants that have similar needs together. They’ll all be sharing one tiny root system so matching needs will give you healthier and more vibrant plants. Past that, the garden centre is your oyster! Explore and fall in love with new plants to bring home. Depending on how free-spirited and artistic you feel, there are a few approaches (ranging from “boldly artistic” to “structured and safe”) to exploring the world of plants out there. Here are a couple ways you can piece your container together. Have fun, get creative, and get ready to fall in love with plants and colours while you’re shopping:

Easy Beginnings – The Recipe Method

If you’re still a bit intimidated about starting, or are a bit of a perfectionist that doesn’t want to leave anything to chance, or want a big and showy container without the fuss, go ahead and grab a container recipe. Look anywhere online for something that catches your eye, but we’ve found lots of ones we like on ProvenWinners.com and Better Homes and Gardens.  These sites (and many others) give you a planogram to lay out your planting and a glossy picture to show you your impressive container before you even start.

If this sounds a little too good to be true, it’s because it is. Container recipes are still a great starting point and can definitely give great results. Keep in mind while browsing, however, that most online gardening material caters to the Eastern and Southern States, where more of their customers are. The plants suggested in many recipes might be best suited for those more temperate climates and may struggle this far north. It doesn’t have to be a deal breaker, but you’ll want to double-check their ingredients to make sure they’ll last outside up here.

Another thing to keep in mind is that many of these recipes are built in order to sell their own plants, and some popular or spectacular recipes might include new or rarer plants to encourage people to buy. You’ll often struggle to find one or two items in a recipe. This isn’t the end of the world, but if you have your heart set on a look, we recommend trying to find something that looks and grows similar instead of embarking on a wild goose chase.

For the Moderates – Napkin Planning

Using a recipe gives predictable and planned results, but can be a little less fun for the creatively inclined. If you don’t want to be chained to a plan, but also aren’t ready to walk into the garden centre cold turkey, try sketching out your ideas first! Have a look at where you want your container, and think about what you’ve liked (and disliked!) in other containers you’ve seen. Build from there to create a container you love.

For the Ambitious – Go Commando

We always encourage this one! You’ll need all your creative forces to walk into the garden centre and let your heart guide you. A container and gardening are all about expressing yourself, so the most beautiful container for your home will be filled with plants that speak to you. Your best container will be centred around plants that make you smile, and that beauty is sure to show when you put them together.

To get started, find something that you love. It’ll probably call to you like a little puppy at the pound, waiting to be taken home. Once you ’ve found “The One,” you can build the rest of your container around it. It doesn’t even need to be the biggest or showiest part of your container, but you’ll know you love it when you see it.

Take this plant with you, and start to pair others with it that you think blend and match well. You might not think that you’re very artistic, but many people are surprised at what they find when they’re shopping! If it looks good to you, it’ll probably look great to others, too (and if it doesn’t, you still love it and that’s the important part). Pair together plants that will play well with each other and look good together to create a container until you have something the same size as your pot’s diameter. You’ll only need to find about 3-5 different plants to make a totally original container.

When it comes down to it, planting a “successful” container garden is much more about finding plants that make you happy than matching what you see in other people’s yards or online. Your container garden is a part of your home and outdoor space and is a fun way to experiment and enjoy gardening for our short summer season. No matter what method you use to create your container garden, we hope to help you put together something that makes you smile every day of the summer!

Our Top 3 New Edibles

Our Top 3 New Edibles

By Erna

“Eat food. Not too much. Mostly plants.”

– Michael Pollan

One of the greatest joys of the gardening season is enjoying your hard work! Nothing quite beats the taste of garden-fresh veggies in the summer. Eating well is so much easier when it’s this tasty and nutritious. Whether they make it all the way to your table, or you just can’t resist snacking as you pick, we have some exciting new edibles for your garden this year.

Dragon Roll Pepper

These peppers are an absolute delight. We love them because they have a smoky and sweet flavour with just enough kick. A hybrid of the popular Shishito Pepper, younger Dragon Roll peppers pack a little punch but will grow in spice with time. At maturity you’ll have a pepper that is only about 1/10 as spicy as jalapenos – which is the perfect flavour for summer snacking. Try them roasted, sprinkled with salt or sesame seeds for a delicious treat. They are the perfect pairing with an ice cold beverage on your deck or patio this summer.

To grow these fun peppers at home, make sure that you choose a spot in your garden with as much sunshine and heat as possible. They’ll prefer moist and warm soil to grow, so mulching will be a big help in getting the tastiest peppers. Fertilize these plants with an all-purpose vegetable mix to give them a boost, but keep in mind that plants grown in drier and less fertilized conditions will give you much more spice – if you like to kick it up a notch. 

Try to catch your peppers while they are still a little immature and green. Always cut (rather than pulling or tearing) when you pick them, leaving part of the stem on the pepper. Your Dragon Roll Peppers will develop a little more after you pick them, turning an enticing shade of red that is full of flavour. Watch your peppers transform after they are picked and enjoy them in as many ways as you can imagine.

Steak Sandwich Tomato

Tomatoes are the garden veggie that always tastes better fresh. With tomatoes straight from your garden you can almost taste the sunshine in them! Steak Sandwich Tomatoes are no exception. These tomatoes are the perfect balance of everything. They’ve got the classic, sweet tomato flavour in a perfect, bright red package. They will stay firm when ripe, making them easy to slice onto sandwiches and burgers, but you won’t need to worry about cracking with moisture changes.

When you’re growing your own Steak Sandwich Tomatoes, find a spot for them that has good drainage and lots of sun. While they like well-draining soil, they will certainly be very thirsty plants, so keep them well-watered and use mulch to help keep that moisture at the roots where it is needed. While your tomatoes won’t be prone to cracking like some other varieties, they are vulnerable to root damage, which can cause rot. Keeping your plants healthy will help to avoid disappointment when it comes time to pick and eat your harvest! For smaller but plentiful harvests, you can plant without a stake and they will sprawl across your garden. For a larger tomato with a cleaner appearance, plant a stake to support the vines as they grow.

Pick your tomatoes when they are at their ripest! They are perfect for picking just when they look the most tempting – fully red and firm to a light squeeze. Harvesting will let more tomatoes grow, too! We probably don’t have to tell you to, but enjoy your tomatoes as quickly after picking as you can for the best flavour – but we bet you’ll be too excited to eat them for them to last very long.

Patio Snacker Cucumbers

The perfect pairing with the juicy taste of garden tomatoes, we also love light and crispy cucumbers from our gardens. The Patio Snacker really lives up to its name with the sweetest little cukes that are the perfect size for snacking. These little veggies are 3-bite size and a great choice for a patio planter, where you can keep them within arm’s reach all summer. If you can resist temptation long enough to get them from your garden to the kitchen, they are also a hit in crispy cucumber salads.

Cucumbers are a heat-loving vegetable and will soak up as much sun as you can give them. They like moist soil but hate wet feet, so make sure they are planted in soil with good drainage. Frequent but shallow watering will keep them happy, and a trellis or hanging basket will give you the best fruit. Despite their light flavour, these veggies are heavy feeders and will need plenty of all-purpose fertilizer as they grow.

Be sure to harvest these sweet little cukes often, before they get too big. If your cucumbers over-ripen on the vine, your plant might prematurely stop producing fruits. Also, your cucumbers taste their best when you pick them young. But remember, they won’t store very well because of their high water content. Don’t worry though, it’s amazing how fast they disappear into hungry mouths once they’re picked.

Summer is full of fresh, green growth and sunshine, and we are lucky to get to bring some of that freshness from our gardens right to our tables! Our weather is fantastic for growing some really great and tasty summer vegetables and this year’s newest edibles are no exception. These selections offer delicious flavours and remixes of old-fashioned classics, making your dinner table the community favourite this year. Happy harvesting!