Author Archives: Oakridge Lifestyle

Your Guide to Fall Planting in Manitoba

fall trees
fall trees

Your Guide to Fall Planting in Manitoba

By Erna

“Autumn is a second spring when every leaf is a flower.”

-Albert Camus

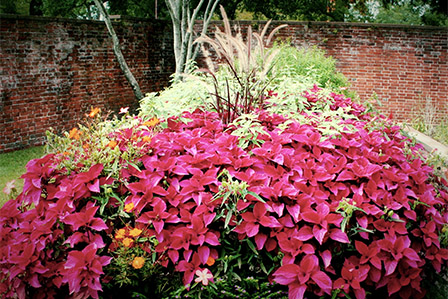
After a long, hot summer, the crisp, cool air of fall is often welcome. The leaves decorate the landscape in beautiful, warm and fiery hues that seem almost to contradict the chill in the air, creating a sensory samba in our minds. While the trees are dropping their leaves and our garden beds are winding down, there’s still plenty of fall planting that can be done here in Manitoba.

Trees and Shrubs

Fall, along with spring, is one of the best times to plant your trees and shrubs. While many fear their newly planted arrivals won’t last through the colder weather, the truth is that they appreciate the calm temperatures that won’t stress them out.

planting a tree

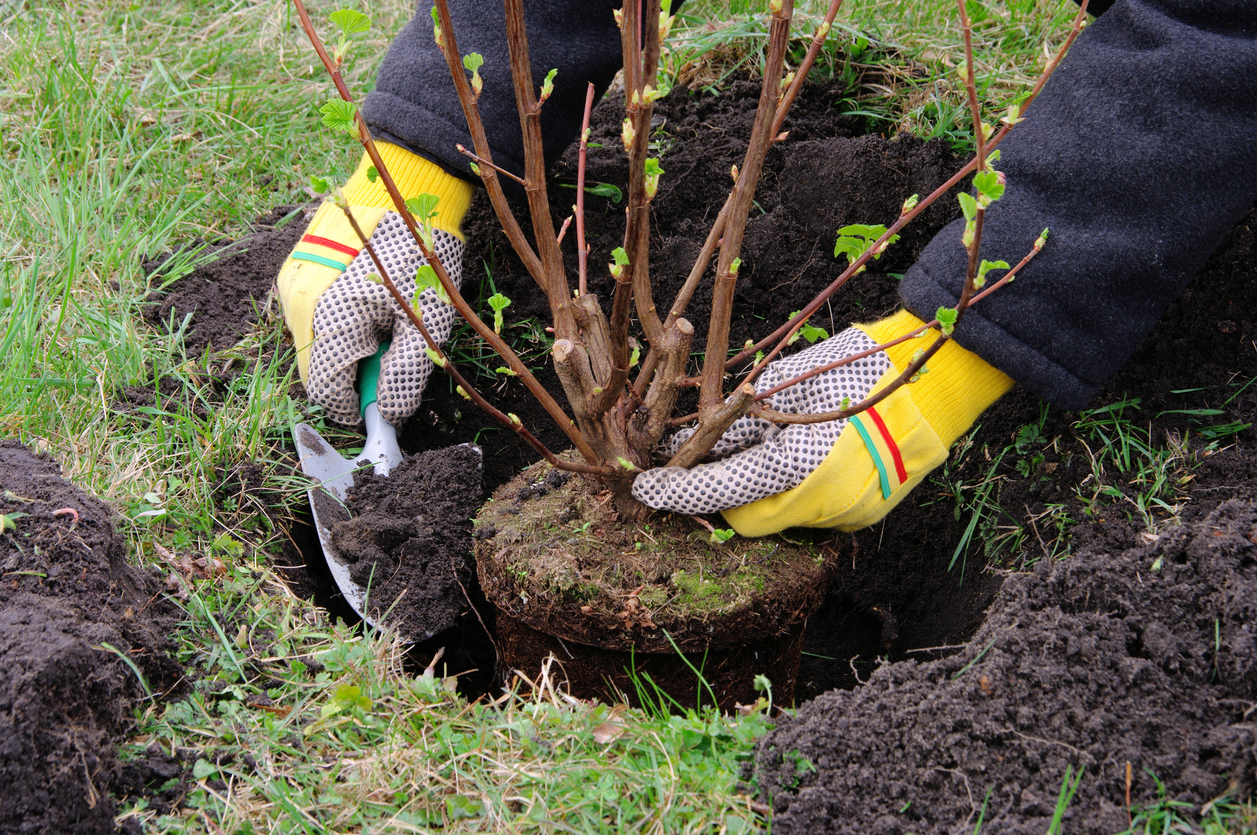
For deciduous trees and shrubs, you can plant late into fall, whether the trees are still actively growing or have gone dormant. In their state of hibernation, they are less prone to shock than if they are moved around at the peak of their growing season.

Evergreens may be stunning year-round, but the heat of the summer is best enjoyed for them if they are well-rooted and in place. Cool seasons, like fall, are a much more relaxed time for them and won’t stress them out like a Manitoba heat wave would.

To plant your tree or shrub, dig a hole that is twice as deep and as wide as the root ball. Carefully place your tree in the hole and backfill with rich, black soil with plenty of aeration. Water the roots well and mulch to protect them, being careful not to let the mulch touch the bark of the tree to prevent rot.
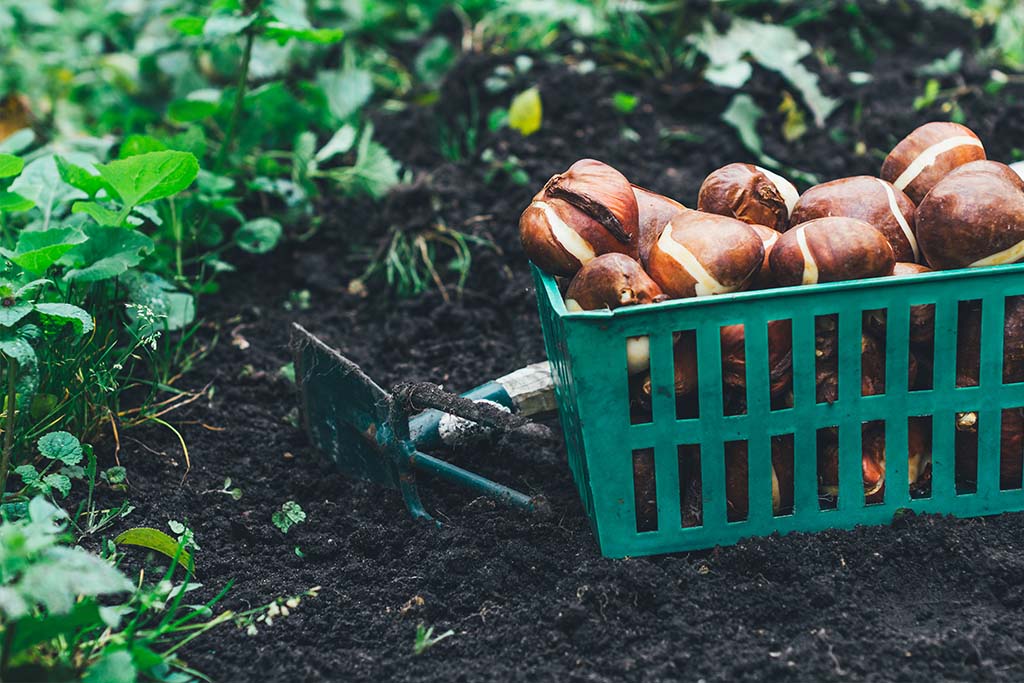
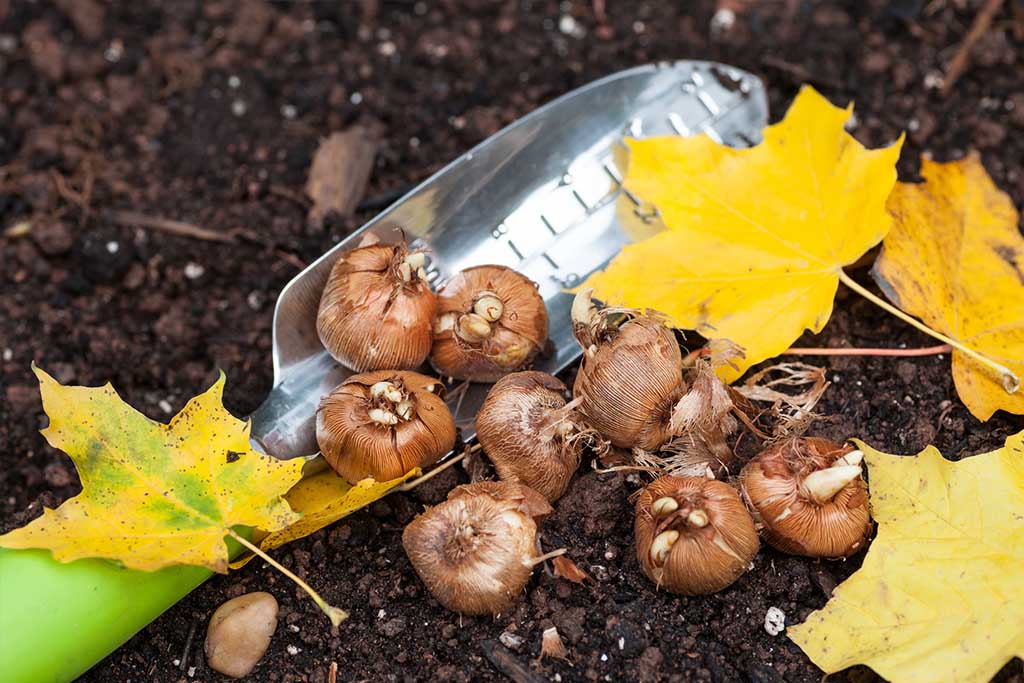
Spring Bulbs

It may seem odd to plan so far ahead, but planting your spring bulbs now will ensure they are ready to burst from the ground as soon as possible when the frost ebbs. No longer will you need to wait for the ground to thaw enough for you to work into it, because your bulbs will already be eagerly waiting to

planting spring bulbs in the fall

get to work as soon as they can.

To plant your spring bulbs – like daffodils, squills, tulips, and snowdrops – find a nice, sunny spot in your garden so they can make the most of the light in the spring. Dig a hole that is 2 – 3” deep for hardy bulbs, or 6 – 8” for less hardy ones (like daffodils), and drop your bulb in pointy side up. Fill in the hole and water well to ensure they freeze to last through the winter. Mulch is also a good idea to give them an extra layer of protection.

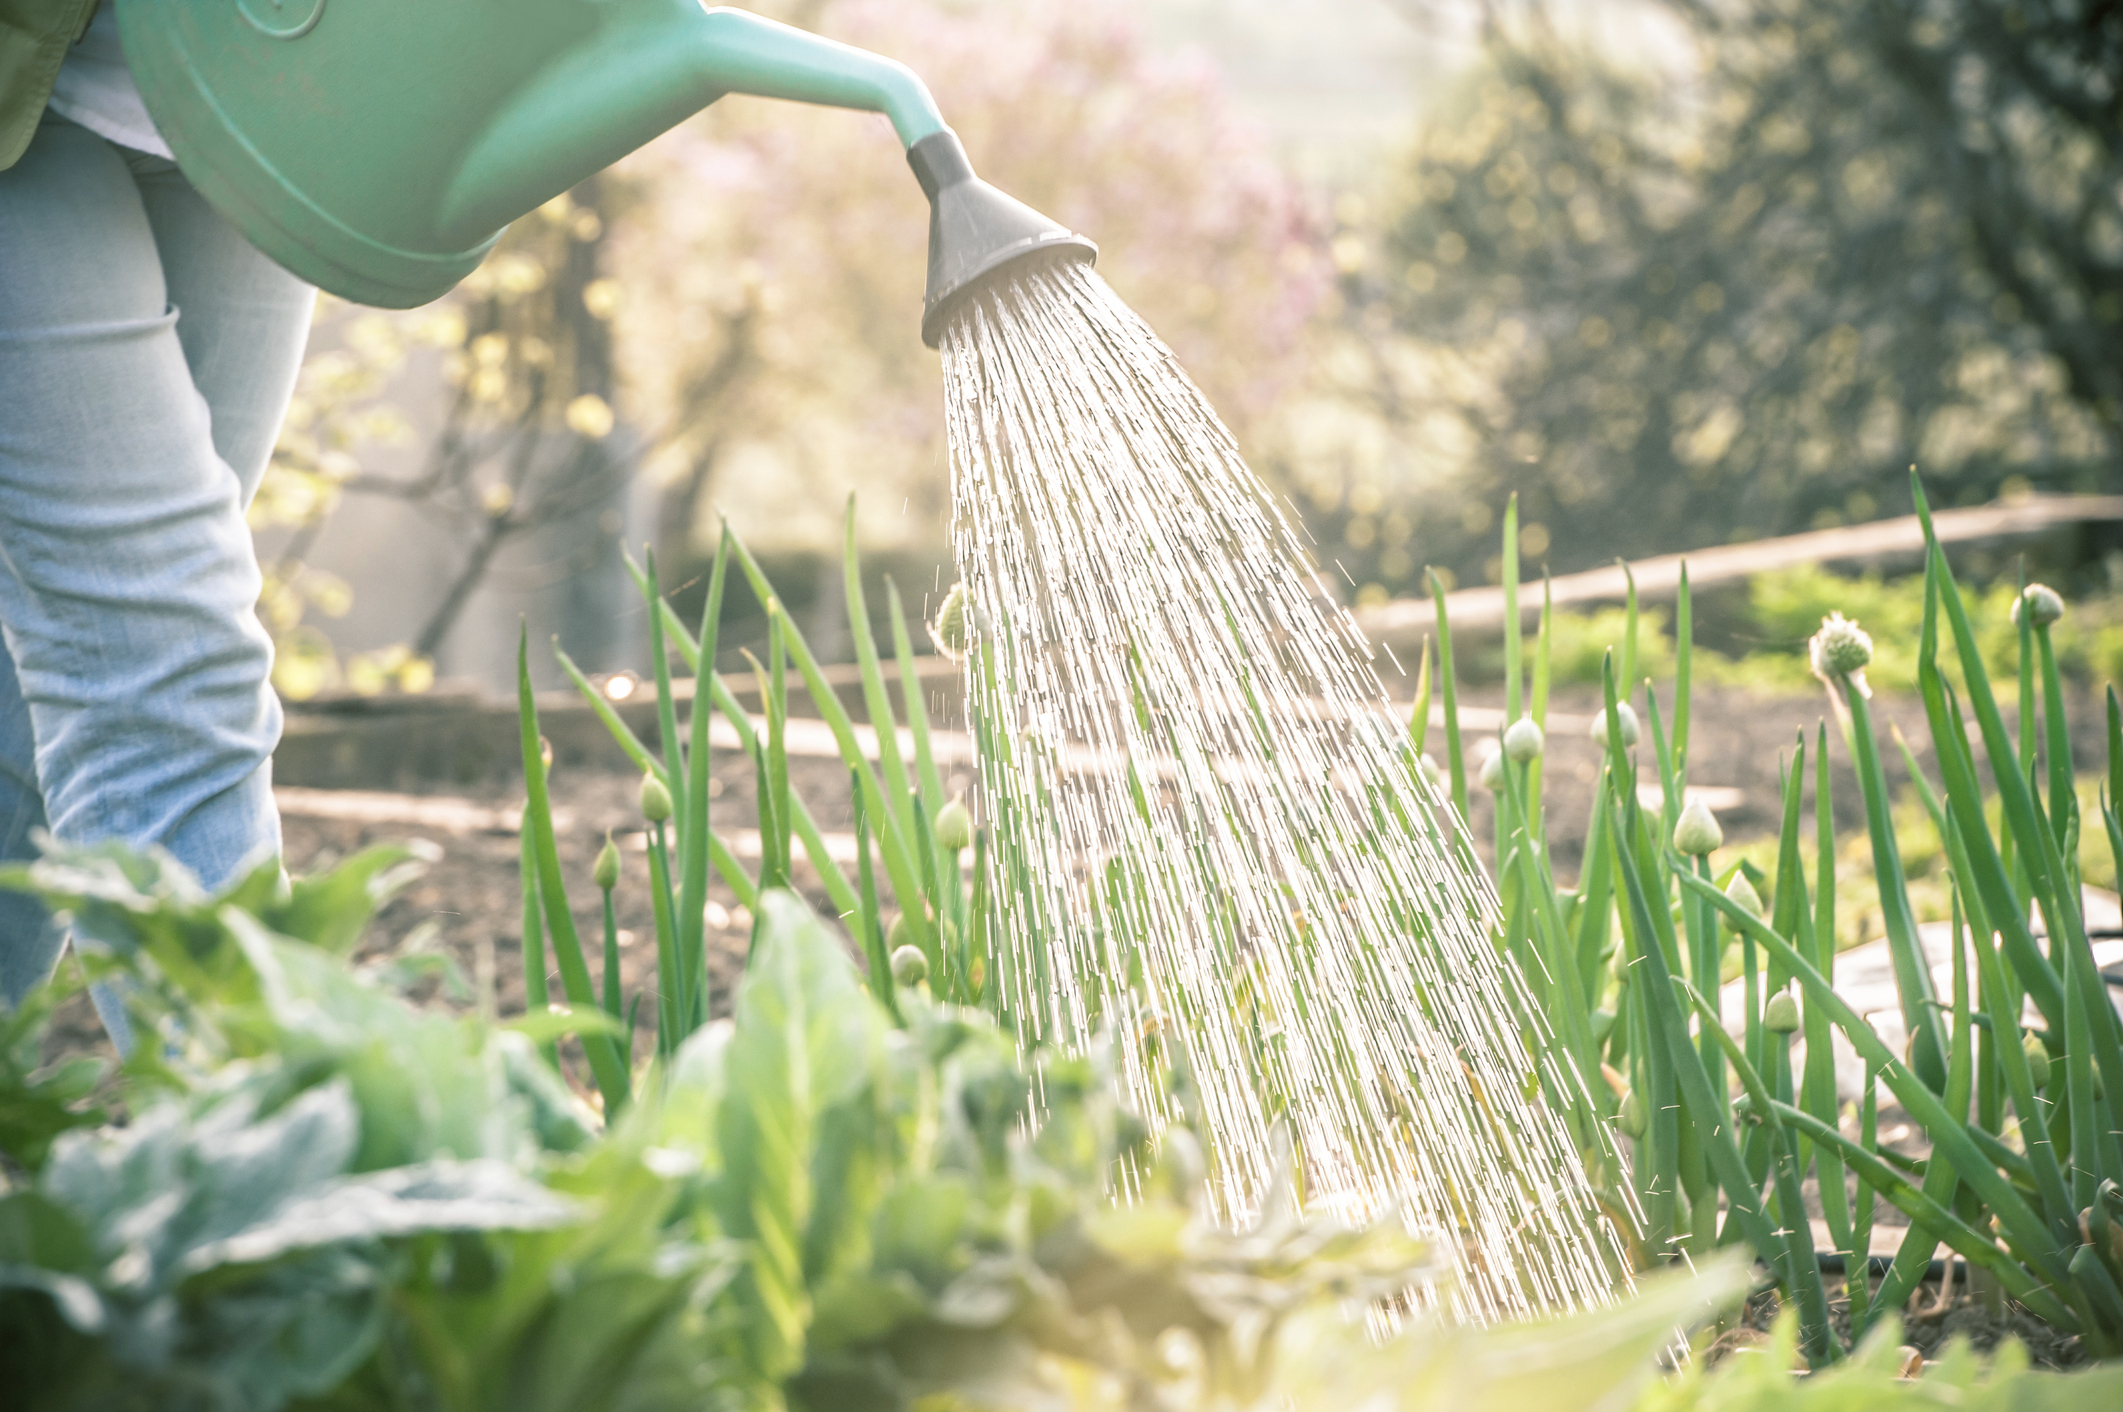
Cool Season Vegetables

Cool season vegetables are those that need the cold to help them germinate to produce early spring harvests of delicious, garden-fresh goodness. While you can plant them in late winter, when they will start germinating, pre-seeding them in winter will allow them to get to work as soon as the thaw starts

planting vegetable seeds

and the cold weather may even make them taste better!

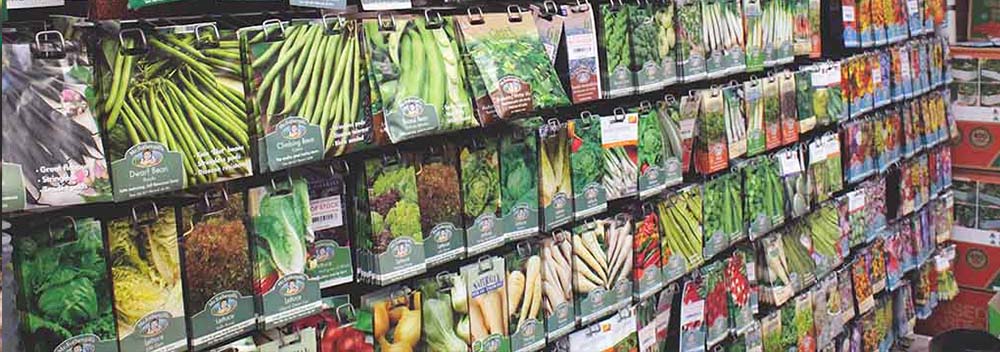
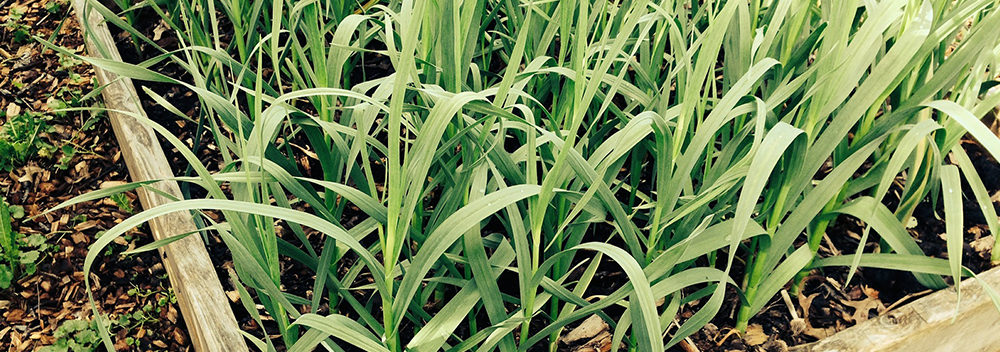
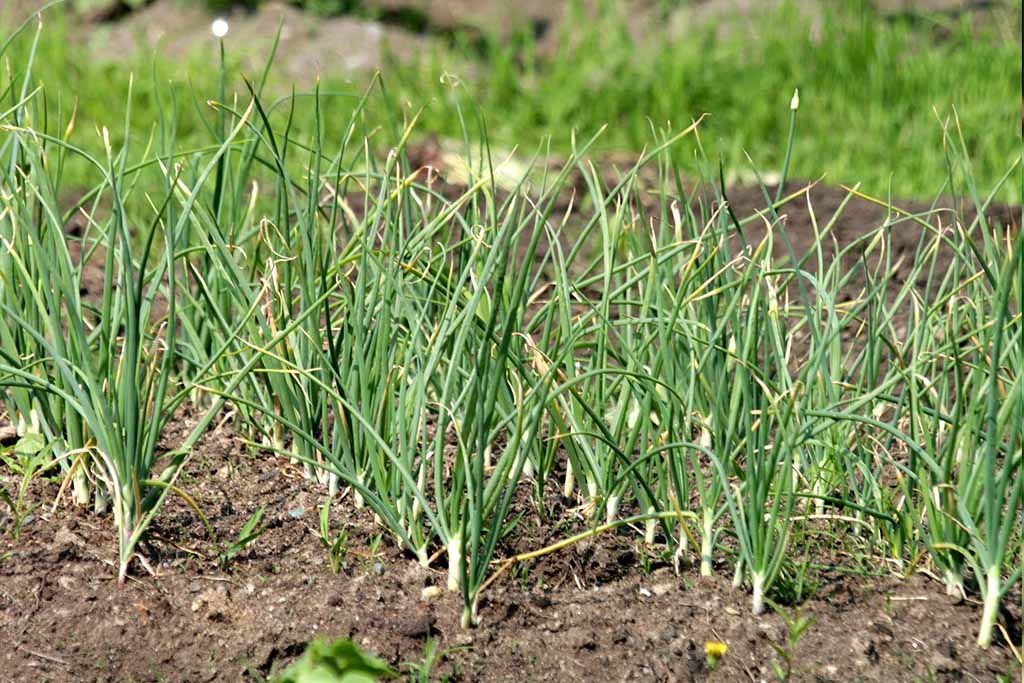
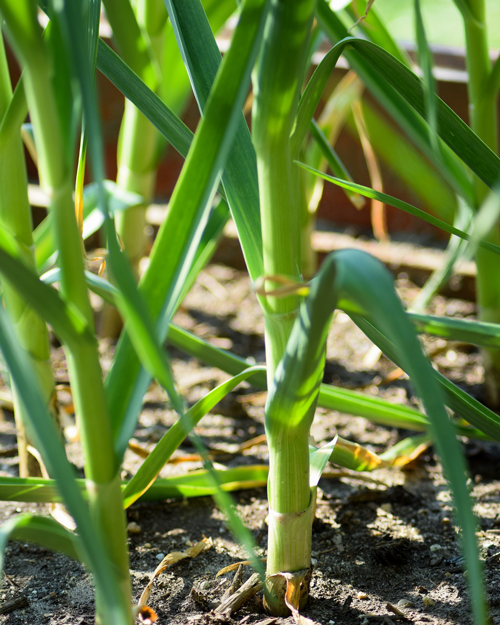
The best cool-season vegetables to pre-seed in fall are your leafy greens – like lettuce, spinach, arugula, and kale – as well as garlic and radish. Plant your seeds just after a nice, deep frost to ensure it’s too cold for them to germinate and mulch well to insulate them for the winter.

watering garden after planting

While our gardens may be fading and our time outside is quickly being replaced with warmer endeavours indoors, there’s still lots we can do in the garden to prepare for spring. By planting your trees, shrubs, bulbs, and early vegetables now, you’ll be setting yourself up for success in the coming growing season for the best year your garden has seen yet!

Planting Fall Bulbs

fall trees in the woods
trees changing colors for fall

Planting Fall Bulbs

When fall comes, we always end up asking how summer could have possibly passed by in such a blur. With cooler nights and the trees changing colours – not to mention back-to-school season already well underway – we can’t help but think about the long winter that we have ahead of us, nostalgically longing for when our gardens and yards were full of fresh, green life.

Fall Season, Spring Bulbs

Fall is full of opportunity for the gardener that wants to get ahead and promise themselves something exciting for the spring. Planting now, in the fall, before the ground gets too frozen will set the bulbs in the soil to be chilled over the winter season. Later, as the weather warms these bulbs will

planting bulbs in a row

spring into action and welcome you into the growing season once more! They’ll be your first blooms of the season and they’ll greet you with bright and cheery colour without any extra work.

Getting Your Own Bulbs

We all love spring bulbs and there’s good reason that flowers like tulips, daffodils, and crocus are so popular. With fall planting, it’s easy to bring these beauties home to your own garden to enjoy this year. Here’s how:

Your Best Picks

Like most flowers, not every bloom or bulb is created equal. Some love the harsh weather of our northern climate and are ready to thrill at the first sign of temperatures above zero, while others are more dainty and might not cut it in our occasional deep-freeze winters.

container full of bulbs

The best choices for here in Manitoba are Tulips, Alliums, Crocus, Fritillaria, Scilla, and Snowdrops. These tough, little flowers are ready to take on our winters without compromising their gorgeous displays in the spring. Some more tender varieties of Daffodils can manage, too, but will benefit from extra mulching for better winter protection.

Planting Fall Bulbs

The only hard part of planting bulbs actually couldn’t be easier! The only things that prevent people from taking advantage of planting in the fall is that it calls for thinking ahead and some people are too intimidated to ask. Don’t let procrastination and intimidation get the best of you, it’s actually

planting bulbs in the fall

one of the easiest garden habits you can practice.

Find a sunny spot to plant. You won’t even need to fear the shady cover of your trees, as these early risers will be blooming long before leaves start emerging. You’ll want to plant in small groups – a single tulip is underwhelming, whereas a group of them is an impressive spot of cheer in your garden.

For tender bulbs, like tulips and daffodils, you’ll want to plant them a little deeper to protect them from the cold. Press your trowel 6-8” into the soil and pull it towards you to create a space. Simply drop the bulb in (pointy side up!), cover, and repeat.

For more hardy bulbs, a shallow hole will do. Just use the trowel to plant them 2-3” deep instead.

No matter the type of bulb, they can benefit from some bulb food to give them the best start they can. Throw in some bone meal or Myke for bulbs into each hole before the bulb as you plant.

Don’t forget to water your bulbs well to give them the icy insulation they need in the winter.

watering garden after planting bulbs

Bulbs in the Spring

After the blooms are spent, the leaves that remain can be a little disappointing until the rest of your garden catches up blooming. However, if you want your bulbs to reappear next year, resist cutting back foliage for about 2 months after the bulbs are spent. The plant will pull nutrients back to the bulb

to prepare for beauty sleep over the winter, getting ready for their biggest show yet next spring.

Many gardeners find bulbs intimidating because they aren’t the type of plant that we are used to working with in our gardens, but they are actually incredibly easy to plant and enjoy! Planting bulbs in the fall is super easy and has tons of options to choose from to get the perfect look in your garden. A bit of thinking ahead to warmer weather today will give you a worthwhile treat in the spring when we’re hungry for a little colour in our lives again.

Seeding Indoors

mosquito
christmas decorated winter porch pot

Seeding Indoors

By Erna

While we can’t wish the deep freeze temperatures away, there are some things we can do as we wait for the weather to warm up. The time is near for beginning our indoor seeding – even if the cold weather outside doesn’t make it feel like garden season is around the corner. It’ll soon be the right moment to start giving our favourite annuals and edibles a “head start” into the season by seeding them in the warmth of our homes, giving us a longer window to enjoy them after their spring transplant.

Before You Plant Your Seeds

Gardening indoors during the winter can have a magical effect on your mood, as we’re able to get the joy of seeing fresh spring shoots before the real thing appears outside. Beyond the mental health benefits, however, seeding our flowers indoors has tangible benefits for our gardens, too!

Our growing season in Manitoba is unfortunately short, with most regions only

oakridge winter porch pot

seeing up to 125 frost-free days per year. While there are plenty of early-maturing flower and edible varieties out there, indoor seeding allows us to enjoy other varieties who wouldn’t have a chance to reach maturity if we waited to plant until after the last frost. Before you get started, though, you’ll want to prepare first:

Read your instructions carefully. The back of each seed packet has important information specific to that particular variety. Ensure you read the back of the packet before purchasing so you’re prepared to meet your seedlings’ special requirements – and that the end result is what you’re looking for.

Get familiar with your zone. The southern

winter porch pot in urn

half of Manitoba is predominantly zone 2a, 2b, and 3a. Review a plant hardiness zone map prior to purchasing seeds. While some that are from zones close to ours can be convinced to grow here, some seeds adapted to much warmer climates may start indoors just fine, but might not survive our climate after transplanting outside.

Start small and work your way up. If it’s your first year of seed starting and you hope to plant an entire edible garden, pause before you start seeding all your vegetables indoors! It’s better to start with one or two varieties and learn how to care for them well, rather than biting off more than you can chew with five to ten plants in the first year. It’s better to have one or two strong, healthy, high-yielding plants than several struggling ones. Besides, you can still always purchase starter seedlings in the spring if you still want to expand your edible garden.

Don’t start too early. While it may be tempting to start seeing something fresh and green as soon as physically possible, you find yourself a little underwhelmed by starting seeds too early. Most plants only need about six weeks of start time before they’re ready for transplant. Start too early and the conditions the plant needs to grow won’t be there for it yet, leaving you with a weak, lanky, or stunted seedling. Review a seeding calendar to plan your indoor seeding schedule first!

Planting & Germinating

      Once you’ve prepared properly, you’re ready to get growing! Here’s how to get your seeds started indoors:

    Use the right soil blend. Potting soil is great for houseplants, but plants that are being grown with the intent to transplant need different conditions. We recommend a

closeup of holiday decorated porch pot with berries, lights and pinecones

blend of peat moss, perlite, and vermiculite, which should allow sufficient drainage and oxygen flow for your developing plant. Whatever your blend is, though, make sure it’s with new materials purchased at the garden centre and not pulled from your garden, because your vulnerable little seeds will need sterile conditions to get started. Then, follow the seed packet instructions for the correct planting depth.

Give seedlings a proper introduction to light. Before germinating, seeds haven’t developed a system for synthesizing light. So they should be kept covered to conserve moisture until the first leaf develops. Once you see the leaf emerge, place them by a sunny window. In our climate, your seedling likely won’t receive the necessary 12 hours

wooden sleigh with winter porch pots

of light it needs per day this early in the year, so supplement light during those dark hours with a grow light!

Be mindful of moisture levels. Seeds are already rich in the nutrients they need to grow, so they need no fertilizer, but they will need a consistently moist environment to germinate. Too much water can cause mould and too little can dry out the baby plant. Keep soil damp by misting as needed with a spray bottle.

Transplant thoughtfully. While those first few days of above-zero weather may make us feel like breaking out the shorts and t-shirts, it’s still a little early for your seedling to survive outside – especially in the chilly spring nights! After the risk of frost has passed, harden them off by giving them a few hours outdoors at a time, then move them back indoors. Repeat this daily for longer and longer stretches of time. Overcast days without wind or rain are particularly good starting points, as your plant is not accustomed to direct sunlight or rain. After a week or two, your seedling should be toughened up enough for transplanting.

closeup of red berries in winter porch pot

Plants, like babies and puppies, are a lot more work than you’d expect from something so small – but at least they have the manners to stay in one spot while they grow! However, as they mature, all the dedication you put into them is worth it. Before long, you’ll be able to look on proudly as they sway in the summer breeze – and this winter will be a distant memory.

Tablescaping 101

mosquito
christmas decorated winter porch pot

Tablescaping 101

By Megan

A lot has happened between the age of rotary phones and the advent of iPhones, and there’s a strong argument that reliance on technology – with instant messaging, around-the-clock reachability, and 24-hour shipping – has brought us away from nurturing meaningful connections. In a time when more and more people associate the word “hosting” with “websites”, have we lost our sense of hospitality?

It doesn’t have to be so! Let’s resolve, in 2019, to be more deliberate with our interactions. More personal. To honour our guests, new acquaintances, and dearly beloved, by creating an atmosphere of comfort and spiritual nourishment. And let’s start by setting the table.

What is Tablescaping?

These days, the focus of most meals is the food. We race the clock to deliver our sides, salads, and entrees so each are delivered, piping hot, at the same time. Tablescaping, at its heart, is inverting this focus. It’s about bringing the focus to the table – to the ambience that has been created, and the company you’re sharing it with. It’s an art, and in some circles, even a competitive event!

Where we can adapt it in the home is to get inspiration from artfully set tables, and create our own tablescapes with decorative objects that we can either purchase or

lemon table decor idea for tablescaping

modify from what we have at home. By putting in that little extra effort, we’re showing our guests that their presence is our privilege – and in turn, they might not mind waiting a few extra minutes while dinner browns in the oven

white candle with greenery

Simple Tablescaping Ideas

For most occasions, your tablescape doesn’t have to take a lot of time. Here are a few interesting ideas for decorating your table, no matter your budget or time frame. Candles & Greenery – This simple and romantic tablescape calls just calls for a few white pillar candles and some delicate

branches of foliage. Simply arrange the pillars lengthwise along the centre of the table, spacing them out slightly, and weave the greenery between them. Eucalyptus, either real or artificial, works beautifully.

Wildflower Vases – Create a simple and sophisticated Easter tablescape by arranging four or five bouquets of mixed flowers in shades of yellow, white, pink, and purple in matching glass vases. Try mixing different floral shapes – perhaps a bouquet of marigolds, roses, astilbe, and pansies – and place them down the centre line of the table. A basic white or cream tablecloth and matching cloth napkins completes the look.

    Rustic Vintage – Create a table runner with a swath of burlap or vintage lace. Arrange simple bouquets of voluminous white blooms, like peonies, with a few sprigs of baby’s breath in vintage vases or mason jars.

Special Event and Holiday Tablescapes

 For special occasions that call for going the extra mile, consider details like table favours and place cards. While these tablescapes require a little more planning and execution, the special touches will stay in guests’ minds and ensure the occasion is a memorable one.

lemon designed pot for lemon party

Lemon Tablescape – Perfect for occasions like engagement parties, baby showers, and post-wedding brunches, sunny lemons are the star of this arrangement. Along the centre line of the table, alternate bowls of lemons with yellow and white bouquets. Serve lemonade from attractive glass pitchers, filled with ice and slices of Meyer lemon, and in lieu of napkin rings, try tying napkins with yellow ribbon. You can have fun with table favours, with each guest receiving a lemon-themed gift. – perhaps a place card tucked into a real lemon, or a tiny bottle of limoncello.

Thanksgiving Tablescape – The objective with a Thanksgiving tablescape is to create a mood of coziness. Try using a warm fabric for your table runner, like a handsome plaid in colours that complement the rest of your arrangement. For your centrepiece, arrange tall white candles and bouquets of chrysanthemums with miniature pumpkins in orange and white. For table favours, miniature mason jars are on-theme and a perfect vessel for homemade jam, apple butter, or hot cocoa mix. Try using chalkboard labels or butcher paper for indicating your guests’ names.

sparkling gold christmas tablescape

Christmas Tablescape – The holiday season leaves so many options for creative tablescaping, the possibilities are endless! We love combining an element of red fruit, like cranberries or winterberry, with real evergreen boughs to create our centrepiece. Cinnamon sticks, tied to napkins with a small sprig of cedar, make a sweet and simple table favour that enhances the

aromas at the table. Candlelight is a must for adding soft light and warmth to the table – but you may want to stick to sturdy votives so nothing gets knocked over as guests pass the food back and forth!

christmas wax candles

A beautiful tablescape can come together quicker than you might expect, and it truly does a lot to make your guests’ experience memorable. Set the tone for a year filled with memories with a creative table setting of your own!

Growing Herbs Indoors

mosquito
growing herbs indoors

Growing Herbs Indoors

By Erna

“Herbs deserve to be used much more liberally.”

Yotam Ottolenghi

While the days of fresh vegetables from the garden have passed for the time being, the days of savoury stews and hearty dinners have only just begun. Of course, the secret to a truly memorable home-cooked meal is the addition of fresh herbs. Not only do they impart a beautiful flavour and aroma, they also add that great hit of colour that you simply can’t get with the dried varieties. Not to mention, it looks downright gorgeous when a dish is served with a garnish of thyme or rosemary sprigs!

Fresh Flavours Indoors

Here in Manitoba, the long and chilly months of winter can leave us longing for the warmer season. Luckily, we can still add some life to our homes, hearts, and plates by keeping an indoor herb garden! Rosemary, thyme, parsley, and basil can all thrive indoors with the right conditions and a little TLC.

growing plants indoors

Pests Off

If you’ve brought your herbs in from your outdoor garden, the first order of business should be to get them freshened up and ready for life indoors. Outdoor herbs can bring some unwanted guests inside with them, like spider mites or aphids, so they appreciate a gentle bath with a little warm water and dish soap just before settling into

aphids

their new homes.

If you notice more bugs than expected on your herbs, all is not lost! Insecticidal soap is safe to use on your edibles as you migrate them indoors. Wash them weekly with the insecticidal soap treatment until the pests are all gone. If you chose to use your herbs in the meantime, give your sprigs a good rinse before using to take care of any bitter residues.

Growing Herbs Indoors

Light is the most important gift you can give your indoor herb garden! Set them up close to a west- or south-facing window where they’ll be treated to full sun for as long as possible. Deep into winter, even a full day of sun isn’t all that much, so you may need to supplement with a grow light. A few

windowsill herbs

extra UV rays will make such a big difference in the height, health, and flavour of your herb plants.

Water: Herbs might experience a little culture shock travelling from their outdoor summer climate into an indoor winter escape. Just as the much as the dry winter air has most of us reaching for the lotion bottle, your herbs will be craving moisture when the humidity fades away.

fresh basil leaves

There are a few tricks for increasing humidity indoors – some of which might make your home more comfortable for you, too!

  • A humidifier is an excellent way to keep your herbs (and other indoor plants) happy and humid during the cold months. Plus, if you’re prone to coughs and colds, you may even find the humidifier also helps you breathe better!
  • Spritzing herbs with a misting bottle will help keep your plants looking vibrant, but during very dry weather it can be cumbersome to keep up with. If you don’t mind spritzing throughout the day, it’s hard to overdo it in the winter – so spray away!
  • Pebble trays cost very little and help a lot! Just place a layer of pebbles on a flat tray with a lip about ½” high. Add water until the pebbles are almost submerged, but not quite, then place the herb pots on the pebbles. The water from the tray will slowly evaporate into the air around the plants all day long. Just check the tray daily and top up with water to maintain.
growing herbs in pebble trays

When it comes down to it, it doesn’t take much work to grow your own herbs inside when the weather outside is frightful. That means you’ll have plenty of time for the real work – the cooking!

Houseplants to Clear the Air

mosquito
Outdoor Fern

Houseplants to Clear the Air

By Erna

“Fresh air impoverishes the doctor.”  – Danish Proverb

What do camera phones, LEDs, CAT scan technology, and handheld vacuum cleaners all have in common? All these technologies exist because of all the hard work that goes into space exploration. We also have the fine folks at NASA to thank for finding out which of our humble houseplants put in the most work to keep our homes clean. Luckily, it’s not rocket science, so feel free to take advantage of their discoveries to help clear the air at home.

NASA’s Air-Cleaning Plants

The problem that NASA was working on in 1984 was simple enough (well, simple compared to some of their other rocket-based problems): they were researching building bubbles with carbon and the latest lightweight plastics to live on other plants. Problem was, they found that all the synthetics they had to use made the air inside practically unliveable in a matter of

NASA's air-cleaning plants

days. All those chemicals give off toxins, like formaldehyde, trichloroethylene, and benzene, which were making those that breathed that air severely ill. In addition to all the complex filtration technologies they worked on, NASA also turned to nature in attempts to clear the air. They found that very common plants that many of us enjoy as houseplants did an amazing job at cleaning the air, not only cleaning up toxins, but using them to actually boost their own growth!

Toxins at Home

We don’t have space-station amounts of plastics and synthetics at home here on Earth, but as every year passes they seem to make up a bigger part of our lives. Air-borne toxins aren’t just NASA’s problem – our homes are slowly filling with a cocktail of toxins, too.

Air-borne toxins

Household Plants and Household Toxins

The simple version of the science behind air-cleaning plants is that they breathe (or “transpire”, if you ask a scientist) kind of like we do. They take in carbon dioxide and breathe out oxygen, but they also take in tons of other chemicals as they breathe, too, pulling those toxins down to their roots to use as fertilizer. The same chemicals that

Household Plants and Household Toxins

can cause headaches, respiratory issues, or irritation for us can actually boost the growth of our plants. Even better, with indoor houseplants that don’t have to brave our Manitoba winters, our homes get a health boost all year. Just be sure your houseplants don’t get root bound!

Our Top Picks For Removing Airborne Toxins

Not every plant is equal when it comes to cleaning your air. Here are some of our favourite air-cleaning powerhouses:


Peace Lily: These plants are a blessing in every way. They thrive in low-light rooms that your other houseplants might not cut it in and are incredibly easy to care

Boston Fern: The oldest houseplant in the world

for. They also produce elegant, white flowers almost all year and are experts at eating toxins. These are an excellent choice for beside an entertainment unit where they can devour the acetone that come off the electronics.


Boston Ferns: This is the oldest houseplant in the world, and we can’t help but wonder if their ability to filter toxins and molds had a part in that. They are absolutely greedy for toxins in the air and will even treat you to a humidity boost around them.

Spider Plant: This plant is so easy to manage that it is often the unsung hero of houseplants. They’re practically impossible to kill, require very little light and care, and love cleaning up your air. It’s one of the few houseplants that will take on deadly carbon monoxide with enthusiasm, making it a great choice near fireplaces and kitchens.

Spider Plant - the unsung hero of houseplants

English Ivy: This vine is easy to grow (you’re more likely to be cutting it back than coaxing it to thrive) and is a gift for allergy sufferers. It gets rid of true nasties in the air, like mold or even airborne feces (yes, you read that right). You are what you eat, though, so this plant is toxic and should be kept out of reach of children and pets.


Bamboo Palm: Also known as “Reed Palm”, this plant is stately and compact enough to fit in any obscure corner of your home. It’s also a heavyweight champion when it comes to eating up benzene and trichloroethylene. This is a good choice to place near new furniture to make the most of its appetite.

Bamboo Palm is also known as Reed Palm

It wouldn’t be the first time that we “borrowed” space age research to make our lives here on Earth better. Thanks to some of the brightest scientific minds, we can breathe easy while enjoying a bright future of working with our favourite plants more and more as they work with us, too!

Growing Your Own Garlic

Oakridge Lifestyle Blog
Growing Your Own Garlic

Growing Your Own Garlic

By Erna

“Garlic is divine.”            – Anthony Bourdain

It’s hard to imagine a good, old-fashioned, home-cooked meal without a generous hit of garlic. From garlic bread to Caesar salad, garlic is the star ingredient in all the most popular dishes on the table, and it even boasts some serious health benefits that have made it a versatile healing aid for millennia. Thing is, growing garlic is a long process that starts in the fall and yields in the summer. However, if you love garlic as much as we do, we think you’ll agree that growing your own is well worth the wait!

Garlic for Your Well-Being

While it tastes sinful, there are actually many benefits to a garlic-rich diet. It’s almost as good at preventing seasonal colds and bouts of flu as it is at kicking up your pasta dishes! If our harsh Manitoba winters seem to be taking their toll on your sinuses, keep your meals rich in garlic for a beneficial boost of Vitamins C and B6.

Growing Your Own Garlic

The natural antibiotic properties in garlic also make it a wonderful home remedy for feminine infections, chest infections, and coughs. Garlic is also high in iodine content, which is great news for people living with hyperthyroid conditions, as well.

Additionally, a diet high in garlic has been shown to guard the body against more serious conditions. Garlic has been shown to gently removes plaque from the arteries, which helps to prevent the onset of cardiovascular disease. It has also been shown to slow the growth of tumours related to cancer in the stomach, prostate, breast, colon, and bladder.

More amazing yet, garlic doesn’t just help your body on the outside. Crushed garlic was even used as a topical ointment for open wounds during the First World War!

To get the maximum benefit from this amazing little plant, consume up to 3 cloves per day – and if you take the time to grow your own fresh, it only makes it that much more irresistible!

Growing Garlic at Home

Growing Garlic at Home

Fresh-grown garlic is a truly an experience to be relished. Not only is it beautifully fragrant, but the flavour of fresh garlic is much fuller and fresher than store-bought, which is often treated with preservatives for longer shelf-life. Speaking of store-bought garlic, growing your own garlic is not only better but far cheaper.

Garlic planting season is in early October, which is a fleeting moment in Manitoba. As we Manitobans know, the soil could be frozen solid by Halloween, so it’s best to seize the day! Just don’t seize it too eagerly – planting too early can cause garlic to grow too vigorously, which will backfire once the frost sets in.

Pick a sunny spot in your garden with good drainage, preferably on sandy soil. The perfect garlic garden is neat and weed-free. Garlic likes company about as much as we enjoy company with garlic breath!

When you’re ready to plant, source your garlic cloves from fresh heads of garlic free from blemishes, bruises, and fungus. Select the fattest, firmest cloves to get the plumpest possible garlic heads at harvest time and do not remove the husks from the cloves – that papery layer is the closest thing your young garlic will have to a wool sweater out there!

Plant your cloves in holes about 2” deep, 6”-8” apart. Top with a little bone meal before covering with 3”-4” of organic mulch, ideally made from cedar or straw. This will protect your baby garlic plants from the cold through the winter months. Make sure to mark each clove so you know exactly where to look when the snow melts.

A Summer Treat

Once summer arrives and the bottom leaves of your garlic plants have died, your home-grown garlic will be waiting for you. Simply dig them up and get to work enjoying it in every meal you make! To get the best flavour from your hard-won harvest, avoid using a garlic press. Instead, slice cloves thinly before adding to recipes.

Growing and planting garden fresh garlic
Growing Fresh Garlic

Remember, fresh garlic is much more perishable than the kind you buy at the grocery store. Once you’ve dug it up, store it in the refrigerator to prolong its crispness. If you’ve grown too much, fresh garlic makes a lovely token of neighbourly appreciation. It’s a magical feeling to share the special flavour of garden-fresh garlic with others who have only tried its supermarket counterparts. By offering some as a “thank you” gift to teachers, colleagues or in-laws, you’re not only be giving the gift of great flavour but also the gift of good health!

Taste of Autumn: Picking & Storing Apples

mosquito
apples ripe for picking

Taste of Autumn: Picking & Storing Apples

By Erna
Even if I knew that tomorrow the world would go to pieces, I would still plant my apple tree.”

 – Martin Luther

We can’t decide if our favourite part of Autumn is the impressive colour display or all the fantastic fall flavours that we get to enjoy. Whether it’s every delightful shade of yellow, orange, and red, or tasting seasonal favourites like pumpkin spice, harvest time is the perfect way for our growing season to finish with a bang.

Apples are an autumn classic that embrace all the colours

and tastes of fall, and they certainly become available in abundance at this time of year. Here are all the tips and tricks for you to make the most of apples at home – as you harvest and into the winter.

Fairest of Them All: The Perfect Pick

Apples sweeten as they ripen, so they’ll only get better the longer that they “hang out” on the branch. As long as you don’t wait for so long that they end up in the grass, they’ll be at their tastiest when they’re nearly ready to drop. Picking them at the perfect time is easy if you pay attention to a few small details:

bright red apples on a branch
Where to pick: The outside of your tree sees the most sunlight through the season, so this is where your fruit is going to ripen first. The best way to enjoy your fruit is to simply pick (and eat!) your way inwards on the tree. Check the South and West sides of your tree first for deliciously ripe apples, as these more sun-exposed sides will ripen even faster.

What to look for: Most fruits make it easy to pick perfection as they give away their ripeness with colour! Generally, apples are ready to go when the last shades of their immature green have faded into a glossy red or yellow. Of course, though, this changes depending on what variety you’re growing. Some types will keep an unripened tinge for weeks after they are ready to pick, so while checking colour is a good rule of thumb, getting to know your own tree is important, too.

Knowing by feel: The best ripe apples are ready to drop right off of the tree, so they should be easy to pick with a slight twist of the wrist. If you’re shaking your whole tree and pulling with both hands, that apple probably isn’t ready to go yet and will need some more time on the tree to ripen.

Storing and Eating Apples

When our apples are ripe, they certainly come off the tree by the bucket-full! Many of us love our fresh home-grown fruit but can be a little overwhelmed with what to do with all the surplus. The trick to making the most of your apples is variety, and we have all the tips for how to enjoy your bounty now and later!

picked apples in baskets
Eating apples, like Honeycrisps, are best enjoyed right away. They are sweet and delicious right off of the tree, but aren’t the best to store for later. Fortunately, they’re so darn tasty that many of them won’t even make it all the way inside once you pick them. These types of apples are great as a snack or uncooked in salads, but will taste their best when you eat them the same day they are picked.

Cooking apples are ideal for storing instead of grazing while you pick. Stored properly, they can keep for quite a while, but you’ll want to make sure that you’re only putting away healthy and undamaged apples – any with blemishes could spoil the whole batch. Do a quick visual check as you pick these apples. Those that are free of marks and dents can be kept for later, while any that are damaged should be cooked and eaten right away.

Different types of apples will ripen at different times. If you aren’t sure if your tree is an early, middle, or late-season riser, Google tells all. Everyone’s trees are different but you can usually expect your early-season trees to be eating apples for consumption right away, while mid-season apples can be stored for a week or two and late season apples store for even longer.

To make the most of storing apples, wash and dry them before storing in a cool and dark place – a pantry, closet, or cellar is perfect. Choose only unblemished apples to store, and consider wrapping them in newspaper to prevent them from touching to get the most from their days in storage. Keep their storage area well ventilated and away from potatoes so that the ethylene gas they give off doesn’t over-ripen them too quickly. Also, consider storing them away from onions and garlic to avoid weird-tasting apples.

Local Picks: Best Apples in Manitoba

The colder provinces in Canada don’t have nearly the same variety to choose from as the warm orchard country, but what grows here in Manitoba is enough to keep most of us happy and well-fed.

Goodland apples are Manitoba natives that are hardy, delicious, and ready to eat

honeycrisp apples on the branch
right off the tree, but just as tasty in an applesauce. They’re delightfully sweet and don’t compromise at all in our cold weather – making them perfect for growing in the backyard.

Another eating apple you won’t be able to resist is Prairie Magic. These large, rose-hued apples have a perfect, crispy bite to them, with a sweet flavor that is hard to beat. Enjoy them when snacking or chop them into a fresh salad.

For fans of Royal Gala apples, the Odyssey variety will be a big hit on your table. With an unbelievable sweetness that pairs perfectly with spices, this apple is a surefire win for all your cooking and baking needs.

box of picked apples
Fresh apples are an essential part of the autumn harvest season, and we can’t wait to sink our teeth into them as soon as the season hits. With these easy tips and tricks you will be well on your way to getting the most out of your apples right now and into late fall. Don’t wait; tasty treats and baked goods are waiting for you!

Gardening as an Anti-Depressant

gardening as an anti-depressant
planting flowers in a flower bed

Gardening as an Anti-Depressant

By Erna

There are a lot of inarguable benefits to gardening that attract us to it. We love having a beautiful, thriving space in our backyard, we like having fresh food that we trust on our tables, and our families enjoy the benefits of a place to relax and play all summer. Nurturing life from simple dirt in our own homes is life-affirming and a great getaway from our sometimes hectic, screen-bound lives. Gardening makes a lot of us happy. It turns out that the glow we get from getting our hands into some fresh soil isn’t just psychological, it could come down to chemistry, too.

Happy Gardeners

There’s some evidence to prove that you do, in fact, feel better when you’re digging around in your garden. In 2007, a study from the University of Bristol first started to look into a common soil-borne bacteria called Mycobacterium vaccae. This bacteria is harmless and they found that when they

standing water

exposed mice to it, it had some promising effects that showed a reduction in anxiety. This bacteria helps to stimulate the production of more serotonin in the brain, which is commonly known as the “happy hormone.”

While the brain and brain chemistry are incredibly complicated, and we are only just beginning to understand it, we do know that serotonin is closely connected to our mood, appetite, and memory, among other things. Having more in our system usually means feeling better, less anxious, and having better memory function – just like these mice did in the tests performed during the study! Even if mice are a bit of a far cry from humans, it shows a lot how these natural bacteria can be such a helpful influence on the brains of mammals.

Helpful Bacteria Right at Home

You get M. vaccae bacteria in your body the same way as any other bacteria. Our lives are full of these microscopic organisms that we can’t even see, and it’s reassuring to know that many of them making their way inside are actually helpful. Just having these bacteria on your hands from working with

walking on an outside trail

soil or even breathing in the fresh air of nature can introduce them to your bloodstream, where they get to work.

Gardening is one of the more direct ways to get introduced to M. vaccae regularly because of how involved you get with your own soil, but you can find these helpers in nature, too. A walk in the woods or being outside is enough to inhale them. There’s some science behind how much going for a walk or simply being outside improves your mood and reduce anxiety.

Healthy Soil, Healthy Home

Of course, the healthier your soil is, the healthier it will be for you. Soil is a living ecosystem that is incredibly complicated. Try to cut back on harsh, synthetic fertilizers and other chemicals in favor of some gentler, natural solutions, and you’ll be rewarded with a healthier garden that grows better, while rewarding you with better mood-boosting bacteria.

healthy soil

Learning Gardens

The benefits of these bacteria certainly aren’t limited to adults that need the stress release. Kids reap lots of benefits from spending time in the garden. They love to explore, they love the wonder of tasting the food that they’ve helped to grow, and they also benefit quite a bit from the exposure to a world of bacteria and dirt.

kids in the garden

The benefits of M. vaccae are still being looked into and refined, but we do know that they are very helpful in boosting memory and the ability to learn. We’ve also found over the years that exposing our kids to dirt and germs in a healthy way is important to boost their developing immune systems. Turns out, a healthy garden reaps even healthier benefits for our kids!

It doesn’t come as too much of a surprise to some avid gardeners that a healthy garden keeps them healthy in return. In fact, the more we learn about our gardens, the more we learn about their benefits for us and our families. More than just a beautiful backyard addition, gardening makes us not only healthier, but happier, too!

Saving Your Garden in a Heat Wave

summer garden
sunlight on summer garden

Saving Your Garden in a Heat Wave

By Erna

“If you saw a heat wave, would you wave back?”

– Steven Wright

In Manitoba, we know what the cold weather feels like, so when summer finally hits, the last thing we want to do is complain about the weather. When our luxurious warm weather is interrupted with a heat wave, though, it’s easy to be overwhelmed.

In a heat wave like this one, everything around us feels like it is moving in slow motion – the days are long, and everything feels like it’s moving impossibly slow. It’s downright

uncomfortable to go outside, and even more difficult to get anything done.

As tough as the heat can be on us, our plants are feeling it even more. While we have the escape of the indoors and even air conditioning, our plants are rooted to the spot, taking the worst of it. As much as we want to be relaxing, sipping our lemonade in the shade, we can’t forget to give them some of our attention, too. Here are some tips to keep them from quitting on us when the weather gets hot:

Keeping It Relaxed

Heat stress is an efficient killer in the garden, but there’s tons you can do to help your plants escape it. Thankfully, preventing heat stress requires less work and stress from you, too.

Skip mowing the lawn. The heat doesn’t

avoid trimming full blooming flowers in a heat wave

just target your garden, but your grass, too! Keeping the grass on the longer side will give the ground some extra shade to keep roots cool. The longer grass will also help your lawn to retain moisture and avoid drying out. It’s also a great excuse to save yourself the work under the hot sun, too – what’s best for your yard is best for you, in this case!

Avoid any trimming. Step away from the clippers! A trim to your plants will give them the signal to start growing. This is the last thing you need in a heat wave. Your plants should be using their energy to stay healthy, not struggling with new growth. As much as you don’t want to be labouring on these hot afternoons, your plants don’t, either. Give everyone a break and save the trimming until the temperatures have cooled a little.

Keep It Cool

We’re all looking for ways to cool down this summer, from a chilled glass of lemonade to a dip in the lake. Our plants want to keep the temperature down at a manageable level too, but will need our help to do it.

Mulch – You’ve heard it over and over how

apply mulch to keep moisture in your garden

mulching will help to regulate soil temperatures in your garden, and this is exactly the circumstances that calls for it! If you had to walk around wearing a heavy dark shirt during a heat wave, you’d be pretty hot and upset. The dark colour absorbs heat and would be your last choice to stay cool. Soil works the same way. As such a dark color, it soaks up the sun and can hold enough heat to cook your plant’s roots. Use a lighter coloured, plant-based mulch, like straw or cedar, to protect your plants with their cooling effect.


Staying Hydrated in the Garden

This is one of the most obvious ways to keep your garden healthy in the heat, but is so important it’s worth talking about a bit more anyways. When the mercury rises a cool glass of water sounds more and more appealing. We’re sweating more to try and stay cool, so we need to replenish our water

water your garden in the morning

more. Soil has the same problem with water evaporating in the heat, and will need some extra care to stay hydrated.

Get to know your garden. Not every plant or root system is created equal, and some of your plants will need more help in this heat than others. Plants native to this area and zone will have an easier time tapping into water reserves with their deep root systems than the tropical annuals that keep their roots close to the surface. Keep them from struggling with extra water and care to help manage the heat.

Know when to water. You don’t want to be outside watering all the time, so choosing when to water can help you make the most of your time and effort. Watering at the hottest point of the day will have half your water evaporating before it can even get to the roots. Water when the temperatures are cooler and the sun is less intense. Morning is the best time for your plants to take advantage of it before the afternoon heat. You can water in the evening too, but if the nights start to cool off, you might be adding mildew to your garden problems.

Soak, don’t sprinkle. In extreme heat, little water droplets will evaporate before they can do much good for your garden. If you still prefer the convenience of sprinklers, consider using a soaker hose in heat waves. They keep the water close to the ground where it’s needed, saving you water, time, effort, and money, all while giving your plants the hydration boost they desperately need.

use a soaker hose in heat waves

When summer heat strikes, you don’t want to leave your poor garden and plants out to dry. Help them stay cool and hydrated in the heat with good garden habits so they can come out the other side of the heat looking their best, ready to shine for the rest of the summer. Remember to beat the heat and stay cool, in and out of the garden while the high temperatures last!