
Because we all know you can never have enough plants! Propagating is an inexpensive and fun way to expand your plant collection and even share it with others. From indoor tropicals, to beautiful annuals, perennials, trees and shrubs, there are a variety of methods to creating your very own plant babies!
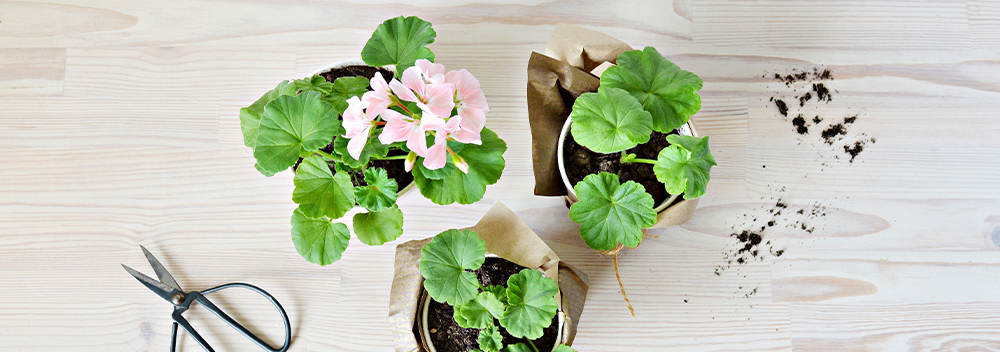
Geraniums
There are two ways to propagate geraniums:

1. Dry Store Over Winter
It may seem almost too easy, but dry storing your geraniums over the winter is a fabulous way to propagate these garden favourites. Before the first frost, dig out any healthy geranium plants you would like to store, then follow these easy steps:
- Tidy your plant roots by shaking off any excess soil, they don’t need to be perfectly clean, just enough to avoid making a mess and prevent rotting.
- Lay them in a shaded area to dry.
- Once dry, place in a cardboard box or paper bag with a closed top and store in a cool, dry place.
- Check on the plants occasionally to ensure you don’t notice any signs of mould or extreme dryness. Both of these can be managed by either trimming off areas with mould, or soaking the plant briefly in water to rehydrate.
- Once you’re ready to prep for planting, trim back the geranium to the healthy green growth.
- Fill a container with dampened soil and place the stem deep enough to cover two leaf nodes.
- It takes about 7-14 days to start seeing new growth, and if you water thoroughly, in about 4-6 weeks the plant should be ready for its move to your garden.
 2. Live Storage/Grow Indoors
Geraniums are a beautiful plant and provide such a wonderful summery scent so you may want to have your plant indoors for the winter to enjoy it year-round. Geraniums need the following to stay healthy indoors during the winter months, including:
- 4- 6 hours of sunlight per day.
- A well-draining plant pot.
- Quality potting soil that provides adequate drainage to avoid root rot.
Once spring arrives, follow these easy steps to make cuttings for your brand new geranium babies:
- Using a sharp, clean tool make 4-6 inch cuttings, removing lower leaves, leaving few sets of leaves at the top.
- In a small pot or tray, place the cuttings with the bottom half buried in a dampened rooting medium. Be sure the medium is a well-draining blend (we suggest one that includes peat moss, perlite or vermiculite).
- Place the cutting in a warm location with bright, indirect sunlight, watering only when the soil feels dry.
- Roots should establish in approximately 3-4 weeks and once formed will be ready to pot in preparation for transplanting in your garden.
Begonias
 One of our favourite plants, begonias can be propagated using a method called vein cutting. To propagate your beloved begonias, try following these steps:
- Cut a healthy leaf that has a prominent vein from your plant right at the base.
- Trim the stalk off so you’re left with just the leaf.
- Make cuts on the underside of the leaf’s main vein and place or pin the leaf, vein-side down so it makes firm contact with your rooting medium (we suggest vermiculite as it will provide the best balance of moisture and oxygen for your developing plants).
- Place your container in an area where you can provide adequate humidity and light. You can cover with a dome or a plastic to keep moisture in, and it is helpful to mist regularly, watering as needed.
- With sufficient warmth and moisture, your begonia babies will start to emerge from the cuts in the vein after about 6 weeks.
- Once the new growth has reached approximately 3” in height and have a few leaves they’re ready to transplant into small pots to further establish their roots in preparation for replanting in a larger pot or into your garden come spring!
Fun fact! You can propagate certain houseplants using the vein cutting method as well, including African Violets.
Shrub & Trees
 It may seem like shrubs and trees would be too complicated to propagate, but they’re no different from any other plant and can be so satisfying to see something so small grow into a major focal point in your landscape. To propagate shrubs and trees, follow these steps:
- Take cuttings from your existing plant using a sharp tool, preferably in late May through early July from the new season’s growth. We recommend using a cutting that has some flexibility but that will break if bent.
- Remove any flowers from your cuttings and make a fresh cut below where one or two leaves are attached to the stem.
- Dip the freshly cut ends into a root hormone. We love Evolve I-Root #1 Rooting Gel, but any quality root hormone will help promote new growth in your cuttings.
- Choose both a rooting medium and container that provide good drainage.
- Fill your container with rooting medium and water, allowing it to drain for a few minutes.
- Insert cuttings approximately 2” deep and place in bright, indirect light. You can cover with a dome or plastic to help maintain moisture. You’ll want to keep the soil moist as the cutting begins to develop new growth.
- Your new tree or shrub growth should make its first appearance around 6-8 weeks. Once there is a well-established root system, carefully transplant cuttings into individual pots.
- After a few additional weeks your tree or shrub baby should be ready for you to prepare it for its move outdoors.
Perennials
Perennials can be propagated in several ways and are a popular choice for gardeners to expand their gardens and share the beauty of their plants with others. To get started, you’ll want to choose your healthiest plants for dividing to ensure they flourish in their new home. Plants that flower in the fall are ideally divided in spring, and those that flower in spring divided in early fall. How you propagate your perennials depends on the type of plant you want to divide, for example:
 Clumping
A clumping perennial, such as day lilies, rudbeckia or hostas can be easily divided by digging up the entire plant and finding a natural point in which to separate into new plants. You may need to cut apart a few roots if the clump is tightly packed but choosing a spot where there is the least resistance to cutting is the way to go. Any portion you divide should have green above ground and roots below.
 Spreading
Spreading perennials, such as phlox, clematis and coneflower don’t clump together but rather grow in groupings of individual plants.
For spreading perennials, you can simply dig up any portion you want to move, leaving the main plant untouched.
 Woody
Woody
Woody perennials, such as lavender and rosemary feature one main stem but can spread when the stem touches the ground and takes root. Sometimes this may happen naturally, or you can layer the stem in soil to create an opportunity for new roots to develop. If roots develop, you can then cut and dig up the new stem without having to touch the main plant.
 Taproot
Taproot perennials, such as oriental poppies, lupine and butterfly weed have one main root. To divide it takes a bit more bravery than simply separating roots. With taproot perennials, you will dig up the plant and cut so that each portion has a piece of the taproot along with some growth buds.
Once you have your new perennial babies divided, it is time to replant! Dig a hole that is slightly wider than the roots and at approximately the same depth as the original plant. Fill in with soil and fertilizer and pat down, watering thoroughly once planted. Continue to water often for the first month to promote root development and watch your new plant flourish.
House Plants
 Succulents
Propagating succulents is an easy way to continue to grow your tropical collection or share your favourite plants (they can also make a fabulous gift!). To begin, cut a few healthy leaves from the base of your plant being careful to remove the entire leaf in one, undamaged piece. From there:
- Place your cuttings in an area with bright, indirect sunlight and leave for approximately four days to allow the ends to callus over.
- After the leaf has calloused over, take your container and fill with a rooting medium that provides excellent drainage.
- Water soil and place cutting on top.
- It is important to keep your cuttings moist and warm, misting regularly can help to let those babies grow!
- After 3-4 weeks new sprouts should emerge and after 7 weeks small leaves and roots should begin to form.
- After 7 weeks you should have new growth large enough to separate from the cutting and plant it its own pot which can be cared for like the original succulent plant.
 Plants that Have Bulbs
Houseplants with bulbs are another popular plant to propagate. Think of plants like the asparagus fern and ZZ plant. This is not only a great way to expand your indoor garden but can also help to maintain the health of your plant by avoiding overgrowth and crowding in your pots. The first step in propagating these plants is to carefully remove it from its pot, from there:
- Gently shake off any excess soil from the roots.
- Examine your plant, looking for its bulb offshoots to divide in sections ensuring that all sections have sufficient roots to grow in their new home.
- Return the original plant into its pot, replacing any soil as needed.
- Plant the new bulb groupings in a pot filled with a quality potting mix about as deep as it was in your original plant.
- Continue to care for the plant as you did before.
 Houseplants with Petioles and Leaves Coming Off a Main Stem
Have houseplants with petioles and leaves that come off the main stem? Petioles are the stalk of the leaf that attaches to the main plant stem. We’re talking fiddle leaf figs, schefflera and African violets. If so, then you can use this method to propagate your plant:
- Cut your chosen leaf petioles at the base, trimming so they are approximately 3-4 inches in length. You’ll want to choose cuttings from more mature sections of your plant to get the best roots.
- Dip your petiole in a rooting hormone and then nestle into your chosen rooting medium ensuring the leaf isn’t in contact with the soil.
- Water, allowing to drain for a few minutes before covering with a plastic bag or dome to maintain moisture. When choosing your rooting medium look for options such as vermiculite and perlite that won’t pack down and retain too much moisture.
- Place in a warm area with bright, indirect light until new growth develops, typically in about 6-8 weeks.
- Once the leaves of new plants have begun to develop, carefully separate them and pot into their own containers using a quality potting mix.
Plants are our passion and we love helping people get their gardens, indoors and outdoors, growing. If you have additional questions about propagating your plants, get in touch, we’d love to hear from you!